A barn door tracker is a simple DIY mount that compensates for Earth’s rotation during astrophotography. You can build one tonight using two wooden boards, a hinge, and a 1/4-20 carriage bolt. Cut the boards, connect them with the hinge, drill a hole for the bolt, and mount your camera. Turn the bolt handle every 15 seconds to track stars for longer exposures without trails. The following guide reveals everything you need for stunning night sky images.
What Is a Barn Door Tracker and Why You Need One
As you venture into the world of astrophotography, you’ll quickly discover that Earth’s rotation poses a significant challenge to capturing clear images of the night sky. Stars appear to move across your frame at about 0.25° per minute, resulting in blurry streaks instead of pinpoint lights during longer exposures.
This is where a barn door tracker becomes invaluable. This simple, hinged device compensates for Earth’s rotation by moving your camera at precisely the same rate as the stars appear to move. By manually adjusting a threaded rod, your camera tracks celestial objects, allowing for longer exposures without star trails.
The best part? You can build one yourself for under $50—a fraction of the cost of commercial tracking mounts. It’s the perfect entry point for capturing stunning Milky Way and constellation shots.
Gathering the Essential Materials and Tools
Building your manual barn door tracker begins with collecting the right components.
You’ll need two wooden boards (around 8″x10″ each), a hinge, and a 1/4-20 carriage bolt approximately 4.5 inches long with a matching T-nut. Most items can be found at any hardware store.
Essential tools include a drill to create holes for the bolt and hinge, a saw for cutting wood to proper dimensions, and sandpaper to smooth edges for smoother tracking.
Don’t forget a camera ball mount to securely attach your camera during long exposures.
Consider adding a Teflon piece to reduce bolt wobble and a green laser for easier polar alignment.
Finally, verify you have a sturdy tripod that can support your manual barn door assembly while photographing the night sky.
Building the Base Hinge Assembly
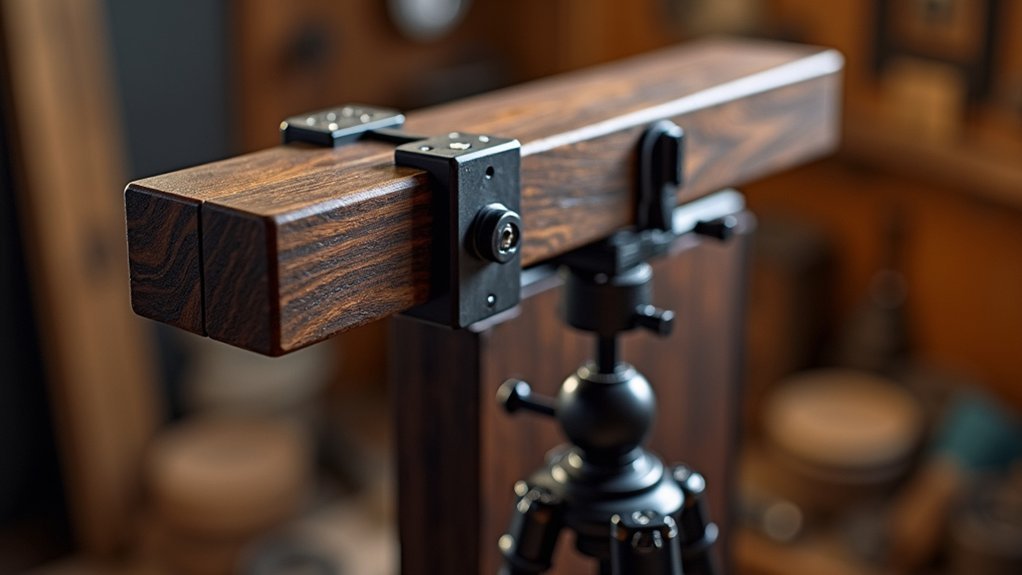
With your materials gathered, you’ll now begin constructing the foundation of your barn door tracker. Cut two triangular wooden pieces of equal size for stability. Connect them using a door hinge, which creates the pivoting action essential for stellar tracking.
Drill a hole through the top board for the 1/4-20 carriage bolt that serves as your threaded rod. Install a T-nut in the bottom piece to secure the bolt firmly. Position the door hinge toward Polaris for accurate astronomical tracking.
| Component | Purpose | Placement |
|---|---|---|
| Door hinge | Pivoting mechanism | Between two pieces of wood |
| Carriage bolt | Adjustment mechanism | Through top board |
| T-nut | Secure bolt threading | In bottom board |
| Wooden triangles | Structural base | Aligned toward Polaris |
Installing the Threaded Rod Mechanism
The threaded rod mechanism forms the heart of your barn door tracker’s movement system.
Begin by drilling a precise hole through both wooden pieces where your hinge is located, guaranteeing perfect alignment for smooth rotation during tracking.
Insert the threaded rod through this hole, allowing it to rotate freely while maintaining a secure connection between the wood pieces.
Attach a comfortable handle to one end of the rod to facilitate manual adjustments when you’re tracking celestial objects in the night sky.
Secure the opposite end using a T-nut, tightening it firmly to prevent any wobbling that could ruin your long-exposure shots.
Finally, mount the entire assembly onto a sturdy tripod for maximum stability.
This robust installation guarantees your tracker will perform reliably throughout your astrophotography sessions.
Mounting Options for Your Camera
Securing your camera to the barn door tracker requires a sturdy ball mount that prevents unwanted movement during long exposures.
You’ll need a tripod head that allows angle adjustments for proper celestial alignment, preferably with a quick-release plate system for efficient camera changes.
Consider investing in a heavy-duty tripod matched to your latitude or build a custom wooden mount using 2x4s for enhanced stability in challenging conditions.
Mounting Options for Your Camera
Proper camera mounting forms the backbone of any successful barn door tracker setup.
You’ll need a secure camera ball mount that prevents movement during long exposures. A heavy-duty tripod supports your entire system while allowing for latitude adjustments vital for proper celestial tracking.
- Install a T-nut inside your tracker’s structure to create a solid connection point that minimizes vibrations during image capture.
- Use a wooden tripod made from 2x4s for superior stability and easier transport to remote photography locations.
- Attach a carriage bolt to the tripod head to enable quick angle adjustments when tracking stars across the night sky.
- Position your camera securely on the ball mount, tightening all connections to confirm nothing shifts during those vital long exposures.
Secure Tripod Attachments
When selecting secure tripod attachments for your barn door tracker, you’ll need to prioritize stability above all else. A heavy-duty tripod is non-negotiable—it must support both your camera and tracker while maintaining rock-solid stability during lengthy exposures.
Attach your camera to the tripod head using a ball mount, which offers the flexibility to adjust positioning while ensuring security. Use a T-nut to create a solid connection at the tripod attachment point on your barn door tracker, capable of withstanding the subtle movements during tracking.
Don’t forget to angle your tripod to match your latitude for proper Polaris alignment. For enhanced stability, consider adding rubber or Teflon pads to the tripod head, minimizing wobble and creating a tighter fit that improves tracking precision.
Quick-Release Plate Systems
Three essential components make up an effective quick-release plate system for your barn door tracker: the plate itself, the mounting clamp, and the locking mechanism.
When you’re setting up for astrophotography, you’ll appreciate how quick-release plates allow fast camera mounting and dismounting, saving precious dark-sky time. Most systems use standardized sizes like Arca-Swiss, ensuring compatibility across various equipment.
- Attach the quick-release plate to your camera’s tripod socket, ensuring it’s firmly secured.
- Mount your camera onto the barn door tracker by sliding the plate into the clamp.
- Engage the locking mechanism to prevent slippage during long exposure shots.
- Use the rubberized surface for additional stability, minimizing vibrations that could blur star trails.
Investing in quality quick-release hardware streamlines your setup process, allowing more focus on capturing stunning night sky images.
Polar Alignment Techniques for Accurate Tracking
Achieving precise polar alignment stands as the cornerstone of successful astrophotography with your manual barn door tracker. Position your tracker’s hinge for sighting directly toward Polaris in the Northern Hemisphere, ensuring it compensates for Earth’s rotation.
Level the hinge to match your latitude—typically 40-50° for many Northern Hemisphere users.
Proper hinge alignment at your specific latitude ensures optimal tracking performance for Northern Hemisphere astrophotography sessions.
Use a compass to find true north, adjusting for magnetic declination in your area. For enhanced precision, employ a polar scope or smartphone app to confirm alignment a number of times throughout your session. This verification becomes especially critical during longer exposures.
Remember to tilt the barn door hinge according to your geographical latitude and periodically check your alignment during your session to maintain tracking accuracy, particularly with manual trackers.
Calculating the Perfect Rotation Rate
To counteract Earth’s rotation of 15 degrees per hour during astrophotography, you’ll need to turn your barn door tracker’s handle at a consistent rate matching this movement.
Your rotation speed depends directly on your camera’s focal length—shorter focal lengths like 30mm require about 1/4 turn every 15 seconds, while longer lenses need more frequent adjustments.
You can fine-tune your turning technique through practice, watching for star trails in your test images and adjusting your timing accordingly.
Rotation Speed Fundamentals
Since the Earth rotates at approximately 15 degrees per hour, your barn door tracker must match this precise movement to capture crisp, trail-free astrophotographs. This translates to 0.25 degrees per minute—the exact rate needed to counteract Earth’s rotation.
For standard 60-second exposures, you’ll need to:
- Turn the handle at a consistent rate, completing one full rotation every 4 minutes.
- Adjust your timing based on focal length—shorter lenses (30mm or less) need only a quarter turn every 15 seconds.
- Use a stopwatch to maintain rhythm and prevent over-rotation.
- Track your results and fine-tune your speed through experimentation.
Remember that your rotation speed directly affects image sharpness. Start with these calculations, then adjust based on your specific setup and lens choices.
Timing Your Turns
While capturing the night sky demands patience, calculating your barn door tracker’s rotation rate requires precision.
Earth’s rotation means you’ll need to turn your tracker handle approximately 0.25 degrees per minute, equating to one complete rotation every four minutes.
For wide-angle lenses (30mm or less), time your turns at 1/4 rotation every 15 seconds to maintain proper star alignment.
When using a 50mm lens, adjust your timing to 90 degrees every half minute to prevent star trailing and capture round star images.
Remember that longer focal lengths demand more frequent adjustments.
The key to successful tracking lies in consistent timing—use a stopwatch or timer app to maintain your rotation schedule.
This disciplined approach guarantees your stars remain crisp points of light rather than elongated streaks.
Testing Your Tracker Under the Night Sky
After spending hours crafting your barn door tracker, you’ll need to test it under real astronomical conditions. Head to a dark site away from city lights to maximize your chances of success. Set your camera to manual mode, adjusting ISO and aperture to capture maximum light during each exposure.
For optimal testing, seek darkness beyond city limits where your handmade tracker can truly prove its worth.
- Start with short 30-second exposures using a wide-angle lens to establish your baseline results.
- Try one rotation of the handle every 15 seconds with a 50mm lens for a 1-minute exposure.
- Examine your images for star trails or elongation, adjusting your turning rate accordingly.
- Gradually increase exposure times as you gain confidence, noting which settings produce the clearest star points.
Fine-tune your technique by experimenting with different focal lengths and exposure combinations until you achieve crisp, trail-free images.
Troubleshooting Common Tracking Issues
Even the most carefully constructed barn door tracker can encounter performance issues when put to the test. When troubleshooting tracking errors, focus on alignment with Polaris first, as this is the most common cause of star trails.
| Problem | Solution |
|---|---|
| Elongated stars | Adjust bolt tension and guarantee smooth hinge operation |
| Inconsistent tracking | Use a stopwatch; rotate handle 90° every 15 seconds |
| Structural wobble | Tighten all components and reinforce weak points |
| Poor tracking at longer focal lengths | Decrease exposure duration; use shorter intervals |
| Tracking drift | Realign with Polaris and check for mechanical issues |
If you notice subtle star elongation, try adjusting rotation speed slightly. Remember that different setups require customization—experiment with your specific equipment to find the best balance between tracking accuracy and exposure duration. Regular maintenance prevents minor issues from becoming major problems.
Upgrades and Modifications for Better Performance
Once you’ve mastered the basic operation of your barn door tracker, several strategic upgrades can transform its performance from adequate to excellent.
Adding eye hooks along the sight path creates a more accurate alignment with Polaris, dramatically improving your initial setup precision.
Precise polar alignment is the foundation of successful astrophotography—eye hooks provide the sightline accuracy beginners often lack.
- Install a tangent error corrector to eliminate the inherent tracking inaccuracies in the basic hinge design.
- Replace manual adjustments with a geared-down DC motor that maintains consistent rotation speed throughout your imaging session.
- Insert a Teflon piece at the bolt connection point to reduce wobble and create smoother tracking motion.
- Experiment with various tripod configurations to minimize vibrations that can ruin long exposures.
These modifications require minimal additional materials but yield significant improvements in tracking accuracy and consistency.
Frequently Asked Questions
How Does a Barn Door Tracker Work?
A barn door tracker works by counteracting Earth’s rotation. You’ll turn a threaded rod that pivots hinged boards supporting your camera, keeping it aligned with stars during long exposures, preventing star trails in astrophotography.
How Do You Make a Barn Door Look Like a Door?
You’ll need wide wooden boards, decorative hardware like iron handles and hinges, paint in traditional colors, and cross bracing with diagonal pieces forming an “X” pattern to make your barn door resemble a classic door.
In Summary
You’ve now built your own DIY barn door tracker! With just a few materials and some simple tools, you’ve created a device that’ll transform your astrophotography. Don’t worry if your first tracking attempts aren’t perfect—practice makes perfect. Keep refining your technique, try the suggested modifications, and you’ll soon capture stunning night sky images that’ll impress everyone. The universe awaits your camera!


Leave a Reply