
Image stacking in astrophotography combines multiple exposures to dramatically improve signal-to-noise ratio. You’ll see details that single shots miss as consistent signals strengthen while random noise cancels out. With each additional frame, your image quality improves proportionally to the square root of total frames used. Calibration frames (darks, flats, bias) further enhance results by eliminating artifacts and correcting optical issues. Discover how just 36 stacked frames can produce results six times better than a single exposure.
Why Stack Multiple Images for Better Astrophotography Results?

When you’re capturing the cosmos through your camera lens, a single frame rarely tells the complete story. By combining multiple exposures into a stacked image, you’ll greatly improve the signal to noise ratio—36 stacked frames can yield results six times cleaner than a single shot. This averaging process reveals fine details and smooth shifts that individual exposures miss.
Stacking multiple shots transforms cosmic noise into celestial clarity, unveiling details invisible to single exposures.
For best results, incorporate calibration frames (dark, flat, and bias) during processing to eliminate artifacts and reduce noise further.
Don’t forget to dither between shots by slightly shifting your camera position, effectively eliminating hot pixels and random artifacts that could compromise your final image.
Remember that shooting from darker locations with minimal light pollution will greatly enhance your stacking results, allowing the celestial details to truly shine through.
The Science Behind Image Stacking in Astrophotography
When you stack multiple astrophotography images, you’re leveraging a powerful statistical principle that dramatically improves the signal-to-noise ratio.
Each frame contains both the desired celestial signal and random noise from your camera sensor or environmental factors. As you combine more images, the consistent signal elements strengthen while the random noise patterns effectively cancel each other out, revealing details that remain hidden in single exposures.
Signal-to-Noise Ratio Improvement
The magic of astrophotography reveals itself not in a single shot, but through the meticulous process of image stacking. When you stack multiple exposures using specialized stacking software, you’ll see a dramatic improvement in signal-to-noise ratio—the fundamental measure of image clarity in astrophotography.
Each additional image you stack contributes to reduce the noise at a rate proportional to the square root of your total frames. Stack 36 images, and you’ll achieve an SNR six times better than a single exposure.
While high ISO settings introduce noise in individual frames, the stacking process effectively averages it out. Integrating calibration frames like darks and flats further enhances your good data by eliminating specific artifacts.
Random Noise Cancellation
Random noise, the persistent enemy of astrophotographers everywhere, surrenders quickly to the mathematical power of image stacking. When you stack multiple frames, the noise decreases proportionally to the square root of the number of images—doubling your frames reduces noise by approximately 30%. This mathematical advantage transforms your image quality dramatically.
During processing, three key factors enhance noise cancellation:
- Dithering between exposures eliminates fixed-pattern noise and hot pixels that would otherwise remain stubborn in your final image.
- Calibration frames (darks, flats, and bias) remove systematic noise before stacking begins.
- Median stacking techniques efficiently reject outlier pixels, preserving genuine signal.
With 36 stacked frames, you’ll achieve a signal-to-noise ratio six times better than a single exposure—revealing delicate details in deep-sky objects that would otherwise remain hidden beneath the noise floor.
Equipment Essentials for Effective Image Stacking
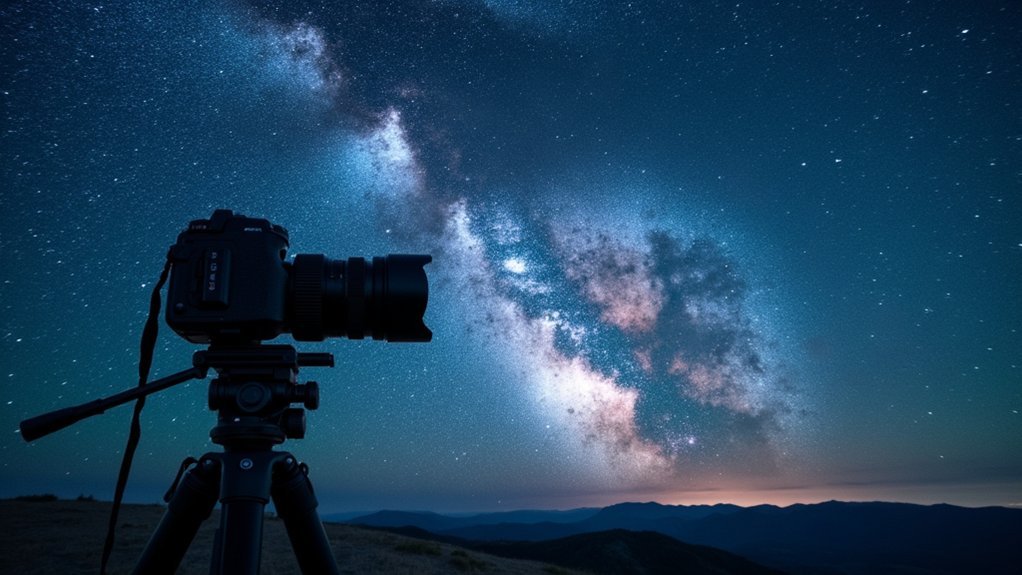
Your tracking mount represents the foundation of successful image stacking, as it allows you to capture longer exposures with pinpoint stars rather than trails.
When choosing lenses, you’ll typically achieve better results with prime lenses over zoom options due to their superior sharpness and light-gathering capabilities.
These quality differences become magnified during the stacking process, where the finest details in each frame contribute to your final composite image.
Tracking Mounts Matter
Serious astrophotographers understand that tracking mounts represent the foundation of successful deep-sky imaging. When you’re stacking and processing multiple frames, your mount’s ability to track celestial objects precisely determines how long your exposures can be.
With a well-aligned equatorial mount, you’ll capture exposures long enough to overcome read noise and reveal faint details in nebulae and galaxies.
- A quality tracking mount can extend exposure times up to 120 seconds with proper polar alignment, dramatically improving your final stacked images.
- During poor seeing conditions, you can switch to multiple shorter exposures with your tracking mount still providing essential stability.
- Equatorial mounts offer superior tracking accuracy compared to alt-azimuth designs, making them the preferred choice for deep sky work.
Prime vs. Zoom
When choosing lenses for astrophotography, the debate between prime and zoom lenses becomes vital for successful image stacking. Prime lenses generally deliver superior results due to their simpler optical design, which is important when capturing faint celestial objects.
| Feature | Prime Lenses | Zoom Lenses |
|---|---|---|
| Optical Elements | Fewer elements, less distortion | More elements, increased aberrations |
| Light Transmission | Better light gathering | Some light loss |
| Sharpness | Excellent corner-to-corner | Often soft at edges |
| Stacking Efficiency | Higher quality frames to stack | More frames needed to overcome limitations |
While a 100mm prime lens will capture more detailed deep-sky objects than shorter focal lengths, your choice should also consider your modern camera’s sensor. Modern CMOS sensors produce less noise than older models, making stacking more effective regardless of your lens choice—though the prime’s optical advantages remain significant.
Step-by-Step Guide to Capturing Stackable Frames
Five critical steps form the foundation of successful astrophotography stacking. Start by precisely aligning your mount and framing your target consistently across all exposures.
You’ll need to set up an intervalometer or computer control system to capture continuous shots, aiming for at least an hour of total shutter time to gather enough data to stack and compare.
Monitor your histogram, keeping peaks between 25-75% to avoid saturation while maximizing signal.
Don’t forget to capture:
- Dark frames (20+ with identical settings) to reduce noise in your final image
- Flat frames to correct for vignetting and dust spots
- Light frames with slight dithering between shots to eliminate random artifacts
Processing software will use these various frame types to produce a cleaner, more detailed final image than any single exposure could achieve.
Understanding Calibration Frames: Darks, Flats, and Bias

Calibration frames act as digital corrective lenses for your astrophotography, revealing details that would otherwise remain hidden beneath various forms of noise and optical artifacts.
These specialized frames work together to greatly improve your final stacked image quality.
Dark frames eliminate hot pixels and fixed pattern noise by capturing the thermal signature of your sensor. You’ll want to shoot these with the same exposure time and temperature as your light frames.
Flat frames correct for vignetting and dust spots by evenly illuminating your field of view, ensuring uniform brightness across your image.
Bias frames capture and help remove your camera’s inherent read noise.
For best results, collect at least 20 of each calibration frame type. This provides enough data to effectively clean your images during processing, considerably enhancing your signal-to-noise ratio.
Popular Software Options for Astrophotography Stacking
The journey from raw captures to breathtaking celestial portraits requires specialized stacking software to combine multiple exposures and extract faint details.
When selecting tools for processing your RAW subs, several options stand out for effective noise reduction and image enhancement:
- Deep Sky Stacker (DSS) – Free and beginner-friendly with calibration frame support to improve noise reduction in your stacked images
- Astro Pixel Processor (APP) – Offers a guided workflow that typically processes stacks faster than traditional photo editing software
- PixInsight and Siril – More advanced options with PixInsight providing extensive post-processing tools during its 45-day trial, while Siril excels at chromatic aberration control as a free alternative
Remember to always process your data in RAW or FITS formats to preserve critical image information during stacking.
Common Challenges and Troubleshooting in Image Stacking
Despite your best efforts at capturing perfect data, every astrophotographer faces obstacles when stacking multiple exposures into a final image. Misalignment is a common issue—ensure consistent framing and use your best frame as a reference during registration.
Combat noise and hot pixels by utilizing calibration frames: dark frames eliminate hot pixels while flat frames correct vignetting. Watch your exposure settings carefully, checking histograms to avoid overexposure that can ruin your stack.
Software compatibility problems may arise when mixing different image resolutions or formats. Maintain consistent settings when using programs like Deep Sky Stacker to prevent processing failures.
Don’t underestimate environmental conditions—fog or clouds can dramatically impact your image quality. Patience is key; sometimes waiting for better conditions yields superior results than forcing image stacking in poor conditions.
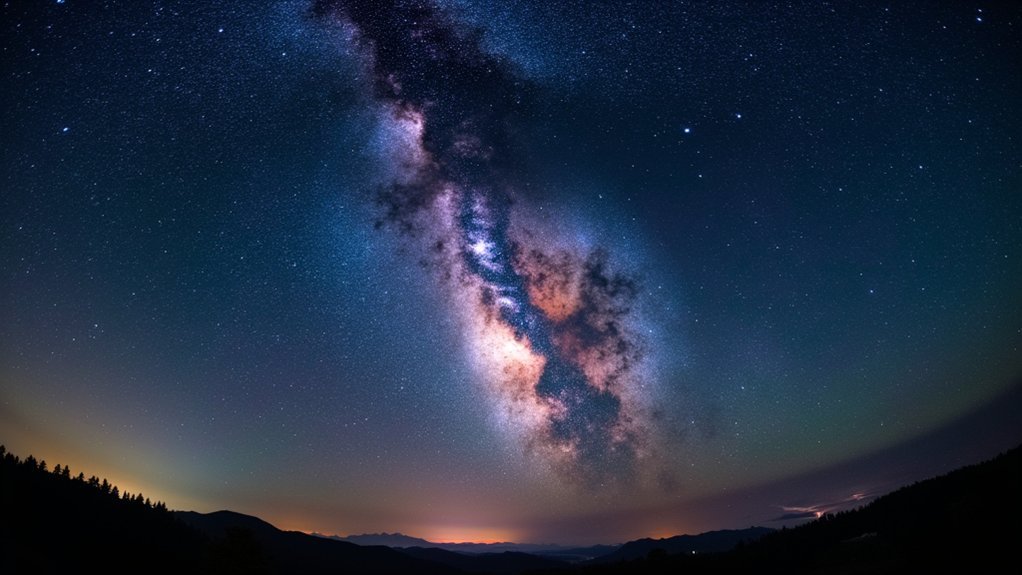
Before and After: Dramatic Improvements Through Stacking
Viewing raw, unprocessed astrophotography frames can often leave you disappointed, as single exposures typically appear grainy and lack the fine details your eyes crave.
When you compare these single frames to stacked images, you’ll witness dramatic differences that transform your celestial photography.
Stacking enhances your final image in several remarkable ways:
Combine multiple frames to reveal celestial details hidden in the noise of single exposures.
- Even with just 10-20 frames, you’ll notice smoother results as random noise gets averaged out
- With 36 subs, you’ll achieve a signal-to-noise ratio six times better than a single exposure
- Adding calibration frames (darks, flats, bias) eliminates hot pixels and corrects vignetting issues
The transformation is striking—objects previously hidden by light pollution emerge with clarity, and subtle nebulosity details become visible where only darkness appeared before.
Frequently Asked Questions
Why Do You Stack Images in Astrophotography?
You stack images in astrophotography to improve signal-to-noise ratio, revealing faint celestial details that aren’t visible in single exposures. It’s how you’ll eliminate random noise and create cleaner, more detailed final images.
What Are the Benefits of Stacking Photos?
When you stack photos, you’ll get improved signal-to-noise ratio, better visibility of details, reduced random noise, enhanced fine details, minimized light pollution effects, and cleaner images. It makes your final result considerably clearer and more detailed.
How Do Image Stacks Improve Image Quality?
Image stacking improves quality by averaging out random noise, enhancing signal-to-noise ratio, and revealing finer details. You’ll see smoother shifts and fewer artifacts while unwanted elements like satellite trails get eliminated with proper stacking techniques.
Does Stacking Increase Resolution?
No, stacking doesn’t increase resolution. You won’t get more pixels than your original images had. It improves image quality by reducing noise, making existing details clearer and more visible within the same resolution.
In Summary
By stacking multiple images, you’ve unveiled the true potential of your astrophotography. You’re not just taking pictures—you’re revealing celestial details invisible to single exposures. Whether you’re a beginner or veteran, this technique dramatically improves your signal-to-noise ratio, reduces random noise, and enhances faint details. Don’t settle for mediocre space shots when stacking can transform your cosmic captures into stunning masterpieces.


Leave a Reply