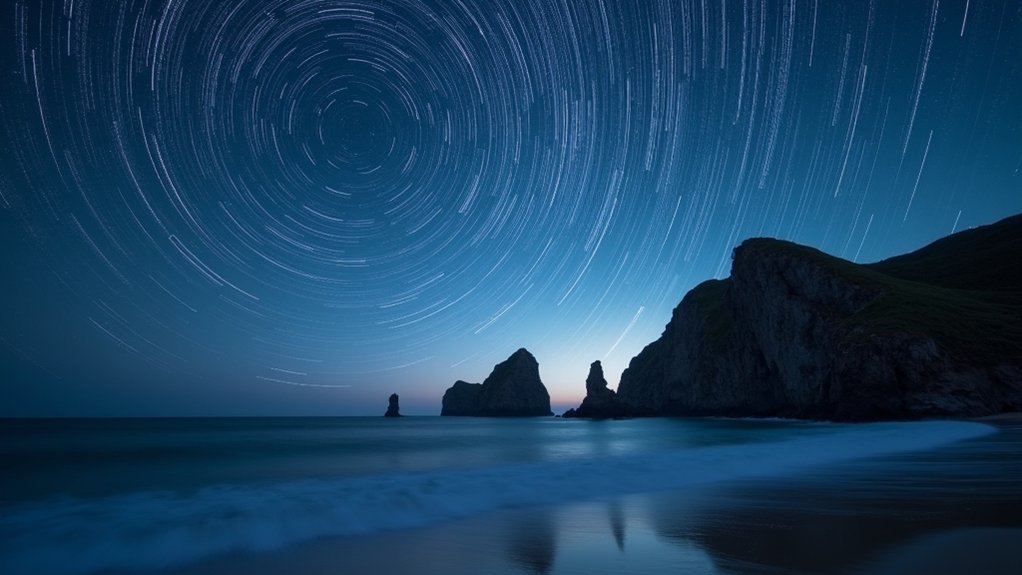
Ruby Beach in Olympic National Park offers exceptional star trail photography with minimal light pollution and dramatic sea stacks. You’ll get the best results during low tide when ancient driftwood creates compelling foregrounds. Bring a sturdy tripod and extra batteries for long exposures, and always check tide charts to guarantee safety. Summer months typically provide clearer skies and more stable weather conditions. Discover how proper planning and equipment can transform your nighttime coastal photography.
Oregon’s Ruby Beach: Iconic Sea Stacks Meet Celestial Trails
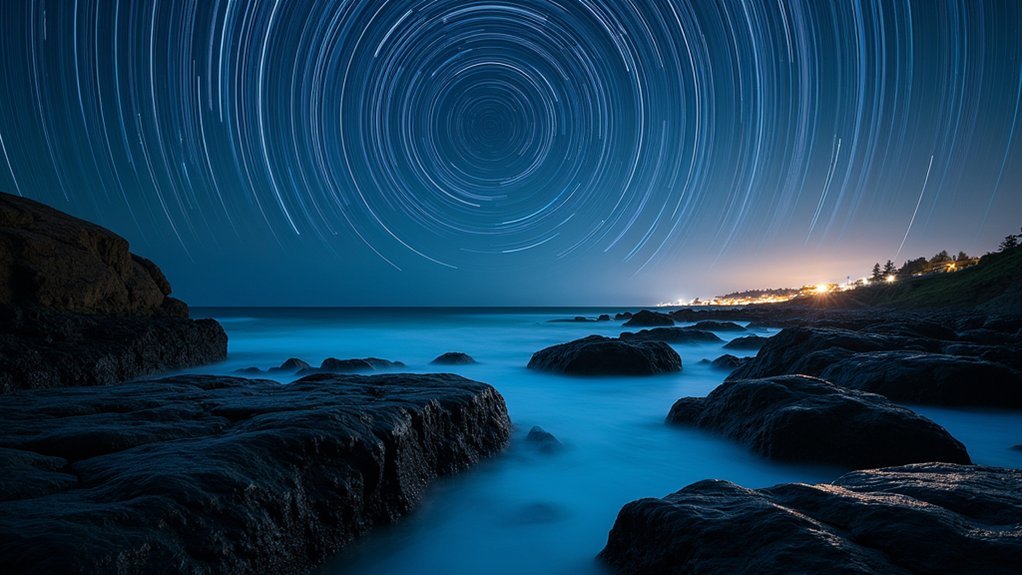
While many photographers seek perfect daytime lighting, Ruby Beach reveals its true magic after dark. Located in Olympic National Park, this stunning coastal gem offers ideal conditions for capturing mesmerizing star trails against a backdrop of dramatic sea stacks and ancient driftwood.
You’ll find minimal light pollution here, creating perfect dark skies for celestial photography. The Milky Way arches magnificently overhead, particularly visible during low tide and even on slightly overcast nights.
For those wanting to master these techniques, photography workshops run September 17-22 and 24-29, covering star trail capture and light painting methods.
Position your camera to incorporate both the rugged coastal landscape and swirling stars above—this remote location’s natural elements create compositional foregrounds that elevate your night photography from ordinary to extraordinary.
Tide Planning: Understanding Water Levels for Night Photography
You’ll need reliable tide app forecasting tools like Tide Graph Pro to plan your coastal star trail photography sessions, ensuring you can access prime shooting locations without risking safety.
When selecting your timing, always prioritize physical safety over capturing the perfect composition, as rising tides can quickly cut off escape routes and create dangerous situations.
These water level predictions let you maximize your artistic opportunities while maintaining a healthy respect for the ocean’s power and unpredictability.
Tide App Forecasting Tools
Since coastal star trail photography depends heavily on water conditions, mastering tide forecasting tools is crucial for both safety and creative success. Apps like Tide Graph Pro provide real-time data on tide heights and timings, helping you determine ideal water levels for your night photography sessions.
When planning coastal photography outings, consult local tide tables through these apps to guarantee you’ll have access to dramatic foreground elements like tide pools. Shooting during low tide not only reveals unique coastal features that complement star trails but also prevents you from being cut off by rising waters during long exposures.
For the best results, schedule your shoots when overcast skies coincide with low tide. These apps allow you to effectively plan ahead, assuring you can safely navigate coastal terrain while capturing stunning astronomical phenomena.
Safety vs. Artistic Merit
Balancing safety concerns with creative vision represents the core challenge of coastal star trail photography. While low tide offers access to stunning unique compositions around tide pools and rock formations, you must prioritize your safety above the perfect shot.
Understanding tide cycles is essential—they determine not just your artistic options, but your window of opportunity for secure positioning.
- Scout locations during daylight to identify potential hazards that might be invisible at night
- Use tide prediction apps to plan your shoot during safe low tide periods
- Monitor local weather conditions that might accelerate tide changes or create dangerous situations
Light Pollution Considerations for Pristine Coastal Star Paths
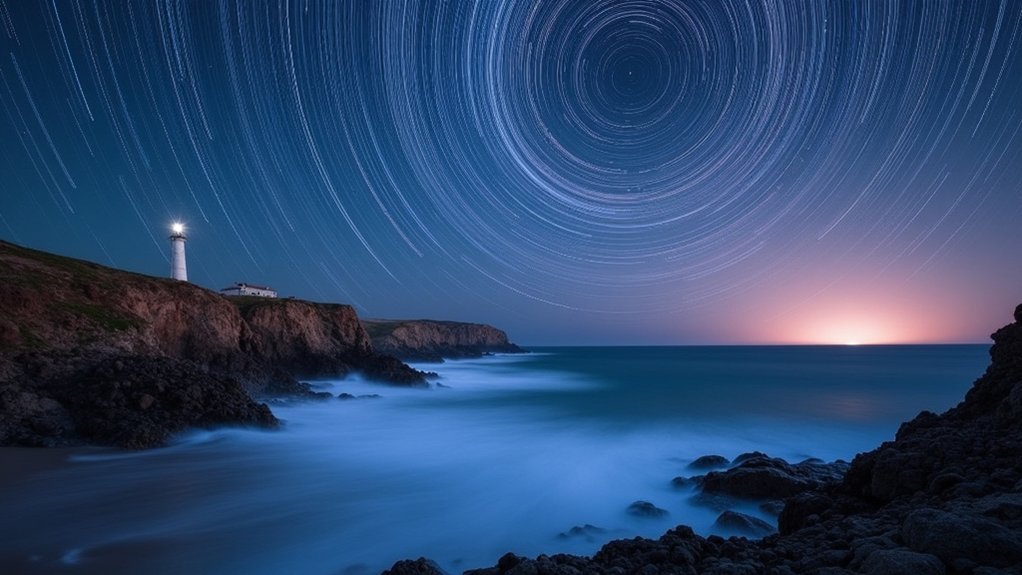
When seeking pristine star trails along the coast, you’ll need to escape artificial light sources that wash out the night sky.
Check reliable light pollution maps to identify coastal zones marked in black or dark blue, indicating areas where stars shine most brilliantly without urban interference.
Your best photographs will come from these designated dark sky regions, especially during new moon phases when natural light interference is minimal.
Light Pollution Escape Zones
To capture truly spectacular star trails along coastlines, you’ll need to escape the artificial glow that plagues most populated areas. Coastal regions often provide the darkest skies for photography, but you’ll need to venture at least 45 minutes away from urban centers to find genuinely pristine conditions.
Consider these strategies when planning your coastal star trail expedition:
- Consult the Dark Sky Finder Map to identify coastal locations with minimal light pollution
- Time your photography sessions during new moon phases to further reduce celestial light interference
- Explore renowned dark sky locations like Ruby Beach or Big Bend National Park for guaranteed results
Even overcast nights can work to your advantage by blocking distant light pollution, creating a natural filter that enhances your coastal star trails while maintaining the dramatic foreground of waves and shoreline.
Coastal Dark Skies Map
The most pristine star trails emerge along coastlines where artificial light hasn’t yet conquered the night sky. When planning your coastal star photography adventure, utilize the Dark Sky Finder map to identify prime viewing locations with minimal light pollution interference.
Olympic National Park in the Pacific Northwest stands out as a premier coastal location, offering exceptionally dark skies where star trails appear in breathtaking clarity against the ocean backdrop. For best results, position yourself at least 45 minutes away from urban centers, where city glow can’t diminish celestial visibility.
Summer months provide ideal conditions for coastal star trail photography, combining comfortable temperatures with clear night skies.
Remember that the most spectacular star trails aren’t just about equipment—they’re about finding those increasingly rare coastal locations where darkness still reigns supreme.
Equipment Essentials for Oceanside Astrophotography
Selecting the right gear for coastal star trail photography involves balancing portability with performance.
You’ll need a lightweight camera setup like the Nikon D3s with a Nikkor 17-35mm f/2.8 lens when trekking to locations such as Ruby Beach. The wide aperture maximizes light capture, vital for nighttime coastal scenes including bioluminescence.
- A sturdy tripod (such as the Gitzo 3541LS) provides stability during long exposure shots, preventing blur in your star trails.
- Remote shutter release or intervalometer enables continuous shooting for stacking multiple exposures without camera vibration.
- Additional batteries are essential for extended shooting sessions, as capturing complete star trails requires numerous frames over several hours.
Remember to prioritize equipment that can withstand coastal elements while delivering the image quality needed for dramatic oceanside astrophotography.
Weather Patterns and Seasonal Variations in Coastal Night Skies
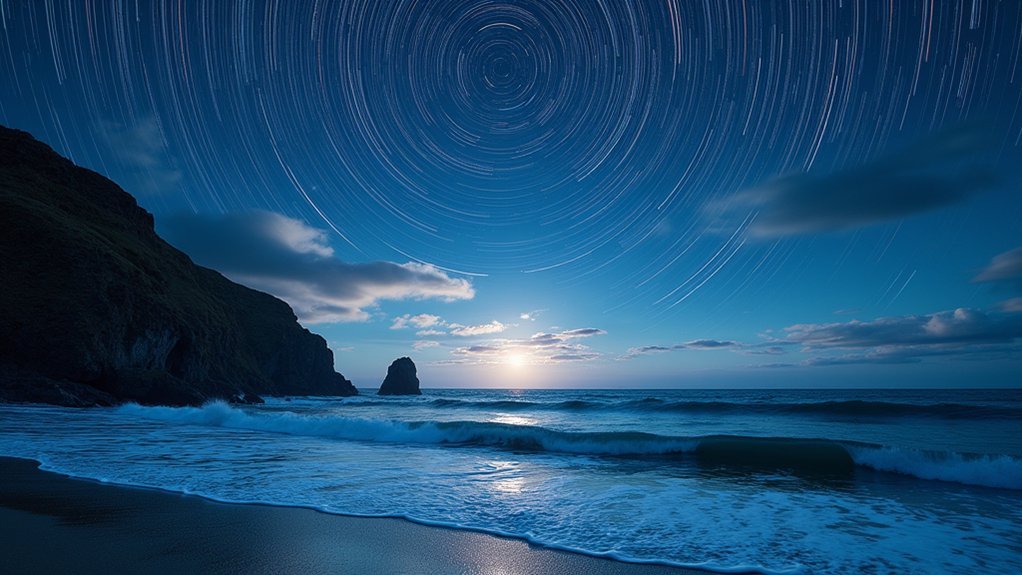
Successful coastal star trail photography hinges on understanding the weather patterns and seasonal variations that dramatically affect night sky visibility along shorelines.
You’ll find summer months typically offer more stable weather and clearer nights, perfect for extended exposures, while winter brings increased storm activity that can derail your plans.
Plan your shoots around new moons when star visibility peaks due to minimal light interference. This is especially valuable in coastal locations where you’ll often battle less light pollution than urban areas.
Don’t overlook fog and cloud cover—these coastal phenomena can obscure your shots without warning.
Consider tides in your planning too; low tides reveal compositional elements like rocks and tidepools, while high tides create reflective surfaces that can double your star trails’ visual impact.
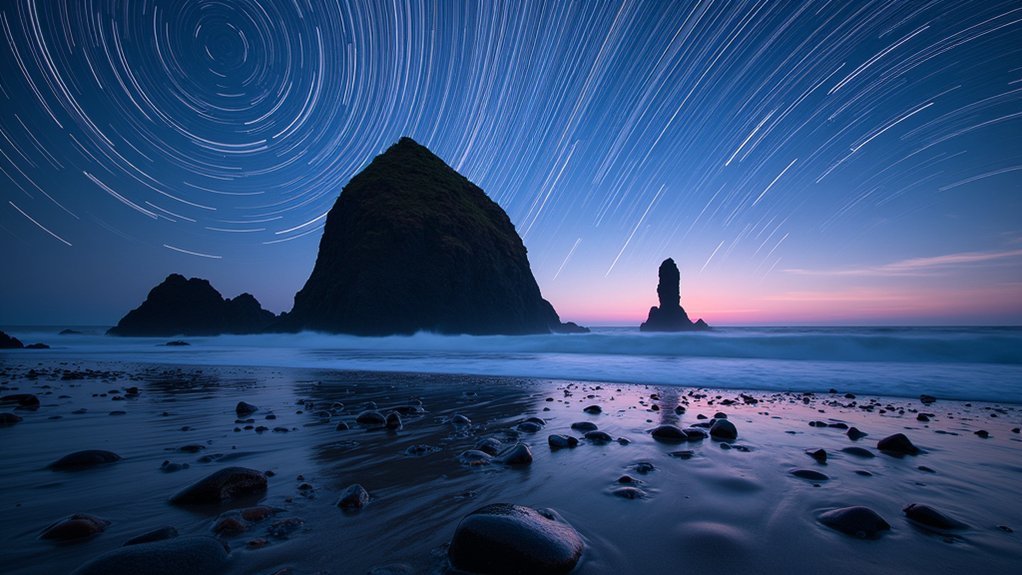
Foreground Elements: Incorporating Driftwood and Rock Formations
Beyond weather considerations, stellar coastal compositions depend heavily on what’s happening beneath your feet. Driftwood and rock formations aren’t just beach debris—they’re powerful foreground elements that transform ordinary star trail photos into compelling visual stories.
When you frame your shot, look for:
- Natural arrangements that create leading lines guiding viewers’ eyes from foreground driftwood toward celestial movements overhead
- Sea stacks and distinctive rock formations that provide scale and contrast against the rotating stars
- Textural elements that add depth and dimensional interest, particularly at locations like Ruby Beach
Safety Precautions When Shooting on Remote Shorelines at Night
While capturing star trails along coastal locations offers stunning photographic opportunities, the isolation and darkness of remote shorelines present unique safety challenges.
Always check tide charts before heading out, as rising waters can quickly cut off escape routes during your night shooting session.
Carry a lightweight first aid kit and a fully charged phone for emergencies.
When traversing uneven terrain, use a headlamp with a red filter to preserve your night vision while preventing falls.
Monitor local weather forecasts carefully, as coastal conditions can change rapidly, putting unprepared photographers at risk.
Keep a respectful distance from any wildlife you encounter on remote shorelines.
Their behavior can be unpredictable, especially at night when your presence may startle them.
Frequently Asked Questions
Where to Point Camera for Star Trails?
Point your camera north to capture circular trails around the North Star, or aim south for more dynamic compositions. You’ll get the best results with a sturdy tripod and wide-angle lens.
What Is the Best Exposure for Star Trails?
For star trails, you’ll get the best results using f/2.8 aperture with ISO 1600. Take multiple 20-30 second exposures (about 120 frames) with 1-second intervals between shots, then stack them in post-processing.
What Is the Best Direction for Star Trails?
For star trails, you’ll want to face the celestial pole – Polaris in the northern hemisphere or near Octans in the southern hemisphere. This creates circular trails, but east-west orientations produce dramatic streaking effects too.
Where Are the Star Trails Located?
Star trails aren’t physically located anywhere—they’re optical illusions created when you photograph stars over time as Earth rotates. You’ll see them in any night sky when using long exposure photography techniques.
In Summary
You’ll discover that coastal star trail photography blends the magic of shorelines with celestial wonders in ways few locations can match. Whether you’re setting up at Ruby Beach or finding your own secluded spot, remember to prioritize safety, check tide schedules, and pack proper gear. With patience and planning, you’ll capture stunning images where stars dance above the rhythmic waves of Earth’s beautiful shores.


Leave a Reply