For affordable deep sky photography, start with a DSLR and star tracker like the iOptron Skyguider Pro or consider a ZWO Seestar all-in-one camera. Focus on bright objects like the Andromeda Galaxy while learning. Add light pollution filters for urban imaging. Use free software like Siril and GraXpert for processing. Invest in a sturdy tripod with vibration dampening pads. Choose refractors like the Apertura 60EDR for better results. These practical steps will transform your cosmic captures.
7 Deep Sky Photography Tips Under $1000

While many astronomy enthusiasts believe deep-sky photography requires expensive equipment, you can actually begin your astrophotography journey for around $1000.
Start with affordable options like a DSLR mounted on a star tracker or the ZWO Seestar camera, which deliver impressive image quality at an affordable price.
Affordable DSLRs with star trackers or the ZWO Seestar provide stunning astrophotography results without breaking the bank.
For wide-field astrophotography, consider a lightweight refractor like the Askar FMA180 Pro. Pair your setup with a stable mount such as the iOptron Skyguider Pro to prevent blurry images during long exposures.
As a beginner, focus on bright deep sky objects like the Pleiades or Andromeda Galaxy, which are more forgiving targets.
Don’t overlook image processing—free software like GraXpert and Siril offer powerful tools for enhancing your deep-sky imaging without additional costs, helping you remove noise and gradients effectively.
Choosing Between Smart Telescopes and DSLR Tracker Setups
When selecting your sub-$1000 astrophotography setup, you’ll face the choice between compact smart telescopes like the $499 ZWO Seestar or traditional DSLR tracker combinations like the Sky-Watcher Star Adventurer GTi.
Smart telescopes offer tremendous value with their all-in-one functionality and gentler learning curve, while DSLR setups provide greater flexibility with existing camera gear and future upgrade paths.
Your decision should weigh these tradeoffs – simplicity versus versatility – against your personal photography experience and long-term astronomy goals.
Compact vs. Traditional Setups
As you explore deep sky photography, the choice between smart telescopes and DSLR tracker setups represents one of your most significant decisions.
Smart telescopes like the ZWO Seestar offer lightweight and compact designs that won’t burden you during travel, with user-friendly automated features that eliminate frustrating calibration processes.
In contrast, a DSLR camera paired with a star tracker setup like the Star Adventurer GTi creates a versatile setup that accommodates interchangeable lenses for various astrophotography scenarios.
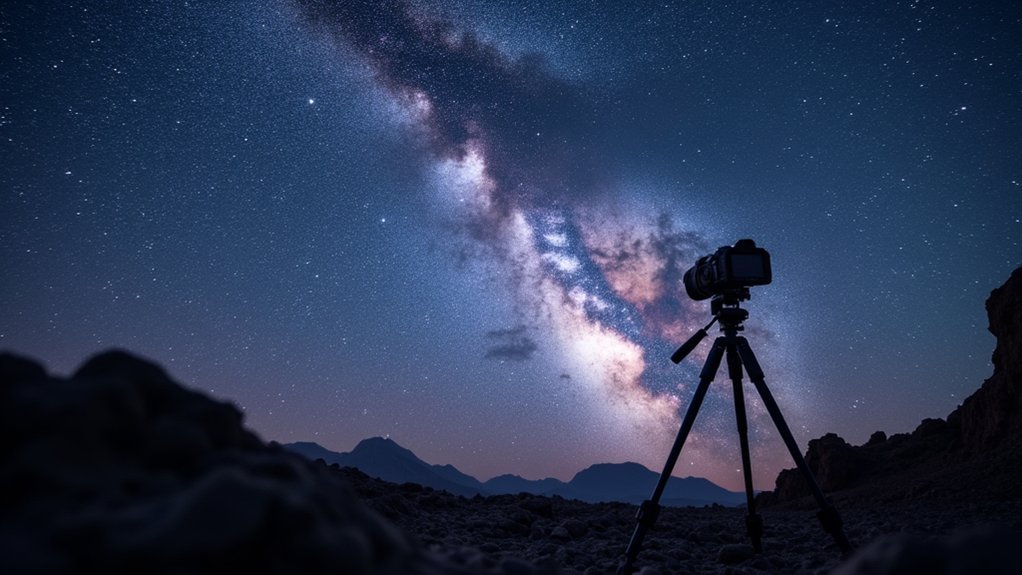
While traditional telescope rigs can be bulky and complex, this setup pictured provides higher-quality deep-sky images without the steep learning curve.
Your $1000 budget accommodates either option nicely—smart telescopes run around $449, while a quality DSLR and tracker combination fits within the same price range, leaving room for essential astrophotography gear accessories.
Budget Value Comparison
The two primary options for deep sky photography within a $1000 budget offer distinct advantages depending on your priorities.
Smart telescopes like the ZWO Seestar ($449 on sale) provide beginner-friendly setups with impressive imaging capabilities right out of the box.
Alternatively, DSLR tracker setups pairing a Canon Rebel T7 with an iOptron Skyguider Pro deliver greater flexibility for your astrophotography journey. This approach supports long-exposure imaging while maintaining portability—the Star Adventurer mount weighs just 2.2 pounds.
For maximum budget value, consider adding an Apertura 60EDR refractor ($600) to your tracker for enhanced deep-sky photography results.
Before deciding, explore community forums like Cloudy Nights to compare real-world experiences with both affordable astrophotography approaches, helping you make the choice that best aligns with your goals.
Learning Curve Considerations
Beyond budget considerations, your comfort with technology and willingness to learn new skills greatly impacts which system will provide the most rewarding experience.
Smart telescopes like the ZWO Seestar offer a gentler learning curve with their automated functions and user-friendly interfaces, making deep-sky photography accessible almost immediately.
In contrast, DSLR setups paired with mounts like the Star Adventurer GTi require you to master exposure settings and manual tracking.
This steeper learning path can be frustrating initially but often leads to deeper astrophotography knowledge and skills.
For budget-conscious beginners, consider how much time you’re willing to invest in learning.
If you value simplicity and quick results, smart telescopes shine.
If you enjoy technical challenges and already own camera gear, a DSLR setup might be more satisfying and cost-effective long-term.
Maximizing the Potential of ZWO Seestar and S-Series Models
Whether you’re just starting your astrophotography journey or looking to upgrade without breaking the bank, ZWO’s Seestar and S-Series models offer remarkable capabilities at affordable price points.
The S30 model delivers user-friendly setup and quality images at just $449 (on sale), making deep-sky astrophotography accessible for beginners.
To get the most from your Seestar:
- Start with the basics – Take advantage of the S30’s compact design and intuitive controls to build confidence before attempting more complex targets.
- Upgrade to the S50 when ready to explore its enhanced imaging features, especially the mosaic mode for larger objects.
- Connect with the community – User feedback shows that sharing experiences accelerates learning and maximizes your device’s potential.
Selecting the Right Star Tracker: Star Adventurer GTi Benefits
While dedicated astrophotography cameras form the foundation of your imaging setup, a reliable star tracker represents your next critical investment. The Star Adventurer GTi delivers exceptional value for deep-sky targets without breaking your budget.
You’ll appreciate its compact and lightweight design, perfect for traveling to dark sky locations. The built-in Wi-Fi connects to a smartphone app, giving you convenient control during imaging sessions.
Accurate tracking is guaranteed through its illuminated polar alignment scope, essential for capturing sharp long-exposure photographs.
The GTi’s energy-efficient design provides up to 72 hours of continuous operation on just four AA batteries. This versatility extends to its multiple photography modes, allowing you to easily capture various celestial objects.
For astrophotography under $1000, this star tracker offers an impressive balance of portability, precision, and performance.
Essential Accessories That Won’t Break Your Budget
While budget tracking mounts like the Star Adventurer GTi form your foundation, you’ll need several affordable accessories to maximize your deep sky imaging potential.
Light pollution filters can transform your urban backyard into a viable imaging location, blocking unwanted city glow without exceeding $100.
For precise tracking without breaking the bank, consider DIY guiding solutions using a guide scope paired with an entry-level ZWO camera, which will dramatically improve your long-exposure capabilities.
Budget Tracking Mounts
A quality tracking mount represents the cornerstone of successful deep sky photography, allowing your camera to follow the stars’ movement across the night sky.
For beginners seeking excellent value, options like the iOptron Skyguider Pro and Sky-Watcher Star Adventurer 2i offer reliable tracking without breaking your budget.
These compact and lightweight mounts deliver impressive stability for clear images during long exposures.
The Skyguider Pro operates for 20 hours on a rechargeable battery, while the Star Adventurer 2i offers 72 hours of tracking with precise alignment through its integrated polar scope.
For maximizing your astrophotography results with these $300-600 mounts:
- Invest in a sturdy tripod to enhance stability
- Use vibration dampening pads for sharper images
- Choose remote locations away from light pollution for ideal results
Light Pollution Filters
Beyond tracking capability, your astrophotography success depends heavily on clarity and contrast.
Light pollution filters are game-changers for urban astronomers, effectively reducing the effects of artificial light while revealing celestial objects that would otherwise remain hidden.
For under $100, these affordable filters dramatically improve quality by enhancing contrast and color saturation of deep-sky objects like nebulae and galaxies.
Choose between narrowband, broadband, or dual-band options depending on your specific imaging needs and local light conditions.
When paired with a fast refractor telescope, these filters can transform your astrophotography results, pulling clear images from even light-polluted skies.
Don’t let city lights limit your cosmic exploration—a quality light pollution filter might be the most impactful budget-friendly addition to your deep sky photography kit.
DIY Guiding Solutions
Despite what many beginners believe, achieving professional-quality tracking doesn’t require expensive equipment. You can dramatically improve your deep sky astrophotography results with low-cost DIY guiding solutions that enhance tracking accuracy during long exposure shots.
A simple guide scope paired with an affordable camera like the ZWO ASI120MM Mini offers remarkable performance for under $1000. Consider these budget-friendly options:
- Repurpose old optics – Transform unused binoculars or small telescopes into effective guide scopes.
- Build a stable platform – Create custom mounts using PVC pipe or wood that provide rigid support.
- Utilize free software – Download PHD2 to autoguide your setup, eliminating star trails even during 5+ minute exposures.
With these DIY solutions, you’ll capture stunning deep sky objects without spending thousands on premium equipment.
Refractor vs. DSLR: Finding Your Learning Path
When starting your deep-sky photography journey, choosing between a refractor telescope and a DSLR camera presents one of the first major decisions you’ll face.
Apochromatic refractors offer exceptional benefits for beginners—they’re lightweight, require minimal maintenance, and produce sharp images with flat fields ideal for large celestial objects.
Meanwhile, entry-level DSLRs like the Canon EOS series provide versatility, allowing you to photograph both terrestrial and celestial subjects while you develop your skills.
They’re budget-friendly too, with used models available under $500.
For an ideal learning path, consider pairing your DSLR with a star tracker like the Sky-Watcher Star Adventurer.
This combination enables longer exposures without star trails, making photographing faint objects considerably easier while you determine if deep-sky astrophotography is your passion.
Post-Processing Software for Beginners on a Budget

After capturing your deep-sky images, you’ll need affordable software to transform your raw data into stunning final photographs. Two powerful budget-friendly options stand out for beginners: GraXpert and Siril.
GraXpert excels at removing unwanted gradients from deep-sky images, enhancing overall appearance without complex techniques. Meanwhile, Siril offers thorough tools for stacking, aligning, and processing astronomical images—rivaling premium alternatives.
Together, these free tools provide everything you need to develop your astrophotography skills:
- Complete workflow – From initial calibration to final processing
- Multiple file format support – Easy importing and exporting for further editing
- Extensive learning resources – Free tutorials to master post-processing techniques
This combination delivers professional-quality results without financial strain, allowing beginners to focus on improving their deep-sky imaging rather than expensive software.
Frequently Asked Questions
What Is the Best ISO for Astrophotography in Deep-Sky?
For deep-sky astrophotography, you’ll typically want to use ISO 800-1600. This range offers a good balance between sensitivity and noise. You can start with ISO 1600 and adjust based on your specific camera’s performance.
What Focal Length for Deep-Sky Photography?
For deep-sky photography, you’ll want to use focal lengths between 300-600mm for a good balance of field view and detail. Shorter lengths (200-300mm) work for wide-field shots, while longer ones (600mm+) capture more detail.
What Lenses Are Good for Deep-Sky Photography?
For deep-sky photography, you’ll want fast prime lenses like Canon EF 50mm f/1.8, Sigma 35mm f/1.4 Art, or any f/2.8 or faster lens with low chromatic aberration to capture faint celestial objects effectively.
What Do You Need for Deep Space Photography?
You’ll need a DSLR camera, stable mount like Sky-Watcher Star Adventurer, wide-field refractor telescope, guide scope, dew heater, and field flattener. Don’t forget post-processing software and community resources for learning the techniques.
In Summary
You don’t need to spend thousands to capture stunning deep sky images. Whether you choose a smart telescope like the ZWO Seestar or a tracker setup with the Star Adventurer GTi, you’ll find accessible entry points to this rewarding hobby. Focus on essential accessories, choose your learning path wisely, and utilize budget-friendly processing software. With patience and these affordable options, you’ll soon be showcasing your own celestial masterpieces.


Leave a Reply