Cave openings create perfect Milky Way shots by serving as natural frames that draw the eye to the stars while blocking light pollution. You’ll get dramatic contrast between the textured silhouette of the cave and the cosmic infinity beyond. The dark interior creates a portal effect, transforming ordinary night photography into striking celestial portraits. Using a fast wide-angle lens and proper exposure settings will enhance this magical terrestrial-cosmic connection. The techniques ahead will elevate your cave astrophotography to new heights.
Natural Framing: How Cave Arches Enhance Composition
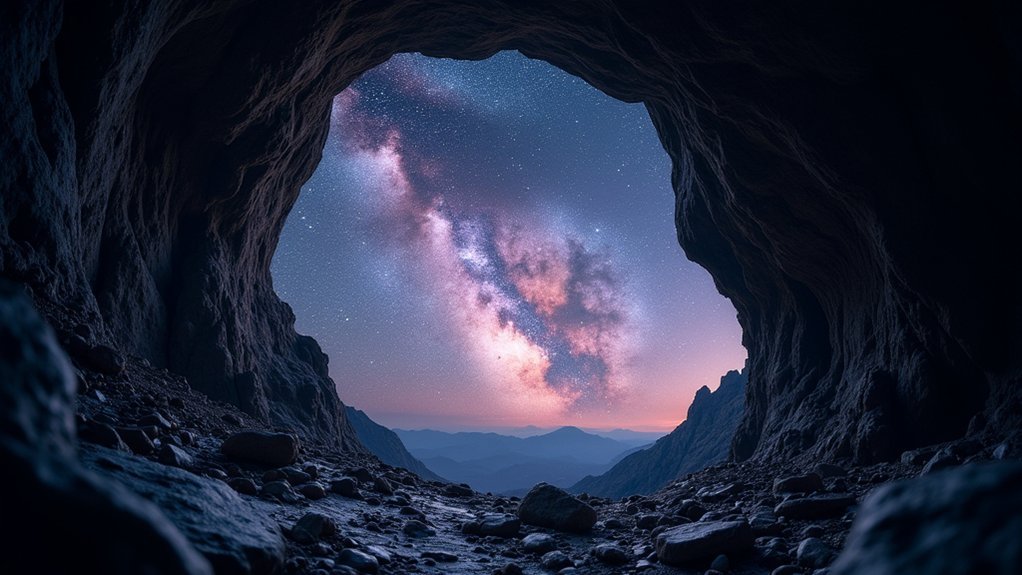
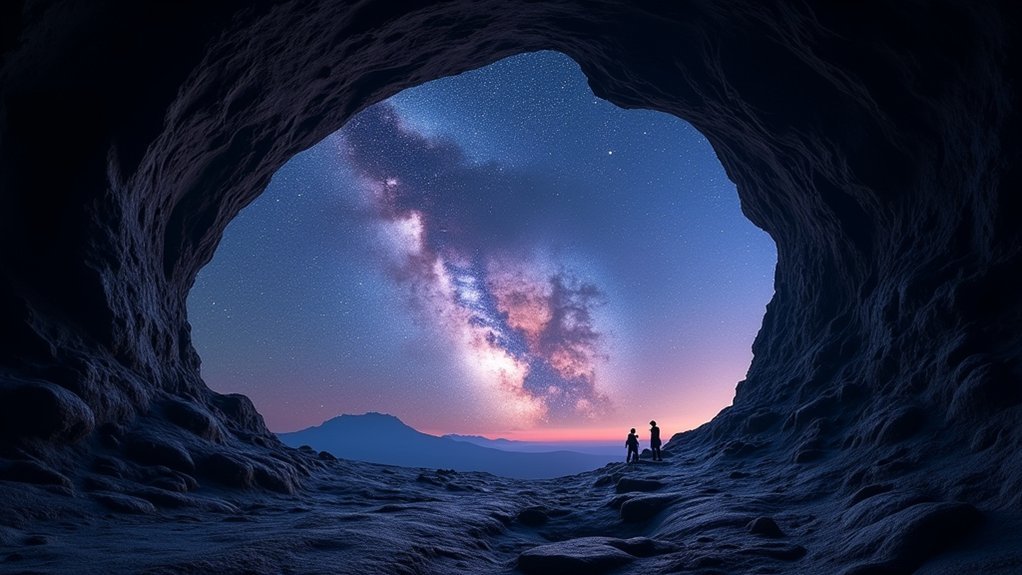
The mouth of a cave acts as nature’s perfect picture frame for the Milky Way’s cosmic display.
When you position yourself inside a cave opening, you’re utilizing natural framing to create depth that draws viewers directly to the star-filled sky beyond.
Cave arches create dynamic leading lines that guide the eye through your composition, making the galaxy appear more integrated with the landscape.
The curved silhouette of the opening provides contrast against the straight lines of the horizon and the scattered patterns of stars.
Light Pollution Shields: Caves as Photography Sanctuaries
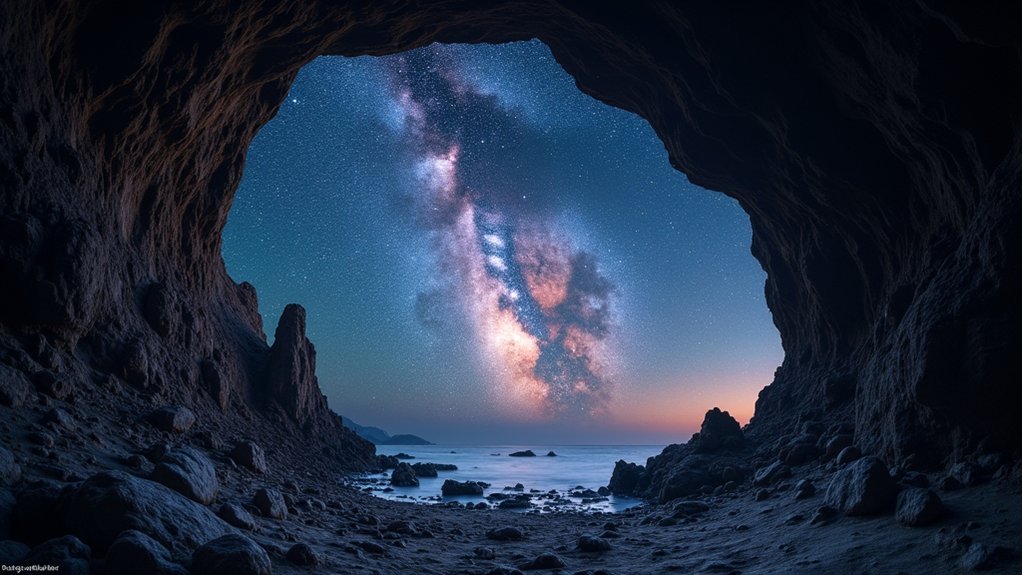
While urban glow increasingly obscures our view of the night sky, caves offer photographers a natural sanctuary from light pollution’s reach. You’ll discover these natural formations create perfect conditions for capturing the Milky Way’s intricate details that would otherwise be washed out in more exposed settings.
The enclosed environment naturally blocks ambient light from nearby cities and towns, giving you a controlled setting for your astrophotography pursuits.
When you position yourself inside a cave, its unique structural features become excellent foreground objects that add depth and context to your celestial compositions. The dramatic contrast between the darkened cave interior and the brilliant star-filled sky creates a visual portal effect that draws viewers in.
This natural shield transforms ordinary night photography into extraordinary celestial portraits framed by Earth’s ancient architecture.
Foreground Interest: Adding Depth With Rock Formations
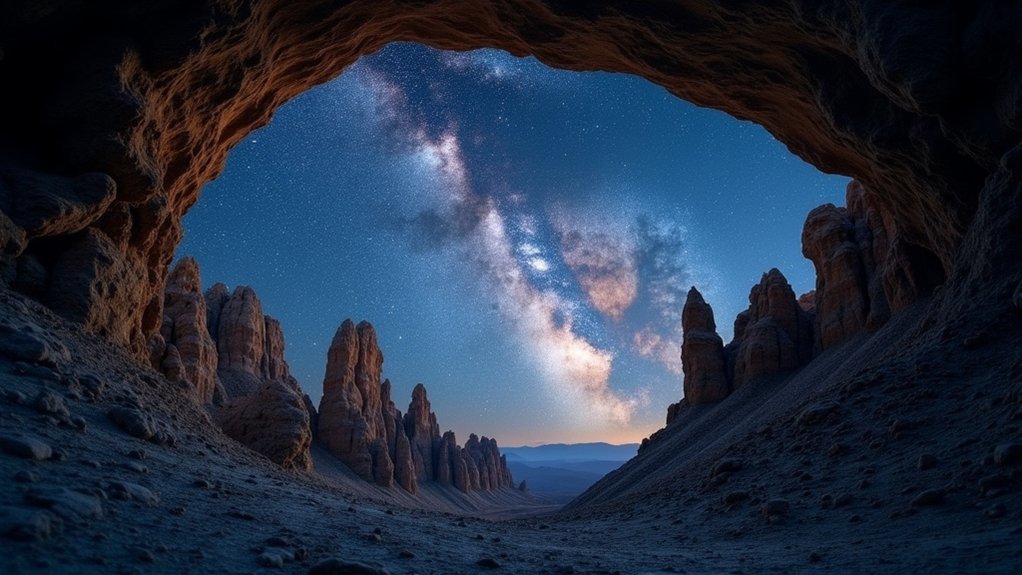
Rock formations near cave entrances serve as perfect framing elements for your Milky Way shots, creating a natural “cosmic canvas” that draws the viewer’s eye upward toward the stars.
You’ll find that these natural structures create dramatic silhouettes against the night sky, adding a compelling layer of visual interest to what might otherwise be a flat composition.
Framing the Cosmic Canvas
Beyond the vast expanse of stars lies a photographic opportunity that truly comes alive when you skillfully incorporate earthly elements into your cosmic compositions.
Cave openings offer natural frames that perfectly complement the Milky Way, creating a window to the universe that guides your viewer’s eye from terrestrial to celestial. When you position rock formations in your foreground, you’re not just adding interest—you’re establishing scale that dramatically enhances the perceived depth of your image.
- Experiment with different angles to find where the cave opening best frames the galactic core
- Use the textured silhouettes of rock formations to create compelling contrast with the star-filled sky
- Let moonlight subtly illuminate the foreground details without washing out celestial elements
- Position yourself so the cave’s natural arch directs attention upward toward the Milky Way
- Try both wide-angle and telephoto perspectives for varied framing effects
Natural Silhouette Creation
The magic of silhouettes transforms ordinary cave photographs into extraordinary cosmic storytelling. When you position yourself at the mouth of a cave, you’ll create natural silhouettes that dramatically frame the Milky Way’s brilliance against the night sky.
These dark outlines provide stark contrast that immediately draws the viewer’s eye upward toward the celestial display.
Try using a wide aperture between f/1.4 and f/2.8 to create a subtle bokeh effect that separates your foreground elements from the cosmic backdrop. This technique enhances depth perception in your Milky Way photos.
For the most compelling compositions, strategically place your camera to capture both the unique texture of the cave opening and the galaxy’s sweeping arc.
The resulting images will showcase the powerful visual dialogue between Earth’s ancient formations and the cosmos above.
Perspective Amplifying Technique
When you master the art of foreground placement, your Milky Way photography instantly gains dimension and visual impact.
Cave openings create a natural “frame within a frame” technique that draws viewers into your composition, establishing an immersive perspective that makes the galaxy appear more dramatic.
By positioning rock formations in your foreground elements, you’ll create striking depth and scale that transforms flat night sky images into three-dimensional masterpieces.
- Position yourself at different angles to experiment with spatial relationships
- Utilize contrasting textures between smooth starlight and rugged rock surfaces
- Shoot during low tide for safer access to compelling cave perspectives
- Incorporate varying distances between rock formations to enhance depth perception
- Look for unique rock shapes that complement the Milky Way’s natural curve
Perspective Balance: Contrasting Earth and Cosmos
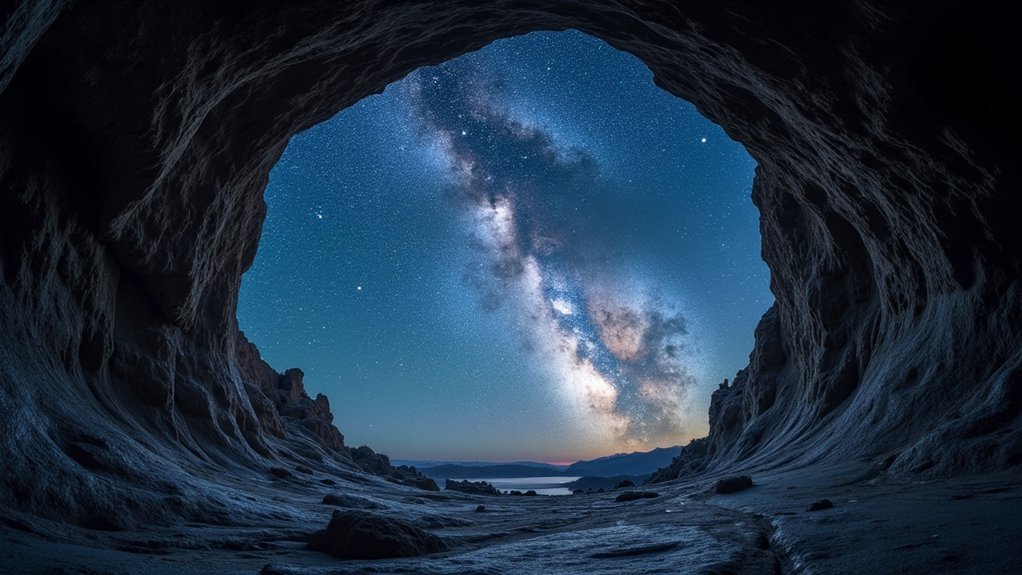
Standing at the threshold of a cave opening, you’ll witness one of photography’s most compelling juxtapositions—the meeting of terrestrial ruggedness and cosmic infinity.
The natural darkness of the cave interior eliminates light pollution, allowing the Milky Way to shine with remarkable clarity against the night sky.
Cave walls provide more than just shelter—they’re powerful foreground elements that guide your viewer’s eye upward toward the celestial display. This creates a dynamic perspective that grounds your composition while celebrating the vastness above.
The textural contrast between rough stone and the soft glow of stars adds visual tension that elevates your imagery.
Safety Considerations for Night Cave Photography
When shooting the Milky Way through cave openings at night, you’ll need reliable headlamps with red-light options and backup batteries to navigate safely while preserving your night vision.
Pack essential safety gear including a first aid kit, emergency shelter, and multiple communication devices since caves often block cell signals and environmental conditions can change rapidly.
Keep wildlife encounters peaceful by researching local species beforehand, making noise while approaching darker areas, and properly storing any food to avoid attracting unwanted visitors to your shooting location.
Night Navigation Essentials
Five critical safety practices stand between success and danger when photographing the Milky Way from cave openings at night.
Maneuvering through dark caves requires careful preparation and proper equipment to guarantee your night photography adventure doesn’t turn treacherous.
- Scout during daylight to familiarize yourself with terrain and identify hazards before returning after dark.
- Carry a reliable light source like a headlamp to move safely while keeping hands free for camera equipment.
- Implement a buddy system rather than venturing alone, making sure someone can help if difficulties arise.
- Know tide schedules when photographing coastal caves to prevent being trapped by rising waters.
- Share your detailed plans with someone not joining you, including expected return time.
These essentials allow you to focus on perfecting your focus technique rather than worrying about safety hazards.
Proper Equipment Planning
Safety precautions create the foundation for your cave photography success, but proper equipment planning transforms safety into stunning Milky Way captures. Your gear selection directly impacts both image quality and personal security when shooting from cave openings at night.
| Essential Equipment | Primary Purpose | Safety Benefit |
|---|---|---|
| Sturdy tripod | Eliminates camera shake during long exposures | Prevents equipment falls on uneven terrain |
| Wide aperture lens (f/1.4-f/2.8) | Maximizes light gathering for clearer Milky Way detail | Reduces time spent in potentially hazardous locations |
| Headlamp with red light option | Preserves night vision while setting up your camera and lens | Guarantees safe navigation within dark cave environments |
Don’t compromise on tripod stability—it’s your most critical piece of equipment. When pairing your camera and lens, prioritize wide apertures that allow you to capture celestial details without extending your exposure time unnecessarily.
Wildlife Encounter Protocol
How quickly a pleasant night of cave photography can transform into a dangerous wildlife confrontation! When capturing those perfect Milky Way shots from cave openings, you’ll need to prepare for potential wildlife encounters. Research local wildlife before your expedition, particularly nocturnal species that may be active during your shoot.
- Always use headlamps with red filters to preserve your night vision while minimizing disturbance to animals.
- Maintain a safe distance from any creatures you encounter—never corner or startle them.
- Carry appropriate deterrents like bear spray when shooting in regions with larger predators.
- Make noise occasionally to announce your presence and avoid surprising territorial animals.
- Remember that many cave-dwelling species are protected—respect their habitat while capturing your shots.
Tide Timing for Coastal Cave Access
When photographing the Milky Way from coastal caves, understanding tide patterns becomes just as essential as knowing celestial movements. You’ll need to time your visit during low tide, which provides safe access to these dramatic natural frames without risking dangerous wave encounters.
Low tide typically occurs every six hours in locations like California, so you’ll need to carefully coordinate your shoot with these windows. Always check tide charts specific to your location before planning your expedition.
With tides cycling every six hours, precise timing using local charts ensures both magical shots and safe coastal passage.
For ideal results, arrive well before low tide begins, giving yourself ample setup time.
Consider using a tide prediction app that provides real-time updates and alerts. This technology guarantees you’ll have sufficient shooting time before the tide rises again, allowing you to capture stunning Milky Way compositions while maintaining your safety.
Seasonal Milky Way Alignment With Cave Openings
Finding the perfect alignment between cave openings and the Milky Way requires understanding the galaxy’s seasonal positioning in our night sky.
Summer months offer prime conditions when the galactic core rises higher, creating dramatic compositions through cave openings. You’ll want to plan your shoot between 11:00 PM in August to around 2:00 AM in May for ideal visibility.
- Cave openings naturally frame the Milky Way, creating a powerful visual contrast
- Use a wide aperture (f/1.4-f/2.8) to capture more light in these challenging conditions
- Summer alignments provide the most vibrant galactic core visibility
- Incorporate cave textures as foreground elements to enhance depth
- Seek locations with minimal light pollution for the clearest galaxy details
Always bring a sturdy tripod when photographing the Milky Way through these natural frames.
Equipment Setups for Confined Cave Spaces
Capturing the Milky Way through cave openings requires specialized gear that can handle tight, challenging environments while still delivering stunning night sky images.
Select a fast lens with maximum aperture (f/1.4-f/2.8) to gather sufficient light in these dark conditions while minimizing noise.
Fast glass is non-negotiable—use f/1.4 to f/2.8 apertures to harvest precious photons while keeping noise at bay.
Wide-angle lenses (14-24mm) are essential for showcasing both the expansive Milky Way and interesting cave formations in your foreground.
Pair this with a sturdy tripod—non-negotiable for the long exposures required in low light.
Consider switching to a lightweight mirrorless camera with excellent high ISO performance for easier maneuvering in confined spaces.
Don’t forget a small LED flashlight for focusing assistance and subtle foreground illumination without overwhelming the night sky’s natural beauty.
Long Exposure Techniques in Cave Environments

Long exposures in cave settings require balancing your camera settings to capture both the dim Milky Way and the darker cave interior.
You’ll need to set your exposure time according to the 500 Rule (typically 15-30 seconds with wide-angle lenses), while selectively light painting the cave entrance for dimensional contrast.
Don’t forget to adjust your ISO sensitivity (usually 1600-3200) based on ambient darkness levels, as caves often require higher settings than open-air night photography.
Exposure Settings for Stars
While shooting from cave openings frames the Milky Way beautifully, achieving the ideal star exposure requires careful technical settings. Your shutter speed must follow the 500 or 600 Rule based on your focal length to prevent star trails.
Shoot with a wide aperture (f/1.4-f/2.8) to capture maximum starlight, and start with high ISOs around 1600, adjusting after test shots to balance brightness and noise.
- Set up a sturdy tripod for stability during 15-second to 2-minute exposures
- Focus manually on bright stars or distant lights for optimal sharpness
- Use the widest aperture your lens allows (f/1.4-f/2.8) to gather more light
- Calculate exact shutter speed using the 500 Rule to keep stars as points
- Adjust ISO based on test shots, balancing light capture against noise
Light Painting Cave Entrances
To transform your cave Milky Way compositions from flat silhouettes into dimensional masterpieces, you’ll need to master light painting techniques. Use a flashlight or LED to gently sweep across the cave walls during long exposures, creating soft illumination that enhances the foreground without overpowering the Milky Way above.
Always trigger your camera with a remote release or self-timer to prevent camera shake while you’re painting with light. Experiment with different colored lights—warm yellows can create an inviting glow while cool blues might complement the night sky’s natural tones.
The key is balance: too much light ruins the stars’ visibility, while too little leaves your cave entrance as a mere shadow. Pair your light painting with appropriate camera settings—wide aperture, higher ISO, and carefully timed exposures—for compositions that reveal both celestial wonders and earthly textures.
Managing Ambient Darkness
Successfully capturing the Milky Way from cave openings demands mastery of exposure techniques that balance the extreme darkness inside with the celestial brilliance above.
When photographing in these challenging environments, you’ll need to control ambient darkness through specialized long exposure techniques.
- Position your camera on a sturdy tripod to eliminate movement during extended exposures
- Apply the 500 or 600 Rule to calculate ideal shutter speeds that prevent star trails
- Start with ISO 1600 and adjust based on initial results to balance cave darkness and star brightness
- Switch to manual focus, using distant lights or bright stars to achieve sharp images
- Experiment with exposure times between several seconds to minutes, depending on your desired effect
Remember that patience is key—finding the perfect balance between exposing the Milky Way while maintaining the cave’s moody darkness often requires multiple test shots.
Finding Accessible Cave Locations on a Budget
Although capturing the Milky Way against a cave opening creates stunning photographs, you don’t need an expensive expedition to find suitable locations.
Start by researching state parks and natural reserves in your area, which often feature accessible cave locations at minimal cost.
Utilize free tools like Google Maps and AllTrails to identify nearby caves and assess their accessibility. Local astronomy clubs and photography groups are invaluable resources for discovering hidden spots perfect for Milky Way photography without breaking your budget.
Download apps like Dark Sky Finder to locate areas with minimal light pollution near these caves.
To further reduce expenses, plan your visits during weekdays or off-season periods when permit fees and parking costs are often lower. This strategic approach lets you capture breathtaking celestial scenes without extensive travel or equipment investments.
Post-Processing Cave and Night Sky Blends
Mastering the delicate balance between cave foregrounds and starry backgrounds determines whether your Milky Way compositions appear natural or contrived.
Your post-processing workflow is vital for successfully marrying these distinctly different exposures.
Post-processing isn’t just important—it’s the essential bridge connecting separate exposures into one cohesive astrophotography masterpiece.
- Select appropriate exposure settings—longer for stars, shorter for cave details
- Layer your images in Photoshop or Lightroom, experimenting with blending modes to achieve seamless shifts
- Apply star reduction techniques to emphasize the Milky Way without overshadowing cave features
- Perform color correction before blending to guarantee cohesive tones between elements
- Use image averaging to minimize noise and maximize image quality
Frequently Asked Questions
What Are Some Common Milky Way Photography Mistakes?
You’ll ruin Milky Way shots with poor manual focus, shooting near light pollution, miscalculating shutter speed with the 500/600 Rule, using unstable tripods, and not shooting in RAW format.
What Is the Rule for Milky Way Photography?
For Milky Way photography, you’ll want to follow the 500/600 Rule: divide 500 or 600 by your lens’s focal length to determine maximum shutter speed without star trails. Use wide apertures and high ISO too.
How Does NASA Get Pictures of the Milky Way?
NASA captures Milky Way images using space telescopes like Hubble and Spitzer alongside ground-based observatories. They’ll process data across multiple wavelengths, stitch together exposures, and apply advanced imaging techniques to reveal our galaxy’s structure and details.
Where Is the Best Place to Photograph the Milky Way?
You’ll find the best Milky Way photography in remote national parks with minimal light pollution. Use Dark Sky Finder to locate ideal spots, and include interesting foreground elements like mountains in your composition.
In Summary
You’ve discovered why caves create ideal Milky Way frames – they offer natural composition, shield light pollution, and add intriguing foreground elements. When you’re shooting these cosmic gateways, remember to prioritize safety, optimize your gear for tight spaces, and master long exposures. Whether you’re visiting well-known locations or finding hidden gems, the contrast between ancient earth and endless sky creates images that captivate viewers on a profound level.


Leave a Reply