
You can start astrophotography with three budget-friendly setups tailored to different goals. A basic DSLR package under $1,000 combines a used Canon T3i with a Rokinon 10mm lens for wide-field shots. Step up to a mid-range setup under $1,500 with a Sky-Watcher Star Adventurer 2i for longer exposures. For deep-sky imaging under $2,000, pair a TPO Ultrawide telescope with tracking mount and DSLR. Let's explore each setup's capabilities in detail.
Basic DSLR and Wide-Angle Setup Under $1000

While many aspiring astrophotographers assume they'll need expensive equipment, you can start capturing the night sky with a basic DSLR setup for under $1,000.
Consider purchasing a used Canon T3i or T5i, which typically costs under $400 and includes essential features like LiveView for easier framing in darkness.
Finding a pre-owned Canon T3i or T5i provides essential astrophotography features like LiveView, while keeping your initial investment manageable.
Pair this with a Rokinon 10mm f/2.8 lens, perfect for Milky Way shots and star trails. Though it's a manual lens, you'll get sharp results at a fraction of the cost of autofocus alternatives. Since high magnification isn't required for most astrophotography shots, this wide-angle lens is an excellent starting point.
Complete your setup with a sturdy tripod and an intervalometer for automated exposures.
You'll also want to download free software like Deep Sky Stacker and StarStaX to process your images.
This combination provides everything you need to begin exploring astrophotography without breaking the bank.
Mid-Range Star Tracker Package Under $1500
Once you've mastered basic DSLR astrophotography, adding a star tracker can dramatically improve your night sky images. The Sky-Watcher Star Adventurer 2i offers excellent value, supporting up to 11 lbs of gear while providing Wi-Fi control for around $400. Its built-in polar scope ensures accurate alignment for optimal tracking performance.
To build a complete mid-range package, you'll want to pair your tracker with a sturdy tripod, remote shutter release, and intervalometer. Consider investing in quality wide-angle lenses like a 14mm or 10-22mm for capturing broad star fields.
This setup enables longer exposure times, revealing fainter deep-sky objects that weren't visible with basic equipment.
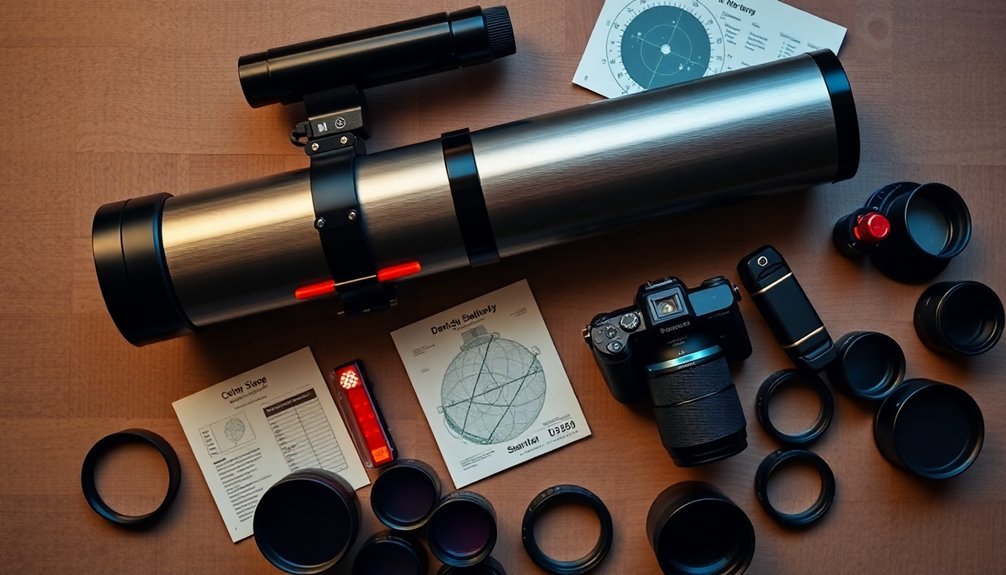
Don't forget essential accessories like a red headlamp and warm clothing for those long nights under the stars.
With proper polar alignment tools and practice, you'll be capturing stunning deep-sky images in no time.
Complete Deep-Sky Imaging Kit Under $2000
Three core components form the foundation of an entry-level deep-sky imaging kit: a telescope, mount, and camera.
You can build a complete setup under $2000 by combining the TPO Ultrawide 180 telescope ($399), Sky-Watcher Star Adventurer 2i Pro Pack ($425), and Canon EOS Rebel T7 DSLR ($449). While telescope setups tend to be more expensive, camera lens setups can provide excellent results for beginners at a lower cost.
This combination provides excellent value while allowing room in your budget for essential accessories like a guide camera and dew heaters.
- TPO Ultrawide 180 offers impressive wide-field capabilities at an affordable price point
- Star Adventurer 2i Pro Pack includes necessary mounting hardware and polar alignment scope
- Canon EOS Rebel T7 provides user-friendly controls and good low-light performance
- ZWO 120mm Mini Guide Camera guarantees accurate tracking during long exposures
- Used equipment can help stretch your budget further while maintaining quality
Frequently Asked Questions
How Long Should I Expose Each Image for Milky Way Photography?
You'll want to expose between 15-30 seconds, using the 500 rule (500 ÷ focal length) as your guide. Keep exposure under 30 seconds to avoid star trails caused by Earth's rotation.
Can I Use My Smartphone Instead of a DSLR for Astrophotography?
Yes, you can use your smartphone for astrophotography, especially newer models with night modes. While you won't match DSLR quality, you'll get decent results using telescope adapters and specialized apps for night sky photography.
What Weather Conditions Are Ideal for Capturing Clear Night Sky Images?
You'll get the best night sky images during clear, moonless nights with low humidity and stable temperatures. Look for calm winds, high barometric pressure, and minimal cloud cover to capture crisp celestial shots.
Should I Shoot in RAW or JPEG Format for Best Results?
You'll definitely want to shoot in RAW format. It'll give you more flexibility during post-processing, retain more detail in highlights and shadows, and allow better noise reduction – all essential for astrophotography success.
How Do I Prevent Dew From Forming on My Camera Lens Overnight?
You'll want to use dew heater bands or hand warmers to keep your lens warm. Attach a lens hood and run a small fan nearby. These methods will prevent moisture from condensing on your glass.
In Summary
Getting started in astrophotography doesn't have to break the bank. Whether you've chosen the basic DSLR setup, upgraded to a star tracker, or invested in a complete deep-sky package, you'll find each option offers a solid entry point into this rewarding hobby. Pick the setup that matches your budget and goals, and don't forget you can always upgrade individual components as your skills progress.


Leave a Reply