Start your astrophotography journey with a capable camera that shoots in RAW format and a sturdy tripod. Choose dark sky locations away from city lights, and bring essential accessories like remote shutters and extra batteries. Set up your equipment carefully, master manual focus techniques, and begin with simple 20-second exposures. Learn to stack and process your images using software like DeepSkyStacker. As you explore these fundamentals, you'll reveal the secrets to capturing breathtaking celestial shots.
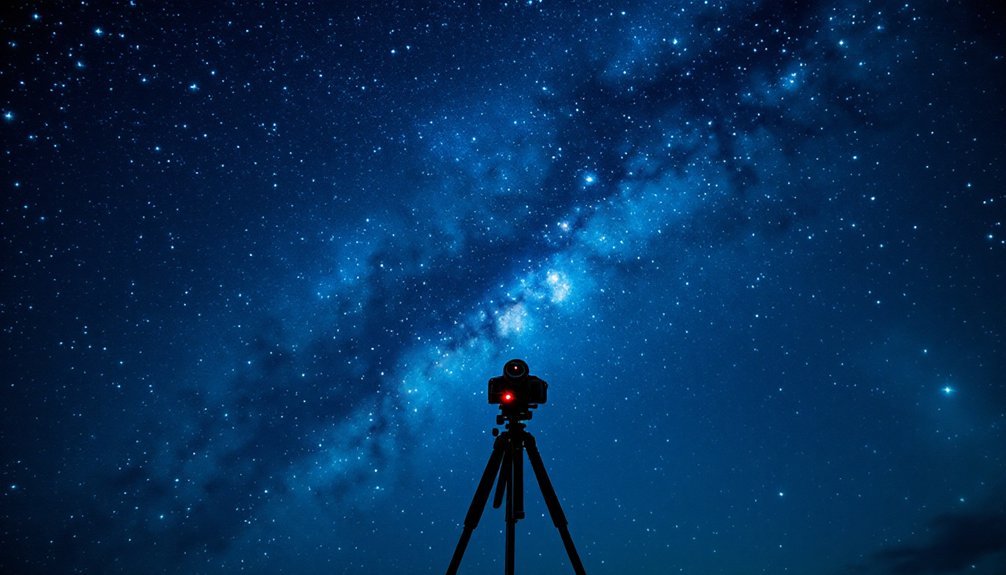
Essential Camera Gear for Night Sky Photography

A well-equipped camera bag is your gateway to capturing the cosmos. To start, you'll need a camera with a full-frame sensor, capable of shooting in manual mode and RAW format.
Whether you choose mirrorless or DSLR, make certain it has good low-light performance and live view capabilities for precise focusing. Models like the Nikon Z9 offer specialized starlight modes that simplify night sky focusing.
Your lens choice is vital – opt for a wide-angle lens with a fast aperture (f/2.8 or wider) to gather maximum light.
Don't forget a sturdy tripod with a reliable ball head to keep your camera steady during long exposures. For comfort and convenience, pack a remote shutter release, lens hood, and extra batteries.
If you're shooting in cold conditions, bring hand warmers to protect your gear.
Finally, download a sky mapping app to help plan your shots and locate celestial objects.
Finding Your Perfect Dark Sky Location
Start your dark sky search by checking light pollution maps online to locate areas with minimal artificial lighting near you.
Look for natural features like mountains, valleys, or dense forests that can shield you from distant city glows and create darker viewing conditions.
You'll want to verify seasonal accessibility to your chosen spots, as some prime locations might've limited access during winter months or require special permits. Aim to find locations rated as Bortle class 1 for the clearest possible views of the night sky.
Research Light Pollution Maps
Before heading out for your first astrophotography session, researching light pollution maps will help you find the perfect dark sky location for capturing celestial objects.
Tools like Dark Site Finder use color-coding to show you areas with minimal artificial light interference, where darker colors indicate clearer viewing conditions. The website's user-friendly interface makes it simple for both beginners and experienced photographers to navigate and find ideal shooting locations.
You'll want to look for remote locations away from urban centers, as these typically offer the best visibility of stars and deep-sky objects.
Check the Bortle Scale ratings in your target areas – Class 1 represents the darkest skies, while Class 9 indicates the brightest.
Consider using stargazing apps like Stellarium or Sky Safari alongside these maps to plan your shoot effectively.
Don't forget to look for natural barriers that might shield you from nearby light sources, enhancing your viewing experience.
Scope Natural Shield Features
Natural shields play an essential role in finding your ideal dark sky location for astrophotography. Look for locations where mountain ranges or dense forests can block urban light pollution from nearby cities.
You'll find exceptional dark skies in deep valleys, isolated islands, or protected national parks where artificial lighting is strictly limited. Using a wide-angle lens will help you capture sweeping views of these pristine dark sky locations.
Consider spots at higher elevations, as they often provide clearer views and less atmospheric interference.
When scouting locations, prioritize areas with geographic isolation and reliable weather patterns to guarantee consistent shooting conditions.
Check if your potential spot has support from local astronomy communities, as they can offer valuable insights and shared experiences.
These natural barriers, combined with the right elevation and weather conditions, will greatly enhance your chances of capturing stunning night sky images.
Check Seasonal Access Points
Seasonal access to dark sky locations can dramatically affect your astrophotography success. You'll need to evaluate how weather patterns, road conditions, and facility operations change throughout the year at your chosen sites.
Summer often provides the most reliable access, with clear skies and maintained roads making remote locations more reachable. Using a Sky Quality Meter reading will help confirm the darkness level of your chosen location.
Before heading out, verify these seasonal factors:
- Peak visibility months for your target celestial objects
- Road closures or restricted access during winter months
- Operating schedules of nearby facilities or park gates
- Local weather patterns that might affect site accessibility
- Seasonal changes in daylight hours and darkness duration
Remember to check both short-term weather forecasts and long-term seasonal trends for your selected location.
Plan your shoots around new moon phases when possible, and always have backup locations identified in case your primary site becomes inaccessible.
Setting Up Your Equipment for Success
Setting up astronomy photography equipment requires three core elements: proper planning, methodical assembly, and precise alignment.
You'll need to start with a stable tripod base, ensuring it's perfectly level and facing the correct celestial pole for your hemisphere.
Mount your equatorial tracking system securely, then attach your telescope using the dovetail mount. Balance everything carefully with counterweights to prevent strain on the motors.
Connect your camera using appropriate adapters, and don't forget to add essential accessories like your field flattener and dew heaters. A light pollution filter can significantly improve your image quality if you're shooting in urban areas.
For best results, you'll want to use a guide scope and camera for autoguiding. Control everything through your laptop, which lets you adjust settings remotely and maintain precise focus throughout your imaging session.
Remember to test all components before starting your actual shoot.
Mastering Basic Camera Settings at Night

You'll need to master three essential camera settings for successful astronomy photography: ISO sensitivity, exposure time, and manual mode operation.
Getting sharp focus in darkness requires using your camera's live view to focus on bright stars while keeping your autofocus disabled. Using a remote shutter release helps prevent camera shake and blurry images during long exposures.
Working in manual mode gives you complete control over your settings, letting you adjust shutter speeds between 15-30 seconds and ISO ranges from 400-3200 for ideal night sky captures.
ISO and Exposure Time
Starlight presents unique challenges that require mastering two critical camera settings: ISO and exposure time. You'll need to balance these settings carefully to capture the night sky effectively.
Start with ISO 1600-3200 and use the 500 rule (divide 500 by your lens focal length) to determine your maximum exposure time before stars begin to trail. Remember that increasing ISO settings will amplify sensor signals rather than actually increase your camera's sensitivity to light.
When selecting your settings, consider these key factors:
- Use longer exposures with lower ISO when possible for better image quality
- Stack multiple exposures to reduce noise, especially at higher ISOs
- Shoot in RAW format for maximum post-processing flexibility
- Enable your camera's timer to prevent shake
- Set your aperture as wide as possible, typically f/2.8
Manual Mode Basics
Building on your knowledge of ISO and exposure settings, mastering Manual mode becomes the next vital step in your astrophotography journey.
You'll need to switch your camera to Manual mode, as it's essential for capturing the night sky effectively. This mode gives you complete control over your camera's settings, allowing you to overcome the limitations of automatic modes in dark conditions.
In Manual mode, you'll manually adjust both exposure and focus settings. While this might seem intimidating at first, it's crucial for achieving sharp, well-exposed images of celestial objects. Starting with a 20 second exposure provides a good baseline for night photography.
Your camera's auto settings simply won't cut it when photographing stars and galaxies. By taking control of these settings yourself, you'll have the flexibility to adapt to various night sky conditions and capture the stunning details that make astrophotography so rewarding.
Focus in Darkness
When photographing the night sky, mastering focus becomes one of the most challenging yet essential skills to develop.
You'll need to switch to manual focus since autofocus systems don't work well in darkness. Start by using Live View mode to zoom in on bright stars for precise adjustments. Once you achieve sharp focus, secure the focus ring using tape to prevent accidental changes during shooting.
Here are your key focusing tools and techniques:
- Use a Bahtinov mask to create diffraction spikes for precise focusing
- Pre-focus during daylight on distant objects and tape your lens
- Utilize bright celestial bodies or distant lights as reference points
- Enable focus peaking or digital zoom features for accuracy
- Take regular test shots to confirm your focus is sharp
Remember to shoot with a wide aperture and adjust your ISO sensitivity to balance light capture with noise levels.
If conditions change, don't hesitate to refocus using these methods.
Capturing Your First Deep Sky Images

Although deep sky photography might seem intimidating at first, you'll find it's an achievable goal with the right preparation and equipment.
Start by selecting beginner-friendly targets like the Orion Nebula or Andromeda Galaxy, which are bright and easy to locate in the night sky.
Set up your DSLR camera with a wide-field refractor telescope and an equatorial mount for tracking. Consider using dew heater straps to prevent moisture from forming on your telescope's optics during long imaging sessions.
Keep your ISO settings low and opt for multiple long exposures to enhance image quality. Before your main shoot, take test shots to verify proper focus using a Bahtinov mask.
Choose a dark location during a new moon for ideal viewing conditions.
Don't forget to use helpful apps like Stellarium to plan your session and identify targets.
With practice and patience, you'll soon capture stunning deep sky images.
Processing Your Astronomical Photos
Once you've captured your astronomical images, the real magic happens during processing. Start by using DeepSkyStacker to align and stack your exposures, which markedly improves the signal-to-noise ratio.
Adjusting your camera's focus with a Bahtinov mask will ensure sharper details in your final stacked image.
You'll then want to move your stacked image into Photoshop for detailed enhancement.
For the best results, follow these essential processing steps:
- Stack multiple exposures to reduce noise
- Apply calibration frames to remove vignetting
- Use selective masking to separate stars from nebulae
- Enhance colors through targeted adjustments
- Remove gradients caused by light pollution
Advanced tools like Topaz DeNoise AI and StarNet++ can further improve your images.
Remember to work in layers when making adjustments, as this allows you to fine-tune specific elements without affecting the entire image.
Finally, use careful blending modes and local adjustments to bring out the subtle details in your astronomical subjects.
Growing Your Astrophotography Skills

Growing your skills in astrophotography requires methodical progression through increasingly complex techniques. Start by mastering the basics of equipment setup, including proper mount leveling and polar alignment.
Once you're comfortable with these fundamentals, focus on perfecting your camera settings through experimentation with exposure times, ISO, and aperture. Developing dark and flat frames will help eliminate unwanted noise and vignetting in your images.
As your confidence grows, introduce advanced techniques like autoguiding and using focus aids such as Bahtinov masks. You'll want to study calibration frames and processing methods to enhance your final images.
Don't forget to engage with the astrophotography community – their feedback can accelerate your learning curve considerably.
Keep pushing your boundaries by attempting more challenging targets and techniques. Remember that every experienced astrophotographer started as a beginner, and persistence through technical challenges will lead to dramatic improvements in your work.
Frequently Asked Questions
How Do You Prevent Dew From Forming on Camera Lenses at Night?
You can prevent lens dew by using hand warmers secured with rubber bands, attaching dew heating strips, mounting small fans for air circulation, or adding lens hoods. These methods keep your glass warmer than ambient air.
What's the Best Way to Keep Batteries Warm During Cold Nights?
You'll want to keep batteries insulated in thermal pouches or near heating pads. Use hand warmers, store them in a cooler with warm water, and always carry spares since cold weather drains power faster.
How Can I Identify Specific Stars and Constellations for Photo Composition?
Use Astrometry.net to upload your night sky photos for automatic star pattern recognition. You'll get detailed celestial coordinates, which you can then verify through SIMBAD's database for specific star identification and composition planning.
Should I Shoot in RAW or JPEG Format for Astrophotography?
You'll definitely want to shoot in RAW format for astrophotography. It'll give you more control over detail, better dynamic range, and enhanced editing flexibility when processing your night sky images later.
When Is the Best Time of Year to Photograph the Milky Way?
You'll get the best Milky Way shots from April to September in the Northern Hemisphere, or February to October in the Southern Hemisphere. Plan your shoot during a new moon for ideal visibility.
In Summary
Getting started in astrophotography doesn't need to be overwhelming. You've now got the essential tools and knowledge to begin capturing the cosmos. Start with simple night sky shots, then gradually work your way up to more complex deep-sky objects. Remember, every skilled astrophotographer began exactly where you are now. Keep practicing, experimenting with settings, and sharing your progress with the astronomy community. The universe awaits your lens!


Leave a Reply