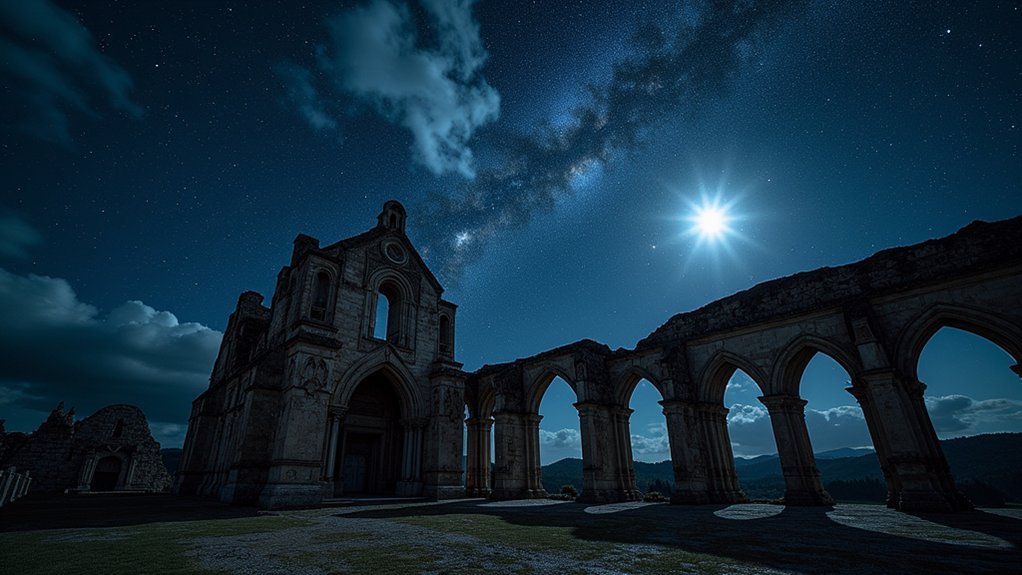
Old Sheldon Church in South Carolina offers incredible night photography possibilities with its haunting silhouettes against minimal light pollution. You’ll want a sturdy tripod, full-frame camera with wide-angle lens, and remote shutter release for capturing these ruins under starlit skies. Light painting techniques can transform ordinary ruins into ethereal compositions. Plan your visit around new moon phases for the darkest skies and best Milky Way visibility. The perfect cathedral ruin awaits your creative vision below.
10 Second-Level Headings for “Best Cathedral Ruins for Night Sky Photography”
Don’t overlook regional gems like the old Sheldon Church ruins in South Carolina, where moss-draped columns create haunting silhouettes against star-filled skies.
Hidden treasures await where history meets the heavens – moss-draped columns silhouetted against cosmic backdrops.
Church ruins at night offer unique compositional elements you won’t find elsewhere, particularly when capturing the Milky Way’s arc over historic structures.
Include sections on “Light Pollution Considerations,” “Long Exposure Techniques,” and “Local Photography Regulations.”
These will help you navigate challenges specific to each location, from the ancient cave dwellings of Matera to the gothic arches of Llanthony Priory, ensuring you’re prepared for that perfect shot.
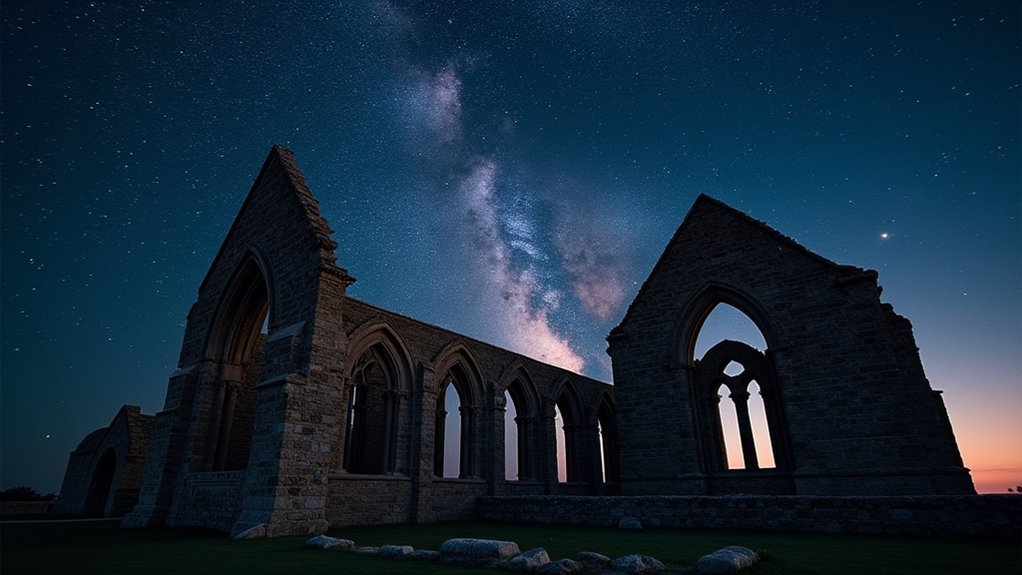
Scouting Old Sheldon Church: South Carolina’s Hidden Gem
Why do photographers repeatedly journey to a partially burned church in the backwoods of South Carolina? Old Sheldon Church’s enchanting ruins offer an unrivaled backdrop for night sky photography that can elevate your portfolio or stock photos collection.
Located just an hour from Savannah, this 18th-century structure survived burning during the American Revolution and was later rebuilt in the 1820s.
Today, its weathered columns stand as silent sentinels against the darkness.
You’ll benefit from minimal light pollution, allowing the Milky Way to shine dramatically above the architectural remnants.
Before your visit, research ideal angles to capture both the church ruins and celestial features.
Bring appropriate gear for nighttime navigation as you’ll be working in near darkness to capture these hauntingly beautiful compositions.
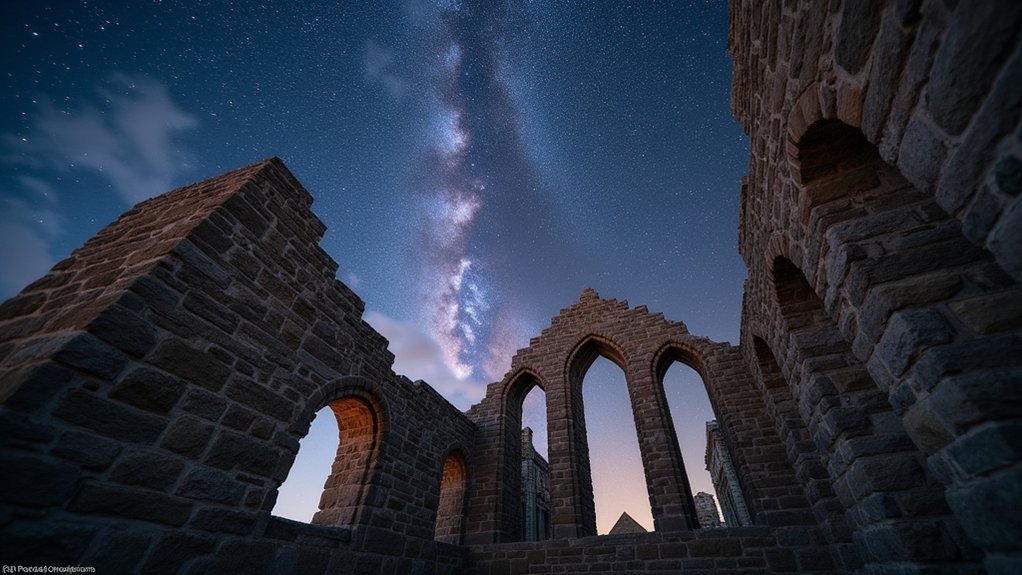
Capturing the Milky Way Above Medieval Abbey Ruins
To capture the Milky Way above medieval abbey ruins, you’ll need a sturdy tripod, full-frame camera with wide-angle lens, and remote shutter release for your essential equipment setup.
For dramatic results, try light painting techniques using a small flashlight to selectively illuminate architectural features while maintaining the dark sky backdrop.
You can experiment with different colored gels over your light source to create atmospheric effects that complement the cool tones of the night sky and enhance the mystical quality of the ancient stones.
Essential Equipment Setup
While medieval abbey ruins create striking silhouettes against the night sky, capturing their grandeur alongside the Milky Way requires specific gear and proper setup. A stable tripod forms the foundation of your night photography arsenal, preventing the slightest vibration during those essential long exposures.
Pair your camera with a wide-angle lens featuring a low f-stop (f/2.8 or lower) to maximize light collection while framing both stars and stonework. Set your ISO between 1600-3200, balancing light sensitivity with acceptable noise levels.
Eliminate camera shake by using a remote shutter release or your camera’s timer function.
For serious astrophotographers, a star tracker represents a worthy investment, compensating for Earth’s rotation and allowing extended exposures that reveal the Milky Way’s intricate details without star trails.
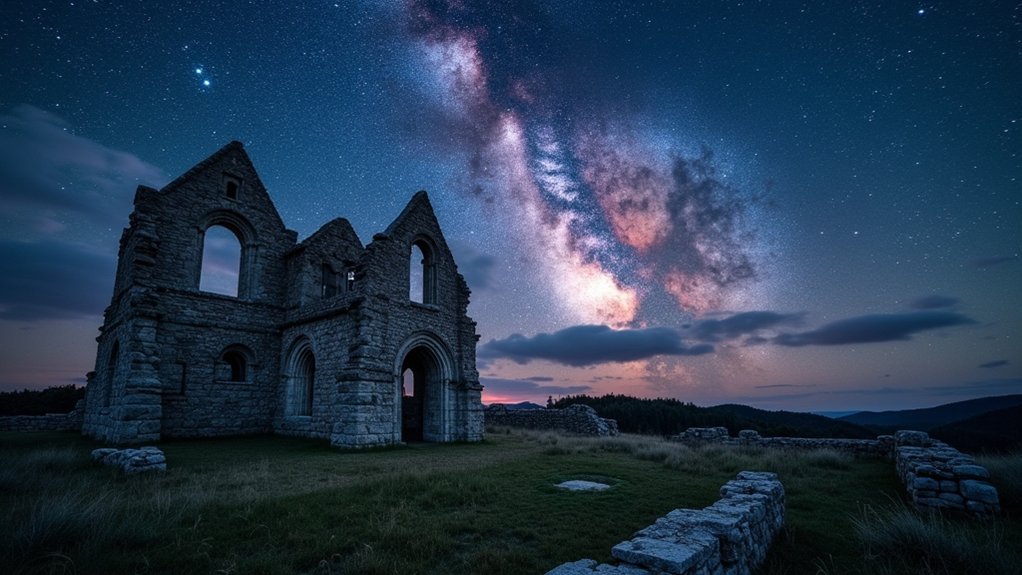
Light Painting Techniques
A few moments of careful light painting can transform ordinary cathedral ruins into ethereal twilight sculptures. During new moon phases, use your flashlight to selectively illuminate architectural features while capturing the Milky Way above. Set your camera to high ISO (1600-6400) with a wide aperture (f/2.8 or lower) on a sturdy tripod.
| Technique | Effect | Best For |
|---|---|---|
| Gentle Sweeping | Soft, even illumination | Large wall sections |
| Targeted Spotlighting | Dramatic highlights | Arches and columns |
| Color Gels | Atmospheric mood | Creating depth |
Experiment with multiple exposures using different lighting angles. You’ll want several options to blend in post-processing, combining the best-lit elements with the clearest star details. Remember that less is often more—subtle illumination creates more natural-looking results than overpowering the night sky.
Essential Equipment for Cathedral Ruin Night Photography
You’ll need specialized camera gear that handles low-light conditions effectively, including a full-frame camera with manual controls, fast lenses, and a rock-solid tripod for those extended exposures.
Don’t underestimate the importance of lighting tools like a headlamp with red light mode to preserve your night vision while setting up compositions and a few small light panels for selective illumination of architectural details.
These equipment choices will make the difference between capturing mediocre snapshots and creating breathtaking images that showcase both the ancient stonework and celestial elements above.
Camera Gear Considerations
Five essential pieces of equipment form the backbone of successful cathedral ruin night photography.
Your most critical investment is a sturdy tripod, which prevents camera shake during long exposures, delivering sharp images even in minimal light.
Choose a camera with extensive manual controls—you’ll need precise command over ISO, aperture, and shutter speed to adapt to challenging nighttime conditions.
Pair it with a wide-angle lens featuring a low f-stop value to capture both the expansive starry sky and architectural details in a single frame.
Don’t forget a remote shutter release or utilize your camera’s timer function to eliminate vibration when triggering exposures.
Finally, pack extra batteries, as cold night temperatures will drain power much faster than expected, particularly during extended shooting sessions at remote cathedral locations.
Lighting Tools Explained
While your camera and tripod form the core of night photography setup, lighting tools represent the artist’s palette when photographing cathedral ruins against starlit skies.
A remote shutter release is essential to eliminate camera shake during those vital long exposures, preserving the sharpness of both stars and ancient stonework.
Don’t underestimate the importance of a quality headlamp with adjustable brightness—you’ll need it to navigate safely and set up equipment without compromising the natural darkness.
For creative expression, consider LED lights for light painting techniques, which can highlight architectural details that would otherwise remain hidden in shadow.
These controlled bursts of illumination allow you to emphasize specific elements of the ruins while maintaining the mysterious atmosphere that makes night photography so compelling.
Light Painting Techniques for Enhancing Architectural Details
Although cathedral ruins are naturally dramatic subjects for night photography, light painting techniques can transform them into truly magical compositions. Using a handheld light source during long exposures, you’ll create depth and dimension that standard photography misses.
- Set your camera on a tripod with 10-30 second exposures while moving your light across targeted areas.
- Highlight textures by passing light at oblique angles to create dramatic shadows on stonework.
- Add colored gels to your light source for artistic interpretations of ancient architecture.
- Practice consistent movement and timing to avoid hotspots and guarantee even illumination.
- Experiment with distance and angles to create unique compositions that showcase the ruins against the starry backdrop.
These techniques will bring forgotten architectural details to life while maintaining the mysterious atmosphere of these historic sites.
Weather Considerations When Planning Your Cathedral Shoot
Beyond mastering light painting techniques, success in night sky photography at cathedral ruins hinges on understanding and planning around weather conditions. Always check forecasts for clear skies and minimal cloud cover, as overcast conditions will obscure celestial views and ruin your shoot.
Time your visit according to moon phases—a new moon provides ideal darkness for capturing the Milky Way, while a full moon washes out fainter stars. Consider seasonal weather patterns to maximize your chances of stable conditions with fewer rain interruptions.
Don’t overlook wind forecasts, as strong gusts can destabilize your tripod during long exposures, resulting in blurred images. Stay vigilant about local weather alerts and atmospheric changes that might suddenly affect visibility at your chosen cathedral location.
Planning Around Lunar Cycles for Optimal Starlight
When photographing cathedral ruins under the stars, you’ll want to avoid full moon nights which wash out faint celestial objects and create harsh shadows across ancient stonework.
Instead, plan your shoots during the new moon phase when the darkest skies reveal countless stars, the Milky Way, and even meteor showers in stunning detail.
Don’t forget that timing your visit between sunset and moonrise can provide an additional window of opportunity for capturing the perfect balance of architectural silhouettes against a star-filled sky.
Full Moon Visibility Issues
Despite their enchanting appearance, full moons can be your greatest adversary in cathedral ruin photography. Their brightness overwhelms the night sky, washing out faint stars and the delicate structure of the Milky Way that would otherwise frame your ancient architecture beautifully.
- Plan shoots during new moon phases (occurring roughly every 29.5 days)
- Schedule photography sessions for the hours between sunset and moonrise
- Consult lunar calendars to identify ideal dates with minimal moonlight
- Consider local weather patterns alongside moon phases for best visibility
- Monitor light pollution forecasts to maximize star visibility even on moonless nights
While a full moon might dramatically illuminate the cathedral ruins themselves, you’ll sacrifice the cosmic backdrop that makes night sky photography truly spectacular.
The contrast between ancient stone and celestial wonders only emerges when moonlight doesn’t dominate the scene.
New Moon Advantage
The new moon phase offers cathedral ruin photographers their greatest cosmic canvas, transforming ordinary historical sites into otherworldly compositions. During these moonless nights, you’ll capture the Milky Way and star trails with maximum contrast and minimal light interference.
Check lunar calendars to pinpoint new moon dates, which occur approximately once monthly. You’ll want to align your photography excursions with these ideal viewing windows.
| Location | Best New Moon Season | Special Features |
|---|---|---|
| Whitby Abbey | Summer | Dramatic cliff positioning |
| Fountains Abbey | Spring | Reflecting pools for stars |
| Tintern Abbey | Autumn | Valley setting minimizes light pollution |
| Rievaulx Abbey | Winter | Snow-covered ruins under stars |
For exceptional results, schedule your visit during meteor showers coinciding with the new moon, adding dynamic streaks of light against the ancient stone silhouettes.
Moonrise Timing Matters
Beyond the new moon phase lies a complete lunar choreography that smart photographers can leverage for cathedral ruin shots.
When planning your cathedral night sky session, you’ll need to track exactly when the moon rises to avoid unwanted brightness washing out your stars.
- Check moonrise times using astronomy apps to guarantee the moon remains below the horizon during your shoot
- Schedule your visits when the moon is less prominent to capture the Milky Way against gothic arches
- Coordinate your photography with meteor showers for dramatic celestial events above cathedral silhouettes
- Remember that the moon’s position changes throughout the month, affecting shadow play on stone ruins
- Plan ahead by tracking lunar phases weeks in advance—optimal conditions might only occur a few nights each month
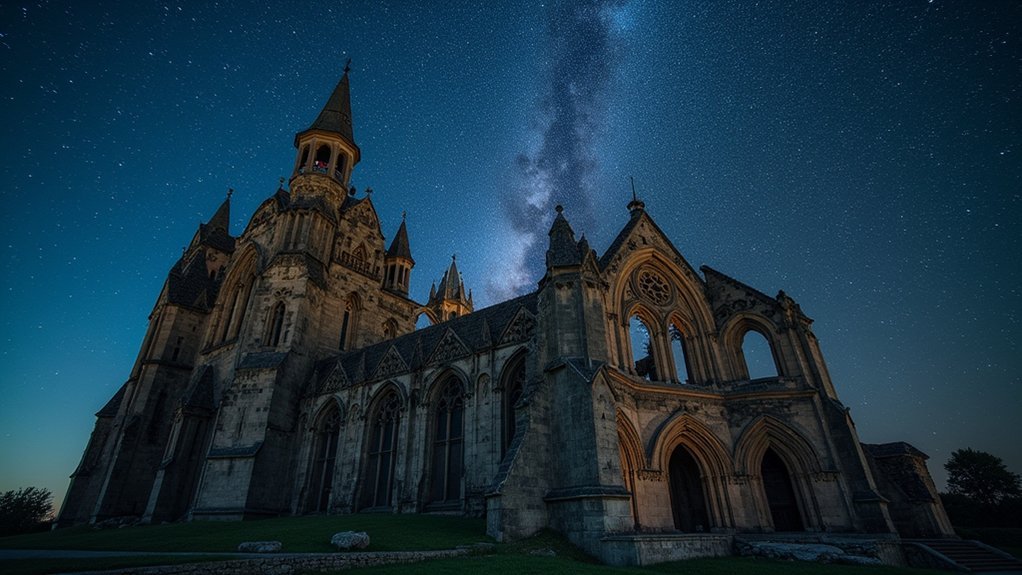
Composition Strategies: Framing Arches Against Star Trails
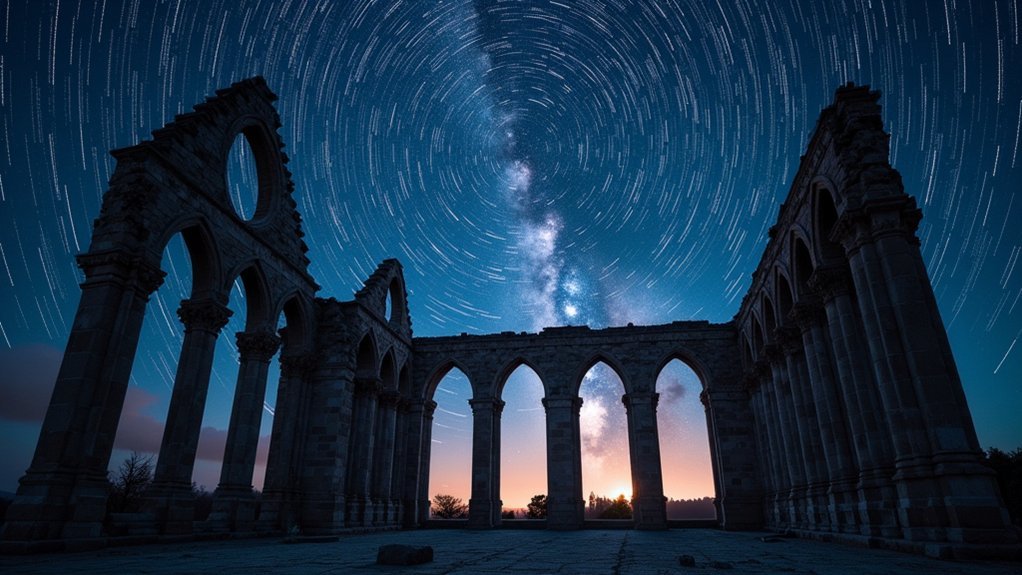
Mastering the art of positioning cathedral arches against celestial movements requires careful planning and technical precision. Position your camera at low angles to elevate these architectural elements, creating a dynamic foreground that guides viewers’ eyes skyward.
Grab your wide-angle lens to capture both the sweeping star trails and intricate arch details in a single frame. Experiment with 15-30 second exposures to record star movement while maintaining the architectural integrity of your foreground.
Don’t hesitate to bring artificial lighting—flashlights or LED panels work wonderfully to highlight textures and increase contrast between the arches and the night sky.
For truly spectacular results, time your shoot during meteor showers or new moon phases when celestial elements are most visible against your carefully composed ruins.
Accessing Remote Ruins: Transportation and Permission Tips
While capturing the perfect cathedral ruins against a starry backdrop demands technical skill, reaching these secluded locations presents its own unique challenges.
Before heading out, proper planning will guarantee you don’t arrive only to find yourself locked out or stranded.
- Research your destination thoroughly—many cathedral ruins lie in remote areas requiring specialized transportation.
- Secure necessary permissions and permits, as some historical sites restrict nighttime access.
- Consider seasonal timing—weather conditions affect both accessibility and star visibility.
- Use GPS and mapping apps to navigate unfamiliar terrain and avoid getting lost.
- Prepare backup transportation options like a mountain bike or hiking gear in case access roads become impassable.
Planning your transportation strategy in advance allows you to focus on what matters most: capturing stunning night sky photographs.
Post-Processing Methods for Cathedral Silhouettes
After capturing your perfect cathedral ruins against the night sky, the real magic happens in post-processing. Programs like Adobe Lightroom or Photoshop allow you to enhance contrast, making architectural silhouettes pop against the starry backdrop while maintaining the nighttime atmosphere.
Apply noise reduction to minimize grain in low-light shots, considerably improving clarity of both ruins and stars. Experiment with blending modes and layer masks when combining multiple exposures to balance the silhouette and sky without losing details.
For visual impact, adjust color balance to emphasize cooler tones in the night sky while warming the cathedral ruins.
Finally, use graduated or radial filters to selectively brighten or darken areas, enhancing drama and depth while highlighting key features of the structure’s silhouette.
Frequently Asked Questions
How Do I Protect Camera Equipment From Moisture in Cathedral Ruins?
You should use silica gel packets, waterproof covers, and lens hoods to protect your camera. Don’t forget to bring microfiber cloths and store equipment in airtight bags when not shooting to prevent moisture damage.
Are Night Photography Permits Different From Daytime Access Permissions?
Yes, night photography permits often differ from daytime permissions. You’ll typically need special approval for after-hours access, which may include additional fees, time restrictions, and rules about lighting equipment you’re allowed to use.
Which Lens Filters Work Best for Cathedral Star Photography?
For cathedral star photography, you’ll want a clear UV filter to protect your lens and possibly a light pollution filter. Don’t use polarizers as they’ll reduce light. A graduated ND filter helps balance bright moon exposures.
How Can I Prevent Light Pollution From Nearby Towns?
You can prevent light pollution by using a light pollution filter, shooting on moonless nights, visiting remote locations, shielding your lens, and timing your shots during astronomical darkness when nearby towns are sleeping.
What Safety Precautions Should I Take When Photographing Ruins at Night?
When photographing ruins at night, you’ll need a buddy, reliable flashlights, first aid kit, charged phone, and sturdy footwear. Don’t trespass, check weather forecasts, and tell someone your location and return time.
In Summary
You’re now equipped to capture breathtaking night sky photographs at cathedral ruins worldwide. Remember, it’s all about timing, technique, and respect for these historic sites. Don’t forget to check weather forecasts, bring your tripod, and secure necessary permissions. Whether you’re catching the Milky Way through Gothic arches or star trails above ancient walls, you’ll create images that blend human history with cosmic wonder.


Leave a Reply