Tripod spreaders provide essential stability for your photography or astronomy setup. To install a ground spreader, position it flat, secure tripod feet in the supports, and tighten all locks with legs at 120-degree angles. For mid-level spreaders, align with locating pins, extend arms to desired position, and verify all latching pins are engaged. Regular maintenance with cleaning and lubrication guarantees peak performance. The right installation technique transforms your tripod from wobbly to rock-solid in minutes.
Understanding Different Types of Tripod Spreaders

When setting up your camera equipment for a shoot, tripod spreaders play an essential role in maintaining stability and preventing unwanted movement.
You'll encounter two main types: mid-level and ground spreaders, each serving distinct purposes.
Mid-level spreaders attach halfway up the legs, offering excellent stability on uneven terrain and allowing for quick setup. They're your best choice when shooting outdoors or on variable surfaces.
Ground spreaders, positioned at the base, provide maximum stability on flat surfaces like studio floors. This stability is critical as it ensures zero movement when capturing images, particularly important for landscape and macro photography.
Some advanced spreaders feature retractable spikes for better grip on soft ground, while others include multi-angle locks that let you position legs at different angles.
When choosing a spreader, consider your typical shooting environment and verify it's compatible with your specific tripod model.
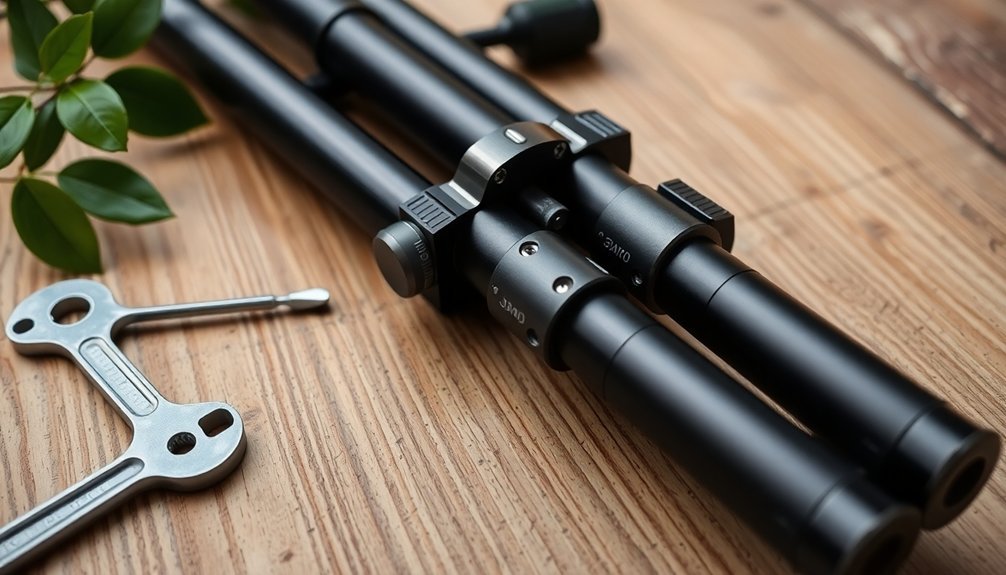
Step-by-Step Ground Spreader Installation Process
Now that you understand the different types of spreaders available, let's examine how to properly install a ground spreader on your tripod.
Begin by ensuring you're working on a level surface and have confirmed the spreader's compatibility with your tripod. Unfold the spreader and place it flat on the ground. Position your tripod so each foot sits securely in the designated supports on the spreader. Engage the foot retaining straps to lock the tripod in place.
Always begin on level ground with a compatible spreader, ensuring each tripod foot locks securely into place.
Next, adjust the spreader arms according to your stability needs and tighten the locks to secure them. Rotate the adjustment cap if angle modifications are necessary. For optimal stability, ensure legs are positioned at 120 degrees apart from each other.
Check that all arms are extended equally for proper balance. Always verify all components are fully engaged before mounting your equipment.
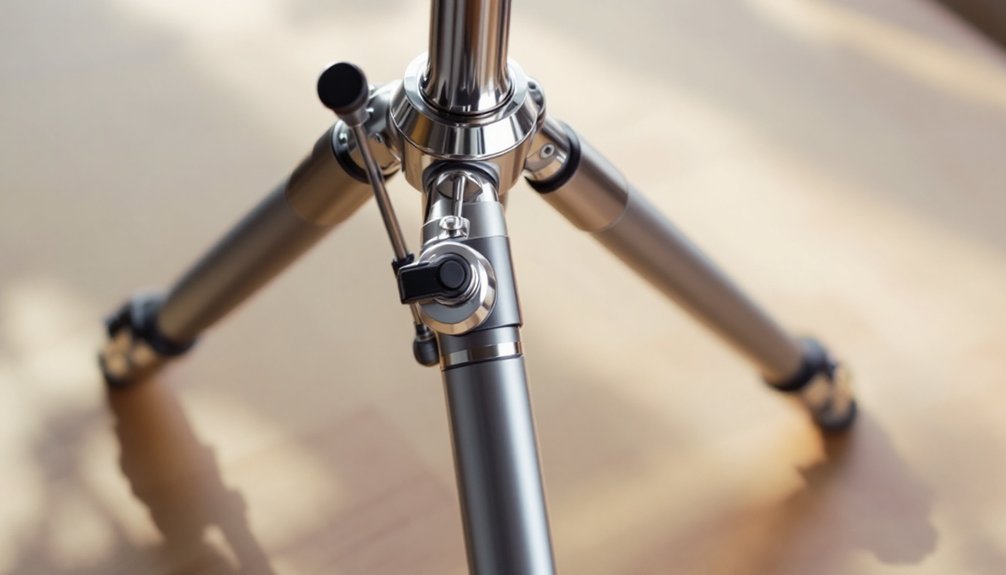
Mid-Level Spreader Setup for Enhanced Stability

Unlike ground spreaders, mid-level spreaders attach directly to the tripod legs, providing superior stability while allowing for greater flexibility on uneven terrain.
To install, align the spreader arms with the locating pins on each tripod leg, then extend the arms to your desired position.
Secure the setup by tightening the locking knobs after adjusting the angle and width to match your shooting conditions. Always check that all latching pins are fully engaged before mounting your equipment.
Don't force the spreader arms beyond their capacity, and keep them clean to prevent mechanism jams.
When not in use, retract the arms completely. Choose a spreader that matches your camera's weight and your typical shooting environment for ideal performance.
DIY Astronomy Tripod Spreaders on a Budget
Commercial spreaders offer excellent stability, but budget-conscious astronomers can craft their own effective alternatives for a fraction of the cost.
You'll only need basic materials like spruce, pine, or plywood, plus hardware such as eye bolts, rubber grommets, and lag screws.
Choose circular or triangular designs for maximum rigidity—circles provide more eyepiece space while triangles offer simplicity.
Total cost can be as low as $72 compared to pricier commercial options.
When installing, attach eye bolts with grommets to the spreader and connect to tripod legs using clamps.
Creating a rigid spreader with aluminum bar stock provides excellent durability and prevents unwanted tripod movement during observations.
Tighten gradually to verify proper placement before final adjustments.
Don't forget to smooth all edges to protect your eyepieces and consider adding glow-in-the-dark elements for nighttime visibility.
Maintenance Tips for Long-Lasting Spreader Performance
Proper maintenance guarantees your tripod spreader will deliver reliable performance for years to come.
After each use, clean your spreader with a soft brush to remove dirt and dust, following up with a damp cloth for stubborn spots. Regular lubrication of pivot points and locking mechanisms prevents wear and guarantees smooth operation. Remaining manure can cause long-term damage to components if not properly cleaned after each use.
- Apply manufacturer-recommended lubricants to grease joints and moving parts
- Store your tripod in a cool, dry place, possibly disassembling for long-term storage
- Always retract and lock legs during transportation, using a padded bag for protection
- Check that spreader arms are evenly set before folding the tripod
- Document all maintenance activities and regularly inspect for rust, loose components, or cracks
Don't forget to test functionality after each maintenance session.
Frequently Asked Questions
Can Spreaders Be Used on Uneven Terrain Effectively?
Yes, you can effectively use spreaders on uneven terrain, especially mid-level spreaders that help maintain balance. They distribute weight evenly, increase stability, and reduce twisting, though extremely rough ground may require additional anchoring methods.
Are Spreaders Compatible With All Tripod Brands and Models?
No, spreaders aren't compatible with all tripod brands and models. You'll need to check specific compatibility as many spreaders are designed for particular brands like Sachtler, Proaim, or OConnor tripod systems.
How Much Additional Weight Can a Spreader Help Support?
Spreaders can greatly increase your tripod's load capacity. Professional models like the Proaim Heavy Duty Aluminum Spreader support up to 400 kg (880 lb) of additional weight, while others vary between 85-209 lb.
Can I Transport My Tripod With the Spreader Attached?
Yes, you can transport your tripod with the spreader attached, especially with Sachtler models designed for this. Just make certain all spreader legs are at the same length and secure everything with transport clips to prevent damage.
Do Spreaders Affect the Tripod's Maximum Height Capability?
No, spreaders don't typically restrict your tripod's maximum height. They're designed to enhance stability while allowing full extension of the legs. You'll still achieve the same maximum height with proper spreader installation.
In Summary
You've now mastered tripod spreader installation for your photography or astronomy setup. Whether you've opted for a ground-level, mid-level, or DIY solution, you'll enjoy notably improved stability in any conditions. Don't forget to regularly check your spreader's connections and keep it clean. With proper installation and maintenance, your tripod spreader will reliably protect your valuable equipment for years to come.


Leave a Reply