
To master telescope stability, start with a perfectly level tripod using a quality spirit level on multiple axes. Extend legs evenly on flat surfaces or adjust individually on slopes. Add weight to your setup by hanging water jugs or sandbags between tripod legs to reduce vibrations. Keep your tripod low in windy conditions and use vibration-dampening pads on the feet. These fundamental techniques form the foundation for the precise observations you'll soon enjoy.
The Foundational Principles of Telescope Tripod Stability
Stability forms the bedrock of successful astronomical observation. Your telescope's performance depends primarily on how well you've established its foundation.
When setting up your tripod, confirm it can support your equipment's weight—this isn't just about preventing collapse but minimizing subtle vibrations that blur celestial details.
Choose your ground carefully; firm surfaces prevent tripod legs from sinking or shifting during observation. Always distribute weight evenly around your setup and take time to properly level each leg. This equal load distribution markedly enhances stability.
Firm ground and balanced weight distribution form the foundation of stellar observation—take time to level properly.
Material choice matters too—carbon fiber offers superior strength-to-weight ratio compared to aluminum, making it ideal for portable setups without sacrificing durability. Be aware that significant play in equatorial mount heads can cause instability even with proper tripod setup.
Remember that even the most expensive telescope becomes worthless atop an unstable mount, so investing time in proper tripod setup pays dividends in viewing quality.
Mastering the Spirit Level for Perfect Horizontal Alignment
You'll find that spirit levels are essential tools for achieving perfect horizontal alignment of your telescope tripod.
Mastering their use involves understanding the bubble's movement and making precise adjustments to your tripod legs until the bubble rests centered within its marked lines.
With practice, you'll develop more advanced techniques like checking multiple axes simultaneously and making micro-adjustments that dramatically improve your telescope's tracking performance. The Agena Tripod Leveling Base significantly enhances stability and accuracy with its non-slip rubber pad that secures your telescope while ensuring optimal stability.
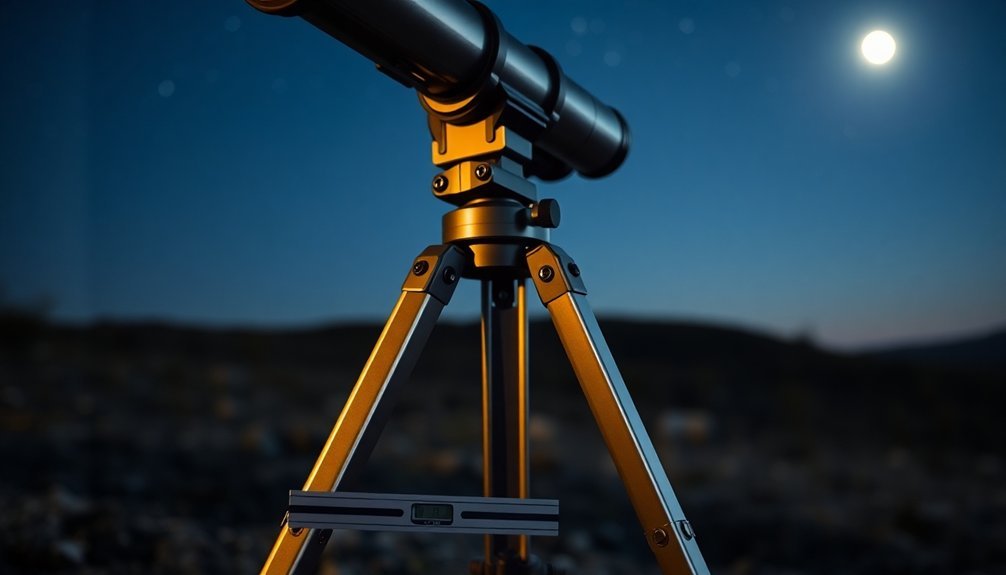
Spirit Level Fundamentals
A cornerstone of accurate telescope alignment, the spirit level has evolved considerably since its invention by Melchisédech Thévenot in 1661.
Today's spirit levels contain bubble vials with liquid and air, where a centered bubble indicates perfect levelness. When setting up your telescope tripod, understanding how to read and use this simple yet precise tool is essential. The liquid is typically alcohol or oil since water is avoided due to potential freezing issues at lower temperatures.
For effective telescope alignment:
- Check multiple axes – Rotate your level 90° to verify both horizontal planes are level
- Ensure proper contact – Place the level firmly against flat surfaces of your tripod head
- Verify accuracy – Test your level by rotating it 180° and confirming the bubble remains in the same position
Modern levels typically offer accuracy within ±0.5mm per meter—precise enough for most astronomical observations.
Advanced Leveling Techniques
While proper tripod leveling forms the foundation of successful astronomical observation, mastering advanced techniques elevates your viewing experience dramatically. Beyond basic adjustments, you'll need to integrate specialized tools and methods to achieve perfect stability for your telescope.
| Technique | Benefit | Best For |
|---|---|---|
| Electronic leveling | Real-time feedback | Low-light viewing |
| Aperture Easy Leveler | Minimizes star trailing | Astrophotography |
| Leveling platforms | Compensates for terrain | Uneven ground |
When setting up on challenging terrain, you'll find directional alignment critical—position your tripod's directional bolt northward for proper polar alignment. In windy conditions, keep your tripod low to the ground and utilize auto-leveling features when available. Remember that for heavier instruments, verifying stability before beginning observations prevents frustrating mid-session shifts. Eliminating parallax error by properly focusing both the eyepiece and objective is essential for accurate astronomical measurements.
Advanced Weight Distribution Techniques for Vibration Reduction

Because vibrations can ruin even the most promising astronomical observations, mastering advanced weight distribution techniques is essential for serious stargazers.
Properly balancing your telescope with counterweights guarantees minimal movement while redistributing mass across all tripod legs creates a stable foundation.
Balance your telescope with counterweights and distribute mass evenly across tripod legs for an unshakable observing platform.
- Optimize your counterweight system – Position weights strategically around the rotation axis and use high-density materials for maximum effectiveness in minimal space.
- Implement multi-plane balancing – Adjust for both visual and imaging configurations by balancing in multiple dimensions.
- Utilize dampening materials – Place vibration-reducing pads under tripod feet and add shock-absorbing materials to critical contact points.
For maximum stability, position your setup away from wind exposure and on solid surfaces like concrete slabs rather than soft ground. Similar to space-based detection systems, achieving pointing stability at the nano-radian level requires active compensation for environmental disturbances.
Terrain-Specific Tripod Setup Strategies
Successful astronomical observation depends greatly on how you adapt your telescope tripod to various terrain challenges.
On flat ground, extend legs to your desired height while ensuring the base is perfectly level using built-in bubble levels.
For slopes, position two legs downhill and individually adjust leg lengths for firm planting. Add counterweights to compensate for uneven loads.
When dealing with soft ground, spread legs wide, use sandbags for added stability, and employ non-slip pads under feet. Adding weight to the tripod's center column can dramatically improve stability in challenging conditions.
In windy conditions, lower your tripod's height, widen its stance, and add weights to the center post.
For restricted spaces, opt for compact tripods with adjustable features, partially loosen leg locks for fine-tuning, or consider alternative mounting solutions like clamps when traditional setups won't fit.
Budget-Friendly Stability Enhancement Methods

You'll find significant stability improvements using simple DIY vibration dampeners placed beneath your tripod legs, which can be made from mouse pads, yoga mats, or specialized rubber pads.
Common household items like sandbags, water jugs, or even rocks can serve as effective weights to counterbalance wind and minor vibrations when attached to your tripod's center column.
These budget-friendly solutions cost practically nothing yet dramatically reduce the shaking that ruins detailed observations, especially at higher magnifications. Ensuring your telescope is set on firm ground will prevent leg sinking that causes misalignment during observation sessions.
DIY Vibration Dampeners
While commercial vibration dampening systems can be expensive, many amateur astronomers create their own solutions with readily available materials.
You'll find that simple modifications can greatly improve your telescope's stability without breaking the bank.
- Sorbothane pads – Place these between your mount and tripod to absorb vibrations effectively. Remember that proper loading is essential—don't overload them or you'll lose their dampening properties.
- Inner tube platforms – Position a semi-inflated tractor or auto inner tube under a wooden platform to create an excellent budget dampener. Experiment with inflation levels for best performance.
- Cross-bracing – Add rigid supports between your tripod legs using wrap-around clamps. This considerably reduces vibrations while providing convenient storage space for accessories. The upper cross-brace can serve as a convenient small table for lens caps and other small parts during your observing session.
Household Weight Solutions
Beyond DIY vibration dampeners, one of the most effective and economical ways to improve your telescope's stability involves items you likely have around your house.
Hanging water or sand-filled gallon jugs between your tripod legs can dramatically reduce sway and vibrations while strengthening structural integrity.
For best results, distribute weights evenly using strong cords, aiming for 8-14 pounds total weight.
Verify all tripod bolts are tightened and consider shortening the legs for additional stability.
Test your setup by observing how quickly your view stabilizes after you tap the telescope.
The effectiveness increases when you combine weights with a triangular spreader between legs.
Setting up on grass rather than concrete provides further vibration reduction.
This approach offers excellent stability enhancement without straining your astronomy budget.
Using a sturdy tripod as your foundation ensures that any additional stabilization methods will be more effective overall.
Polar Alignment Precision on Uneven Surfaces
Achieving precise polar alignment presents a significant challenge when setting up a telescope on uneven terrain. Your mount's polar axis must align perfectly with Earth's rotation axis to prevent star trailing during long exposures.
When your tripod isn't level, altitude readings become inaccurate, causing field-of-view drift even with autoguiding.
- Level before mounting – Use a bubble level on all axes of your tripod before attaching your equipment to guarantee stability. Setting up on solid surfaces rather than soft ground will significantly improve your alignment precision.
- Point north first – Orient your tripod roughly northward (using a compass if Polaris isn't visible) before leveling to minimize later adjustments.
- Monitor for sinking – On soft ground, check your level periodically as tripods can gradually sink, altering your carefully achieved alignment.
Weather-Resistant Leveling Approaches for Outdoor Viewing

Weather conditions present unique challenges when leveling your telescope tripod in the field. Wind, rain, and extreme temperatures can compromise stability and accuracy of your observations. Counter these effects by adding sandbags or weights to your tripod setup, particularly in windy conditions.
Mother Nature often conspires against astronomical precision—anchor your tripod firmly against the elements.
Choose leveling tools with appropriate IP ratings for moisture protection when observing in humid or rainy environments. Electronic and automatic levels with built-in compensators maintain accuracy despite slight adjustments caused by environmental factors.
For peak performance, regularly calibrate your leveling instruments and check for proper collimation.
Your tripod's material matters—opt for corrosion-resistant aluminum or steel that can withstand temperature variations while remaining lightweight enough for field transport.
Remember to adjust your leveling techniques according to temperature changes, as some instruments require recalibration in extreme conditions. While precise leveling can aid setup, many modern alignment systems like PoleMaster and SharpCap can reduce reliance on perfect tripod leveling.
Frequently Asked Questions
Can Tripod Dampening Pads Replace Weight Hooks for Stability Improvement?
No, you can't replace weight hooks with dampening pads completely. Pads reduce vibrations but don't lower center of gravity like weights do, especially in windy conditions where additional weight offers superior stability.
How Often Should Tripod Leg Locks Be Serviced for Optimal Performance?
Service your tripod leg locks regularly based on usage conditions. If you're shooting in harsh environments, clean after each outing. For casual use, check them monthly or when they feel stiff. Don't wait for malfunctions.
Do Smartphone Level Apps Work Reliably for Telescope Alignment?
Smartphone level apps aren't reliable enough for precise telescope alignment. You'll face compass interference, sensor drift, and calibration issues. They're convenient for casual stargazing, but serious astronomers should use dedicated alignment tools instead.
What's the Maximum Safe Wind Speed for Using a Telescope Tripod?
You'll typically find your telescope tripod stable in winds under 10-15 mph. For heavier setups, you might handle up to 20-25 mph. Always consider your specific equipment and add stabilizing weights when needed.
Can Tripod Stability Deteriorate With Age Despite Proper Maintenance?
Yes, your tripod's stability can deteriorate with age despite proper maintenance. Materials naturally degrade, joints loosen over time, and metal fatigue occurs from repeated use, even when you're diligent about care and upkeep.
In Summary
You've now mastered the essential tripod leveling techniques that'll transform your stargazing experience. By applying proper weight distribution, terrain adaptation, and precision alignment, you'll achieve the stability needed for clear observations. Don't let uneven ground or weather conditions disrupt your viewing—use these budget-friendly methods consistently. Remember, a properly leveled telescope isn't just stable—it's your gateway to exploring the cosmos with confidence and clarity.


Leave a Reply