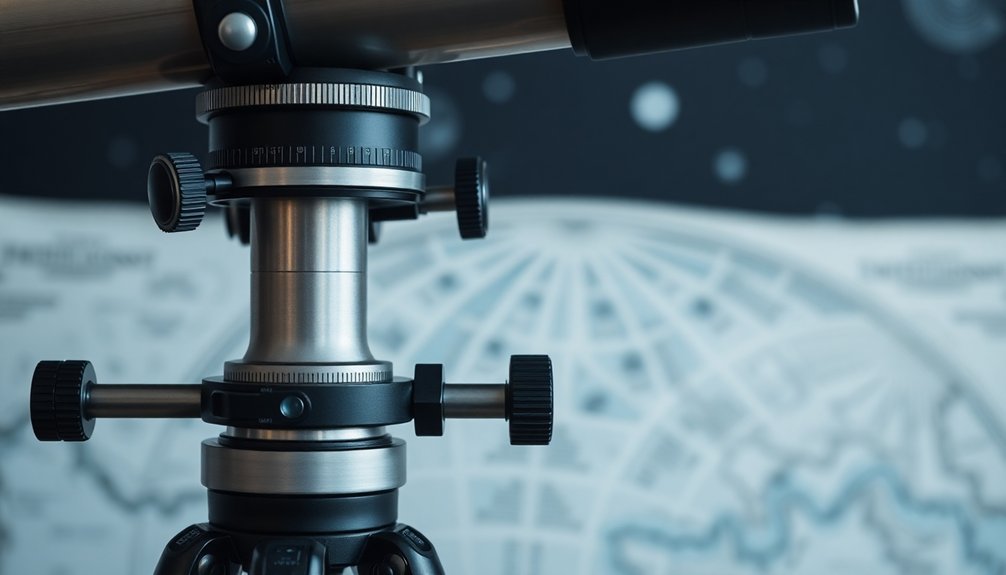
Proper balance on your telescope mount isn't just helpful—it's essential for successful stargazing and astrophotography. When your mount is balanced, motors work efficiently, tracking stays accurate, and vibrations disappear. An unbalanced setup strains gears, causes jerky movements, and produces star trails in your images. You'll need different techniques depending on your mount type (equatorial, altazimuth, or fork). Master these critical balance points and watch your astronomical observations transform from frustrating to breathtaking.
The Physics Behind Telescope Mount Stability

When you're observing the night sky, physics quietly governs every aspect of your telescope's performance. Achieving equilibrium in your mount isn't just helpful—it's essential for stable tracking and clear images.
Your equatorial mount must counteract Earth's rotation precisely, which requires proper alignment with the celestial pole. When balanced correctly, motors don't fight against excessive torque, reducing wear while improving tracking accuracy.
The mechanical advantage of well-positioned counterweights neutralizes your telescope's weight, creating smoother movement. This stability eliminates field rotation—crucial for astrophotography—and prevents unwanted vibrations that blur stellar details. This is especially important in light pollution environments where maximizing image quality is already challenging.
Remember that every adjustment affects mechanical stress on gears and bearings. A properly balanced mount extends equipment lifespan while delivering the precise, consistent motion needed for capturing distant celestial wonders.
Critical Balance Points for Different Mount Types
Different telescope mounts require specific balance points that dramatically affect your viewing experience and equipment performance. Each mount type has unique considerations you'll need to master for ideal results.
| Mount Type | Critical Balance Points | Impact if Unbalanced |
|---|---|---|
| Altazimuth | Altitude and azimuth axes | Jerky movement, manual tracking difficulties |
| Equatorial | RA axis and declination axis | Motor strain, star trailing in photos |
| Fork | Optical tube center of gravity | Gear wear, tracking inaccuracy |
For equatorial mounts, you'll need to adjust both the counterweight position and telescope's fore/aft placement. Fork mounts require balance across the fork arms, while altazimuth mounts need even weight distribution to prevent unwanted movement during observation. Proper balance eliminates vibration, reduces motor strain, and guarantees smooth tracking regardless of your mount type. The presence of any play or looseness in your mount's components will amplify balance issues and further compromise observing quality.
Step-by-Step Balance Techniques for Beginners

You'll need just a few basic tools to balance your telescope mount: a bubble level, Allen wrenches, and possibly additional counterweights.
Finding perfect equilibrium requires methodical testing in both the right ascension and declination axes, with small adjustments until the telescope stays put when released.
Start with the heavier axis first (usually RA), then move to the lighter one, making sure to maintain a firm grip on your equipment throughout the process. Remember to slightly unbalance the RA axis to counteract the effects of gear backlash which can interfere with tracking accuracy.
Essential Tools Needed
Before attempting to balance your telescope mount, gathering the proper tools will greatly improve your success and safety. Counterweights are the most essential component—they offset your telescope's mass on the RA axis. Make sure they're secured with reliable fasteners to prevent dangerous drops during adjustment.
You'll need dovetail plates or tube rings to properly attach your scope to the mount. When balancing, include all accessories you'll use during observation or imaging, such as cameras and guide scopes, as these greatly affect weight distribution. Achieving proper balance protects your gear by minimizing the strain on your equatorial mount's motors during operation.
Don't overlook cable management systems—loose cables can snag during movement and throw off your carefully achieved balance. Organizing cables with clips or Velcro straps prevents this frustration and improves your mount's tracking performance during long exposure photography.
Finding Perfect Equilibrium
Achieving proper balance on your telescope mount might seem intimidating at first, but the process becomes straightforward with a methodical approach.
Start by locking one axis while adjusting the other—this systematic method prevents frustration and equipment damage.
For equatorial mounts, begin with the right ascension axis by positioning the counterweight shaft horizontally. Adjust counterweights until the telescope remains stationary when released.
Then lock the RA axis and balance the declination axis by sliding your telescope forward or backward in its rings. When balancing, make sure to attach all accessories including your average eyepiece or camera that you'll use during your observation session.
- Lock the opposite axis when balancing one axis
- Position counterweight shaft horizontally for RA balancing
- Make small, incremental adjustments to weights
- Test balance by gently releasing (not dropping) the telescope
- Consider leaving your setup slightly "east heavy" for astrophotography
How Imbalance Affects Tracking Accuracy
When a telescope mount suffers from imbalance, its tracking accuracy deteriorates considerably, compromising the quality of astronomical observations and photography.
Uneven weight distribution forces the mount to drift, creating unwanted movement that prevents precise star tracking over time.
You'll notice this most clearly as declination drift, especially when crossing the meridian. The consequences are immediate – elongated star trails in your images and frustration when trying to locate celestial objects.
Even minor imbalance can magnify existing gearing errors and introduce oscillations that degrade performance.
Your imaging scale determines how sensitive your setup is to these tracking errors. Finer pixel scales demand more precise tracking, making proper balance even more critical.
Without it, even high-end mounts like the EQ6-R can't achieve their specified sub-arcsecond accuracy.
Proper balance is particularly important for both the Right Ascension axis and Declination axis to ensure the mount can accurately follow celestial objects as they move across the night sky.
Equipment Weight Distribution Strategies

Properly distributing equipment weight across your telescope mount serves as the foundation for reliable astronomical observations and astrophotography.
When setting up your equipment, consider both static and dynamic balance needs by strategically positioning your telescope on its dovetail bar and adjusting counterweights accordingly.
For ideal weight distribution:
- Position your telescope's center of gravity directly above the declination axis
- Adjust your counterweights to be slightly "east heavy" to reduce gear backlash
- Attach all accessories (cameras, guidescopes, etc.) before performing final balance checks
- Test balance at various declination angles to verify stability throughout your imaging session
- Make incremental adjustments rather than dramatic changes when fine-tuning
Remember that different mount types require specific balancing approaches.
German equatorial mounts benefit from careful balancing along both RA and declination axes, while fork mounts have their own unique requirements. Ensuring the polar axis is properly aligned with the celestial pole is essential for accurate tracking during long exposure astrophotography.
Balancing When Adding Cameras and Accessories
The addition of cameras and accessories dramatically shifts your telescope's center of gravity, creating new balancing challenges that must be addressed for successful imaging sessions.
Heavy DSLRs or specialized astrophotography cameras can considerably increase the load on your mount, requiring additional counterweights to maintain equilibrium.
For portable setups like the iOptron SkyTracker, which handles cameras up to 7.7 lbs, you'll need precise balance to prevent strain and tracking errors.
When attaching long focal-length lenses or heavy accessories, verify you're using appropriate counterweights that match your specific configuration.
Always test your setup's balance before beginning long-exposure imaging. Proper balance minimizes vibrations, resulting in sharper images and preventing premature wear on your mount's motors and gears.
Proper balance is crucial for producing quality results during long exposure astrophotography sessions.
Follow manufacturer guidelines for your particular mount to achieve peak performance.
Seasonal Adjustments for Outdoor Setups

Seasonal changes bring unique challenges to outdoor telescope setups, demanding specific adjustments to maintain ideal balance and performance. As temperatures fluctuate between seasons, your mount's metal components expand or contract, potentially disrupting your carefully calibrated balance.
You'll need to adapt your approach throughout the year:
- Recalibrate counterweights when switching between summer and winter configurations
- Account for humidity effects on mechanical parts, especially in spring and fall
- Adjust polar alignment techniques as seasonal constellations shift
- Protect electronics from temperature extremes with appropriate insulation
- Modify your power supply strategy for extended winter sessions when batteries drain faster
Don't underestimate how dramatically seasonal conditions affect tracking performance. A perfectly balanced summer setup may struggle in winter's chill, requiring you to develop season-specific routines for maintaining peak performance year-round. Always allow your telescope to acclimate to temperature for at least 20-30 minutes before observing to prevent heat currents from causing blurry images.
DIY Solutions for Difficult Balance Scenarios
When conventional balancing methods fall short, creative DIY solutions can rescue your telescope setup from frustration and poor tracking performance.
For short dovetail bars that don't allow sufficient movement, try installing a second dovetail clamp with a counterbalance weight atop your tube rings.
You'll need a dovetail bar, clamp, counterbalance weight, 6mm bolt, washer, and Nyloc nut. Attach the clamp to your tube rings and secure the weight properly. This system effectively balances the declination axis by adding weight where needed. A sturdy Vixen-style dovetail provides the best foundation for this counterbalance system.
For precise balance assessment, measure your mount's power consumption—well-balanced setups use less energy. You can also check declination balance by gently tipping the telescope forward until it begins to sway.
Always verify all accessories and cables are attached during balancing to maintain consistency.
Troubleshooting Common Balance-Related Issues

Identifying and resolving balance-related problems early can prevent frustrating observing sessions and potential damage to your telescope mount. When you notice persistent drifting or jerky movements, first check if your mount is properly balanced in both right ascension and declination axes.
If balance issues persist despite your adjustments, consider these common culprits:
- Uneven distribution of accessories causing weight imbalance
- Insufficient counterweights for your optical tube and accessories
- Exceeding your mount's recommended payload capacity
- Mechanical issues in the mount's gearing system
- Poor polar alignment contributing to tracking problems
Remember that maintaining an "east heavy" balance can actually improve tracking by keeping slight tension on the gears. Ensuring that all accessories you plan to use during your observation session are attached before balancing will help achieve stable positioning throughout your viewing experience.
Regular maintenance and staying within your mount's weight limits will greatly reduce balance-related headaches.
Frequently Asked Questions
Does a Small Amount of Imbalance Actually Improve Tracking Performance?
Yes, a small amount of imbalance can improve tracking performance. You'll benefit from slightly counterweight-heavy setups that maintain gear engagement and reduce backlash, but don't overdo it or you'll strain your mount's motors.
How Often Should I Rebalance My Mount During a Viewing Session?
Rebalance when switching heavy accessories like cameras or eyepieces. You'll rarely need to during a single session unless you're making significant equipment changes. A properly balanced mount should maintain stability throughout your observations.
Can Automated Meridian Flips Cause Balance Issues?
Yes, automated meridian flips can cause balance issues. When your mount flips, weight distribution changes considerably, potentially affecting tracking accuracy. You'll often need to rebalance your setup after flips for ideal performance.
Does Temperature Affect Telescope Balance Throughout the Night?
Yes, temperature affects your telescope's balance as the night progresses. As components cool at different rates, materials contract unevenly, shifting your carefully adjusted balance. You'll notice drift that wasn't present during initial setup.
Are Balance Requirements Different for Planetary Versus Deep-Sky Imaging?
Yes, your balance needs differ between planetary and deep-sky imaging. You'll need precise balance for planetary's high magnification, while deep-sky requires even stricter balance to support longer exposures and additional equipment.
In Summary
Whether you're using an equatorial or alt-azimuth mount, proper balance isn't optional—it's vital. You'll notice immediate improvements in tracking accuracy, motor longevity, and image quality when you take time to balance your setup. Don't overlook this vital step when adding accessories or changing seasonal positions. Master these techniques, and you'll transform your observing experience from frustrating to phenomenal, even with modest equipment.


Leave a Reply