
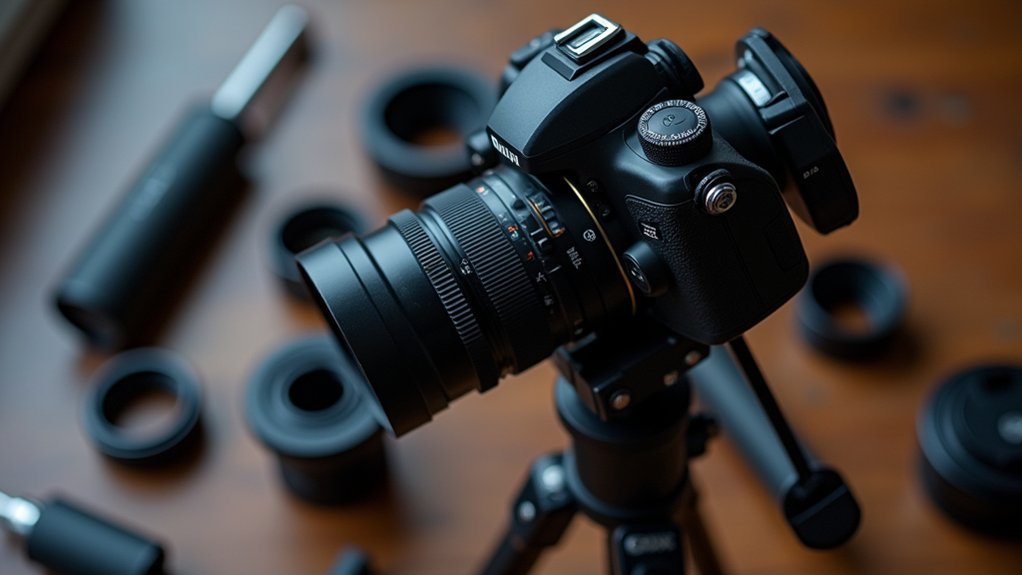
To shift from smartphone to DSLR telescope photography, start with proper adapters like Celestron or Orion models with X-Y adjustment controls. For both devices, first focus your telescope manually, then fine-tune camera settings. With DSLRs, use manual mode, wide apertures (f/2.8 or lower), ISO 800-3200, and 15-30 second exposures. Minimize vibrations with remote triggers and sturdy tripods. The following guide explores advanced techniques to capture those elusive deep sky objects.
Essential Equipment for Smartphone Astrophotography

Before diving into celestial photography, you’ll need to gather the right tools to transform your smartphone into a capable astrophotography device. A reliable camera adapter from brands like iOptron, Celestron, or Bresser is vital for aligning your smartphone camera with the telescope eyepiece to achieve perfect focus.
Pair your setup with both low-power (25mm) and high-power (8mm) eyepieces for locating objects and capturing detailed shots respectively.
Consider using third-party apps like ProCam X, Halide, or VSCO to shoot in RAW format for better post-processing flexibility.
Don’t underestimate the importance of a sturdy mount like the Stady Bix Pro for precise alignment control.
Finally, protect your investment with a drop-proof case during outdoor sessions—stability and safety are essential for sharp celestial images.
Selecting the Right Telescope Adapter for Your Phone
Choosing between basic clamp adapters like the Stady Bix Universal and premium options with wider ledges and adjustment capabilities will greatly influence your astrophotography results.
You’ll need to take into account mounting stability features, as reliable brands like Celestron and Orion offer sturdier construction that prevents unwanted movement during imaging sessions.
The adapter’s alignment precision tools, particularly those with X and Y slow-motion controls, will allow you to perfectly position your smartphone’s camera with the telescope eyepiece for vignette-free images.
Adapter Types Compared
Three main factors should guide your smartphone telescope adapter selection: stability, alignment precision, and compatibility with your equipment.
After comparing leading options, here’s what you need to know:
- Budget-friendly option: The Stady Bix Universal adapter offers a simple clamp system that works with standard eyepieces and secures your camera lens effectively.
- Advanced features: For serious astrophotographers, the Stady Bix Pro provides fine X-Y controls for precise alignment and accommodates both smartphones and point-and-shoot cameras.
- Alignment precision: Make sure to select adapters with slow-motion controls to position your smartphone perfectly over the eyepiece.
- Quality matters: Avoid flimsy models that create shadows or vignetting. Trusted brands like iOptron, Celestron, and Bresser deliver consistent results with a little practice.
Mounting Stability Factors
While quality brand selection matters, stability stands as the most critical factor when mounting your smartphone to a telescope. Opt for trusted manufacturers like Celestron, iOptron, Bresser, or Orion to guarantee your setup remains secure during astrophotography sessions.
For beginners, a simple clamp system like the Stady Bix Universal provides an affordable entry point that works effectively with standard eyepieces. If you’re seeking more control, consider advanced models like the Stady Bix Pro, which offers fine adjustment capabilities and accommodates both smartphones and point-and-shoot cameras.
Look for adapters that allow lateral positioning to maintain ideal eyepiece distance and eliminate unwanted shadows.
Practice using the adapter’s slow-motion controls before your session—precise alignment is essential for capturing clear, vibrant celestial images.
Alignment Precision Tools
Perfect alignment serves as the foundation for successful smartphone astrophotography. When selecting a phone adapter for your telescope, prioritize models that provide stability and precise adjustment capabilities.
- Choose adapters from trusted brands like iOptron, Celestron, Bresser, or Orion, which deliver reliable performance and proper alignment features.
- Consider your experience level – beginners may start with affordable clamp-style options like the Stady Bix Universal that fits standard eyepieces.
- Look for X and Y slow-motion controls that allow fine-tuning without introducing vibrations or shadows in your field of view.
- Invest in adapters that securely hold your smartphone in position, preventing the frustration of constant readjustment during your imaging session.
Advanced users should explore the Stady Bix Pro with its precision alignment controls for ideal image quality.
DSLR Camera Connection Methods for Telescopes
Connecting your DSLR camera to a telescope requires specific adapters that guarantee proper alignment and focus for celestial photography. Different connection methods offer various magnification options and imaging capabilities.
| Connection Method | Best Use Case |
|---|---|
| T-Ring Adapter | Direct prime focus imaging with wide field views |
| Eyepiece Projection | Higher magnification for planets and moon |
| Camera Port/C-Mount | Simplified connection with factory-designed interface |
| Off-Axis Guider | Simultaneous imaging and guiding for tracking |
| Barlow Lens Setup | Extended focal length for detailed planetary imaging |
Use your telescope’s focusing knob while monitoring the DSLR’s live view to achieve sharp images. For long exposures, you’ll want to use a remote shutter release or self-timer to prevent camera shake that could blur your celestial targets.
Achieving Perfect Alignment Between Device and Eyepiece
Achieving proper alignment between your smartphone and telescope eyepiece requires mastering the centered optics technique, where you’ll position your device’s camera lens directly over the eyepiece center to eliminate vignetting.
You’ll need to make precise adjustments using the X and Y slow-motion controls on adapters like the Stady Bix Pro, which allow for incremental positioning until you see a full, bright circular image.
Regular practice with these fine adjustment methods will greatly improve your astrophotography results, as even minor misalignments can considerably degrade image quality and detail.
Centered Optics Technique
The cornerstone of successful astrophotography lies in mastering the centered optics technique. When aligning your DSLR with the telescope eyepiece, precision is paramount. Position your camera sensor directly over the eyepiece’s center to capture clear, vignette-free images.
For ideal results:
- Verify your telescope is sharply focused before attempting camera alignment—this creates the clearest foundation for your image.
- Utilize a smartphone adapter with fine adjustment controls for precise lateral and vertical positioning.
- Apply slow-motion controls to make minute alignment adjustments, preventing shadows from obscuring your view.
- Practice regularly—developing this centering skill dramatically improves your astrophotography quality.
With consistent practice, you’ll develop an intuitive feel for perfect alignment, transforming your celestial photography from amateur to impressive.
Fine Adjustment Methods
When your smartphone camera and telescope eyepiece are perfectly aligned, the universe reveals itself in stunning detail.
Utilize the X and Y slow-motion controls on your smartphone adapter to make precise adjustments that perfectly align your camera lens with the eyepiece.
Position your smartphone at the ideal distance from the eyepiece to avoid shadows and guarantee a complete bright circle of light in your frame.
Always center the smartphone lens directly over the eyepiece to maximize the captured image area and eliminate vignetting effects.
Practice this alignment process repeatedly to build muscle memory and reduce setup time during actual astrophotography sessions.
Remember to check and readjust your alignment whenever you change eyepieces or shift between different celestial objects to maintain clarity and detail in your images.
Manual Focusing Techniques for Celestial Objects
As you point your telescope toward the night sky, proper focusing becomes the critical difference between capturing stunning celestial details and ending up with blurry disappointments.
Whether you’re using a smartphone or DSLR, mastering manual focus techniques is essential.
Manual focus mastery isn’t optional—it’s the gateway to revealing the hidden details of our universe.
- Adjust both devices – Use the telescope’s focusing knob first, then fine-tune your camera’s focus separately for maximum sharpness.
- Control exposure – With bright objects like planets, tap your smartphone screen to reduce overexposure before shooting.
- Switch to manual mode – When using a DSLR, disable autofocus which struggles in low light, and gradually adjust until details appear crisp.
- Select high-power eyepieces – Use 8mm eyepieces to fill more sensor pixels with your target, especially for smaller celestial bodies.
Regular practice with different objects will dramatically improve your focusing skills over time.
Camera Settings Optimization for Night Sky Photography
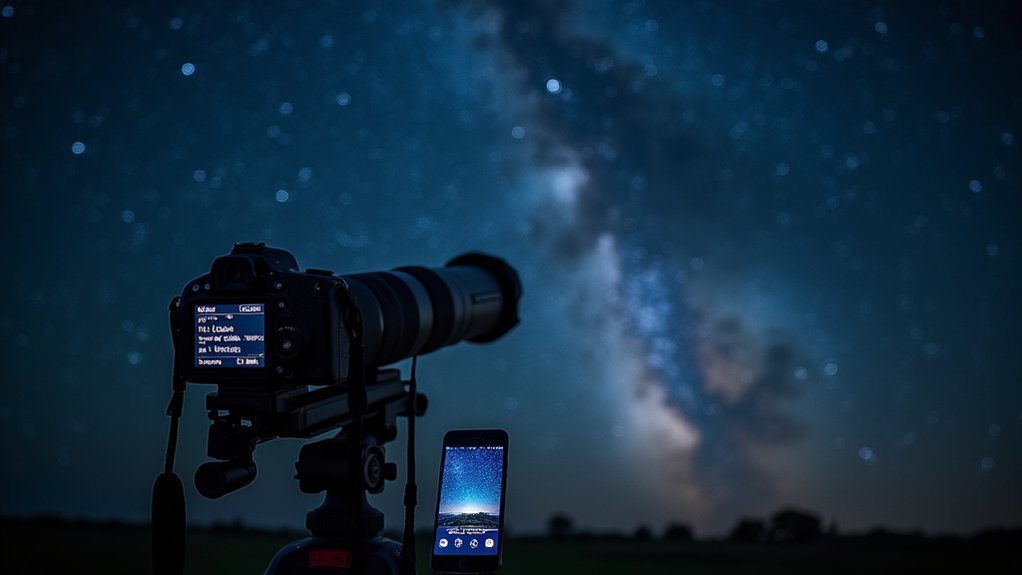
Perfect camera settings reveal the true potential of your astrophotography setup, transforming ordinary telescope views into breathtaking celestial portraits.
Start by switching your DSLR to manual mode with the widest aperture possible (f/2.8 or lower) to maximize light collection.
Set your ISO between 800-3200, finding the sweet spot between sensitivity and noise for your specific target. Use a shutter speed of 15-30 seconds to capture faint stars while avoiding star trails, and always mount your camera on a sturdy tripod.
Skip autofocus—it’ll struggle in low light. Instead, manually focus on a bright star until it appears sharp.
Finally, shoot in RAW format to preserve detail and give yourself greater flexibility during post-processing when adjusting exposure and color balance.
Reducing Vibration for Sharper Astronomical Images
You’ll notice dramatic improvements in your astrophotography by implementing simple vibration dampening methods like using a shutter delay or a sturdy tripod.
For smartphone setups, dedicated remote trigger apps eliminate the need to touch your device during exposure, preventing those frustrating micro-movements that blur stellar details.
DSLR users should invest in a quality remote release that works with their telescope mount, creating a hands-free capture system that produces consistently sharper images of celestial objects.
Vibration Dampening Methods
Three critical factors can ruin your perfect astrophotography shot, with vibration being the most insidious.
Even the slightest tremor can transform sharp celestial objects into blurry smudges, especially during long exposures.
To combat unwanted vibrations:
- Set up your equipment on a sturdy tripod with adjustable legs and guarantee it’s positioned on firm ground for maximum stability.
- Place vibration-dampening pads under each tripod leg to absorb shocks from wind gusts or nearby footsteps.
- Add weight to your tripod’s center column to lower its center of gravity and increase overall stability.
- Use a remote shutter release or timer function to trigger your camera without physically touching it.
These simple techniques will dramatically improve the sharpness of your astronomical images without requiring expensive equipment upgrades.
Smartphone Remote Triggers
When photographing celestial objects with a smartphone attached to your telescope, even the slightest touch can introduce vibrations that ruin your image quality. To combat this problem, consider using a remote trigger for your smartphone.
Most modern smartphones offer Bluetooth or Wi-Fi remote shutter capabilities that let you capture images without physically touching your device. This hands-free approach dramatically reduces vibrations, resulting in sharper astronomical photographs.
If you don’t have a dedicated remote, your phone’s self-timer function works as an effective alternative, giving vibrations time to settle before capture.
For more control, explore third-party camera apps that offer enhanced remote trigger functionality along with additional astrophotography settings.
With consistent practice using remote triggers, you’ll notice significant improvement when capturing faint celestial objects that require longer exposures.
Capturing the Moon: Step-by-Step Guide

Although the Moon might seem like an easy target because of its brightness and size, capturing detailed lunar photographs requires careful preparation and technique. Start with a low-power eyepiece (25mm) to locate and center our celestial neighbor before switching to higher magnification (8mm) for close-ups.
Lunar photography: deceptively simple yet requires methodical approach and proper magnification technique for impressive results.
- Align your smartphone camera directly over the telescope eyepiece, ensuring you’ve focused the telescope beforehand using the focusing knob.
- Enable shutter delay on your camera app to minimize vibrations that could blur details.
- Shoot in RAW format using third-party apps and adjust the exposure slider to reduce the Moon’s natural glare.
- Remember that telescope images may appear inverted or reversed—check reference photos online and use editing software to correct the orientation.
Planetary Photography With Budget Equipment
Capturing the planets doesn’t require expensive equipment to yield impressive results. Start with a low-power 25mm eyepiece to locate your planetary target, then switch to an 8mm eyepiece for detailed views.
A smartphone adapter is your budget-friendly solution for planetary imaging. Simply align your phone’s camera with the telescope eyepiece and secure it in place. Tap directly on your screen to focus on the planet, as these small celestial objects often appear overexposed without manual adjustment.
For better image quality, shoot in RAW format using third-party apps instead of standard JPEGs. This gives you greater flexibility during post-processing.
Don’t hesitate to experiment with different eyepieces to maximize the number of pixels capturing the planet, considerably improving detail and clarity in your final photographs.
Image Processing Software for Smartphone Astrophotographers

Taking photos through your telescope is just the first step – the magic happens during post-processing. Your smartphone captures can transform from simple snapshots to stunning celestial portraits with the right software tools.
- RAW processing is essential for maximum editing flexibility – apps like Adobe Lightroom Mobile preserve more detail than JPEGs, allowing greater adjustment of exposure, contrast, and color balance.
- Stacking software such as DeepSkyStacker combines multiple images to reduce noise and enhance details that might be lost in a single exposure.
- Layer-based editors like Photoshop enable selective adjustments, letting you enhance star clusters while preventing the Moon from washing out your image.
- Mobile editing apps including Snapseed and VSCO offer convenient on-the-go adjustments with intuitive interfaces perfect for quick enhancements between observation sessions.
Troubleshooting Common Focus Problems
Frustration with fuzzy images can quickly dampen your astrophotography enthusiasm. When shifting from smartphone to DSLR astrophotography, focus issues often become more apparent due to the camera’s increased sensitivity and resolution.
Ensure your telescope is properly collimated first—misalignment guarantees poor results regardless of camera quality. Set your DSLR to manual focus and use live view mode, zooming in digitally for precise adjustments.
| Problem | Likely Cause | Solution |
|---|---|---|
| Consistently blurry images | Poor collimation | Realign optical elements |
| Can’t achieve focus | Incorrect focal plane | Adjust diagonal position |
| Sharp center, blurry edges | Field curvature | Try different eyepiece/adapter |
| Overexposed bright objects | Exposure settings | Experiment with focal lengths |
If using a diagonal, verify that your camera’s focal plane aligns correctly with your adapter, as even slight misalignments can prevent sharp focus.
Advanced Stacking Techniques for Clearer Deep Sky Objects
While single exposures can reveal bright celestial objects, deep sky photography requires image stacking to truly bring out the hidden details. When you combine multiple frames, you’ll dramatically reduce noise while enhancing faint features invisible in single shots.
For ideal stacking results:
- Capture at least 20-30 frames with consistent exposure settings and minimal tracking variation to guarantee proper alignment.
- Include calibration frames (darks, flats, and bias) to correct for sensor noise and optical imperfections.
- Process your images in specialized software like DeepSkyStacker or Adobe Photoshop using their astronomical tools.
- Experiment with different stacking algorithms (average vs. median) to find the perfect balance between preserving details and minimizing noise.
With these techniques, you’ll transform ordinary telescope images into stunning deep sky portraits.
Frequently Asked Questions
How to Take Pictures Through a Telescope With a Phone?
You’ll need to align your phone’s camera with the telescope eyepiece. Start with a low-power eyepiece, secure your phone with an adapter, focus carefully, and consider shooting in RAW format for better results.
How Do I Connect My Smartphone Adapter to My Telescope?
Secure your smartphone adapter to the telescope’s eyepiece, then center your phone’s camera lens directly over it. Tighten all screws firmly, ensuring your phone is stable before fine-tuning the focus for clear images.
How to Connect Dslr Camera to Telescope?
You’ll need a T-ring specific to your camera brand and a T-adapter for your telescope. Remove the eyepiece, attach the T-adapter to the focuser, connect the T-ring to your camera, and join them together.
What Is the Best Smartphone for Astrophotography?
For astrophotography, you’ll get exceptional results with the Google Pixel 7, known for its outstanding night mode. The iPhone 14 Pro and Samsung Galaxy S21 Ultra are also excellent choices with their advanced low-light capabilities.
In Summary
You’ve now got all the tools to transform your smartphone or DSLR into a powerful astrophotography setup. With the right adapters, focusing techniques, and processing software, you’ll capture stunning celestial images that once required expensive equipment. Don’t be discouraged by initial focusing challenges—practice makes perfect. Keep experimenting with different settings and stacking methods to reveal the hidden details of our magnificent universe.


Leave a Reply