Perfect smartphone night sky photos depend on maximizing your device’s capabilities through computational photography. You’ll need a stable tripod, manual camera controls, and apps like NightCap or PhotoPills to adjust exposure settings. Set longer exposures with appropriate ISO (1600-3200), shoot in RAW format, and find dark locations away from light pollution. Post-processing with Lightroom Mobile or Snapseed enhances details and reduces noise. These fundamentals will transform your ordinary phone into a celestial capture tool.
Understanding Smartphone Camera Limitations and Capabilities
While smartphone cameras have revolutionized how we capture everyday moments, they present unique challenges for night sky photography. Your device’s smaller sensor struggles in low light, producing more noise than DSLRs when photographing stars and celestial objects.
However, don’t be discouraged. Modern smartphones come equipped with computational photography features that enhance night sky images through advanced noise reduction techniques. Despite fixed aperture limitations, you can leverage astrophotography apps to gain creative control over ISO, exposure time, and focus settings.
Remember that stability is essential for clear results. Even the best smartphone camera requires proper stabilization accessories during long exposures. A quality tripod eliminates the micro-movements that cause blurry images, allowing your phone to capture the maximum amount of light needed for striking night sky compositions.
Essential Apps for Smartphone Astrophotography
You’ll need specialized apps to overcome your smartphone’s inherent limitations when shooting the night sky.
Apps like NightCap Camera give you manual control over exposure settings essential for capturing dim celestial objects, while star trackers such as SkySafari and Star Walk 2 help you locate and identify astronomical features worth photographing.
PhotoPills and Light Pollution Map round out your toolkit by helping you plan the perfect time and location for your smartphone astrophotography adventures.
Exposure Control Apps
Although smartphones have capable built-in cameras, specialized apps transform them into powerful astrophotography tools. Apps like PhotoPills and The Photographers Ephemeris help you plan ideal shooting times by tracking celestial objects and providing moon phase information.
For smartphone astrophotographers, these exposure control apps offer built-in calculators that determine the best shutter speed and ISO settings based on your desired outcome.
You’ll also benefit from light pollution maps that guide you to darker locations for clearer night sky visibility.
Apps such as Star Walk 2 and SkySafari assist with identifying stars and constellations, improving your composition skills.
The real-time tracking features allow you to adjust your settings on the fly as celestial objects move across the night sky, ensuring you capture the perfect shot.
Star Tracking Software
Beyond basic exposure control, star tracking software takes smartphone astrophotography to another level.
Apps like SkySafari and Star Walk 2 help you identify celestial objects in real-time and track their movements, simplifying your shooting session planning.
Many of these apps feature augmented reality, overlaying constellations on your screen for enhanced navigation and better composition.
PhotoPills can calculate the Milky Way’s position and moon phases, helping you determine ideal shooting times and locations.
Struggling with light pollution?
Star tracking software can identify nearby dark sky areas, ensuring the best possible conditions for your night photography.
You’ll also find community sharing features in many of these apps, where you can showcase your results and draw inspiration from fellow astrophotography enthusiasts’ work—all without needing a DSLR camera.
Selecting the Best Smartphone for Night Sky Photography
Modern smartphones with advanced computational photography can rival entry-level DSLRs for capturing stunning night sky images.
You’ll want to prioritize models with dedicated night modes that combine multiple exposures to reveal stars and celestial objects invisible to the naked eye.
The quality of your smartphone’s lens system ultimately determines how much light reaches the sensor, making wide apertures and multi-lens arrays essential features for serious astrophotography enthusiasts.
Computational Photography Capabilities
Smartphones have revolutionized night sky photography through sophisticated computational techniques that rival traditional DSLR cameras. Night Mode technology combines multiple frames to dramatically reduce noise and enhance low-light performance when capturing the stars and Milky Way.
Your smartphone’s wide apertures (typically f/1.5-f/2.2) work alongside computational photography capabilities to gather more light than you’d expect from such compact devices. Many flagship models now offer manual controls for ISO, shutter speed, and focus—essential tools for serious astrophotography.
What’s truly game-changing is the AI integration that automatically detects celestial objects and optimizes settings accordingly. This means you can capture stunning night sky images without mastering complex techniques.
The smartphone in your pocket contains sophisticated algorithms that transform what would be grainy, underexposed shots into clear, detailed astronomical portraits.
Dedicated Night Modes
When choosing a smartphone for astrophotography, dedicated night modes should be your top priority. These specialized features leverage longer exposure times and enhanced low-light performance, allowing you to capture celestial details that were once exclusive to DSLRs.
Look for devices with wide apertures (f/1.5 or lower) that maximize light collection—critical for revealing stars and the Milky Way in your images.
Models like the Google Pixel series and iPhone 14 Pro offer specialized astrophotography settings that automatically optimize your shooting parameters when pointed at the night sky.
The best smartphones incorporate sophisticated noise reduction algorithms and AI enhancements that clean up what would otherwise be grainy images.
Multi-frame processing technology combines multiple exposures into one stunning shot, delivering impressive clarity and detail without the blurriness that typically plagues nighttime photography.
Lens Quality Matters
Although night modes enhance your photos digitally, the physical lens quality ultimately determines how much light reaches your smartphone’s sensor.
When choosing a smartphone for night sky photography, prioritize models with wide aperture (f/1.8 or lower) lenses that capture more starlight in low-light conditions.
Optical image stabilization (OIS) is essential for preventing blur during the longer exposures needed for celestial photography.
You’ll also want to look for phones with larger sensors—like those in high-end Google Pixel or Samsung Galaxy models—which dramatically improve light capture and detail.
The best smartphones combine excellent lens quality with computational photography features that stack multiple exposures, reducing noise while preserving star detail.
This hardware-software partnership delivers impressive results that were previously impossible without a DSLR camera.
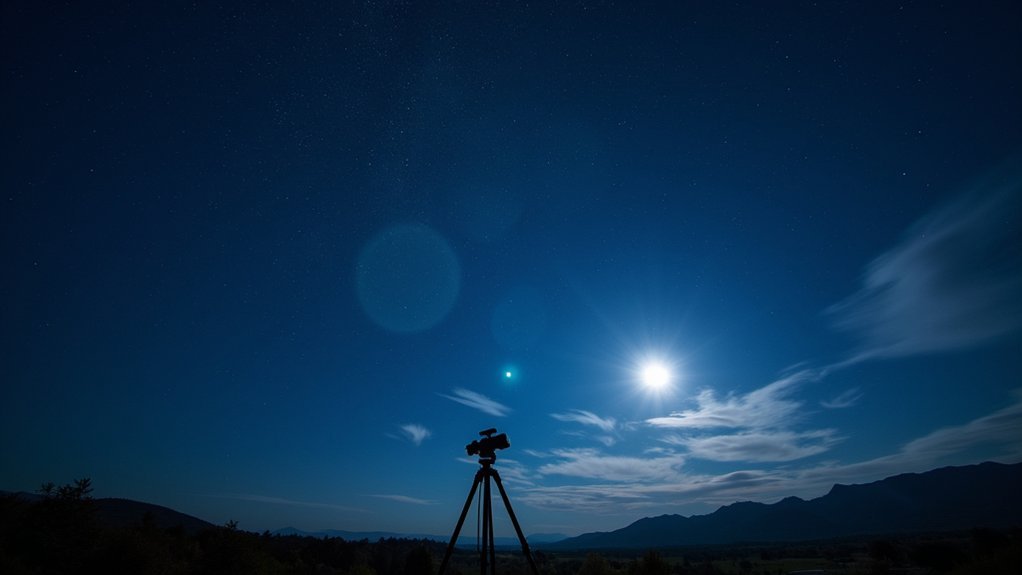
Stabilization Methods for Long Exposure Shots
Three critical elements separate stunning night sky photography from blurry disappointments when shooting without a DSLR: proper stabilization, patience, and technique.
Your primary defense against camera shake is a sturdy tripod, which remains essential for longer exposure times.
Don’t have one? Any stable surface can work in a pinch. To eliminate vibrations from pressing the shutter button, use a remote shutter release or your camera’s self-timer function.
When shooting handheld isn’t avoidable, activate your device’s stabilization features like OIS or EIS to reduce blurriness.
Brace your arms against your body and maintain steady breathing for sharper images.
Select a lens with a fast aperture (f/2.8 or lower) whenever possible—this allows more light in while keeping exposure times shorter, resulting in crisper night sky photos.
Manual Mode Settings for Star Photography
When shooting stars with a non-DSLR camera, you’ll need to master the exposure triangle fundamentals—aperture, shutter speed, and ISO working together.
Your ISO strategy matters greatly; start at ISO 1600 to capture more light while keeping noise manageable, then adjust based on your specific camera’s capabilities.
Remember to pair your ISO choice with the widest possible aperture (f/2.8 or lower) and a shutter speed calculated using the 500 Rule to achieve properly exposed star images.
ISO Strategy Matters
Despite what many smartphone photographers believe, manual mode is your secret weapon for stunning night sky photography even without a DSLR. Your ISO settings play a critical role in capturing stars clearly without excessive noise.
Start with ISO between 1600-3200 for ideal low-light performance while maintaining image quality. If your camera has superior capabilities, experiment with lower settings for better noise reduction. Always shoot in RAW format to preserve detail for exposure adjustments during editing.
Remember the “500 Rule” when setting your shutter speed: divide 500 by your lens focal length to determine the longest exposure that still captures crisp star points without trails.
For example, with a 20mm lens, shoot at 1/25 second or faster (500 ÷ 20 = 25) to prevent star movement from registering as streaks.
Exposure Triangle Fundamentals
The exposure triangle forms the cornerstone of successful night sky photography, whether you’re using a smartphone or dedicated camera. Mastering these three elements—ISO, aperture, and shutter speed—enables you to capture stunning celestial images without a DSLR.
| Setting | Recommendation | Why It Matters |
|---|---|---|
| ISO | 1600-3200 | Balances sensitivity with noise control |
| Aperture | f/2.8 or lower | Captures more light from distant stars |
| Shutter Speed | Use 500 Rule | Prevents star trails (500÷focal length) |
| Manual Mode | Essential | Gives complete control over settings |
| Adjustments | Scene-dependent | Adapt to sky conditions and gear limitations |
Switch to manual mode to independently control these settings, allowing for precise adjustments as conditions change. Remember, higher ISO increases sensitivity but adds noise, wider apertures gather more light, and proper shutter speed prevents unwanted star trails.
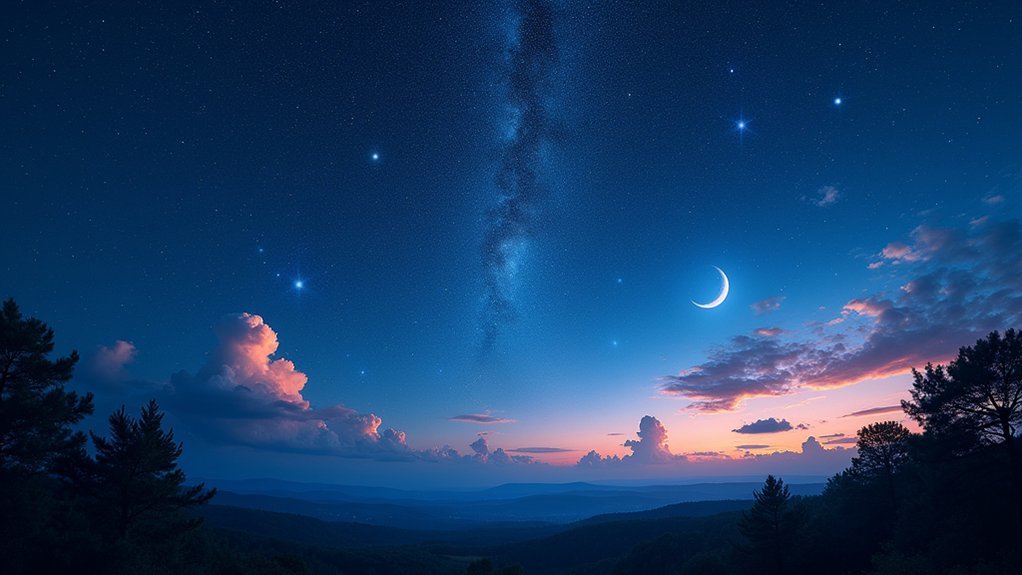
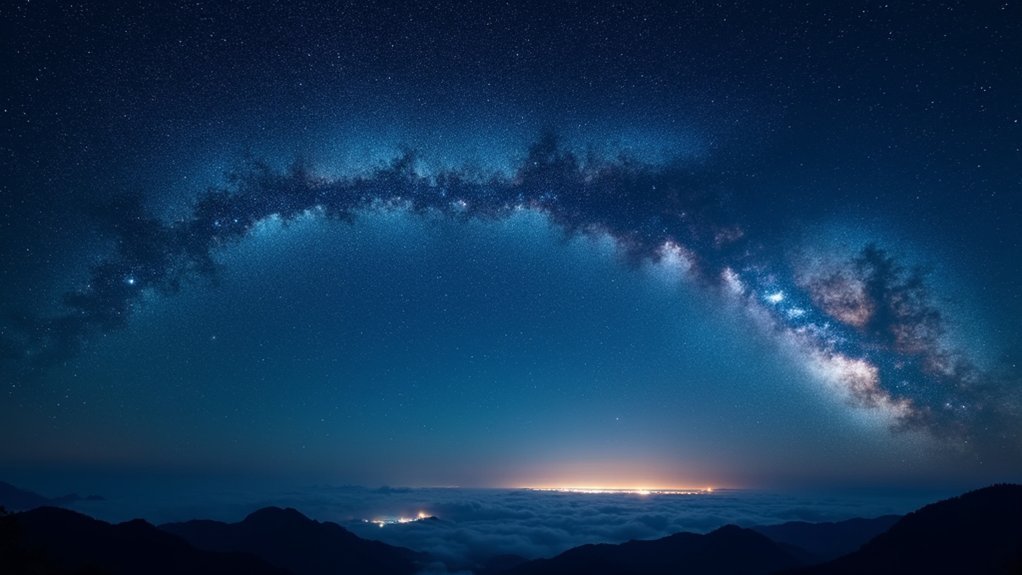
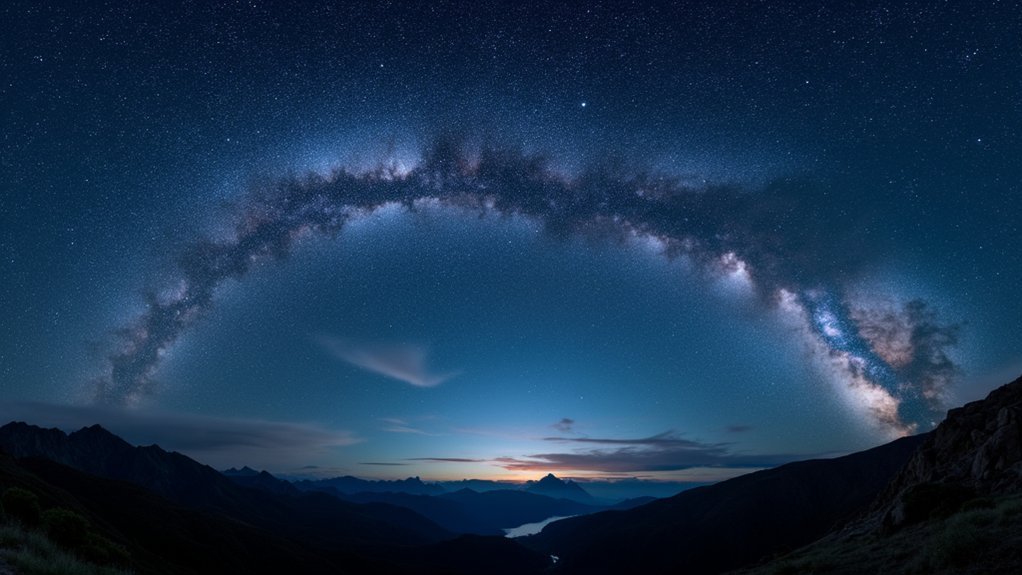
Finding Dark Sky Locations for Clearer Results
Even with smartphone cameras becoming more advanced, your night photography results still depend heavily on finding locations away from light pollution.
Consult light pollution maps to identify areas where artificial illumination won’t interfere with the clarity of night sky images you’re capturing.
Seek out designated Dark Sky Parks, which offer protected environments specifically for stargazing.
Higher elevations provide significant advantages—mountain locations reduce atmospheric interference that typically degrades detail and color in celestial photography.
Time your outings around the new moon phase when the sky is naturally darkest.
For additional resources, connect with local astronomy clubs hosting stargazing events; they’ll often know the best spots and might share techniques specific to smartphone photography.
These communities can guide you to ideal dark sky locations you might otherwise miss.
Post-Processing Techniques for Smartphone Star Photos
Once you’ve captured the night sky from those ideal dark locations, your smartphone astrophotography journey continues in post-processing.
Dedicated photo editing apps like Lightroom Mobile or Snapseed are essential for enhancing your smartphone star photos. Focus on adjusting contrast, color balance, and exposure to make celestial objects pop against the dark background.
Apply noise reduction to minimize graininess—a common issue in low-light photography. The stacking technique, which combines multiple shots of the same scene, further reduces noise while improving clarity.
Fine-tune your images with tonal adjustments to reveal details in both stars and foreground elements.
Don’t overlook composition refinements—cropping can dramatically improve your final image by eliminating distractions and applying the rule of thirds for more balanced, visually appealing night sky photos.
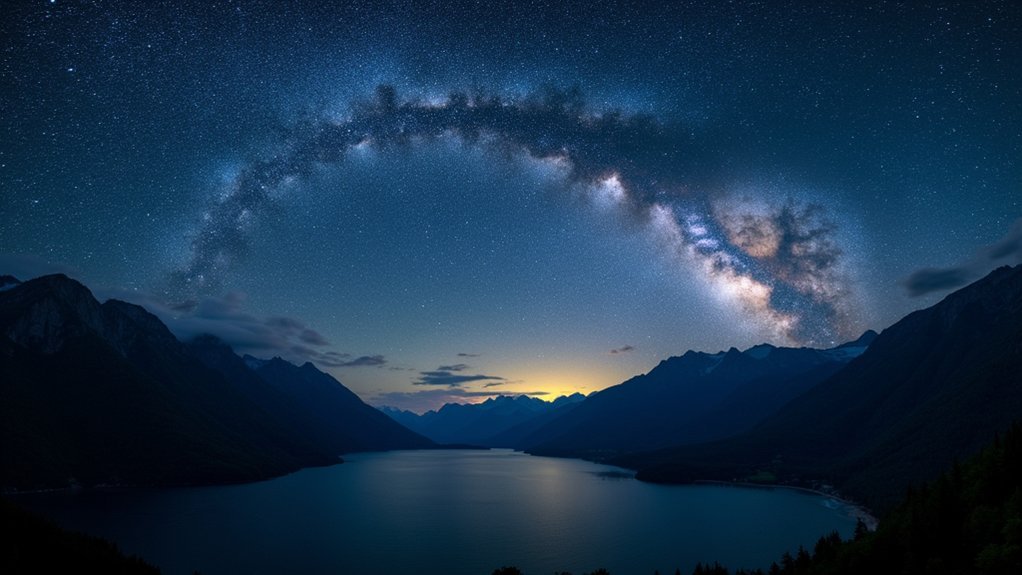
Creative Compositions With Smartphone Wide-Angle Lenses
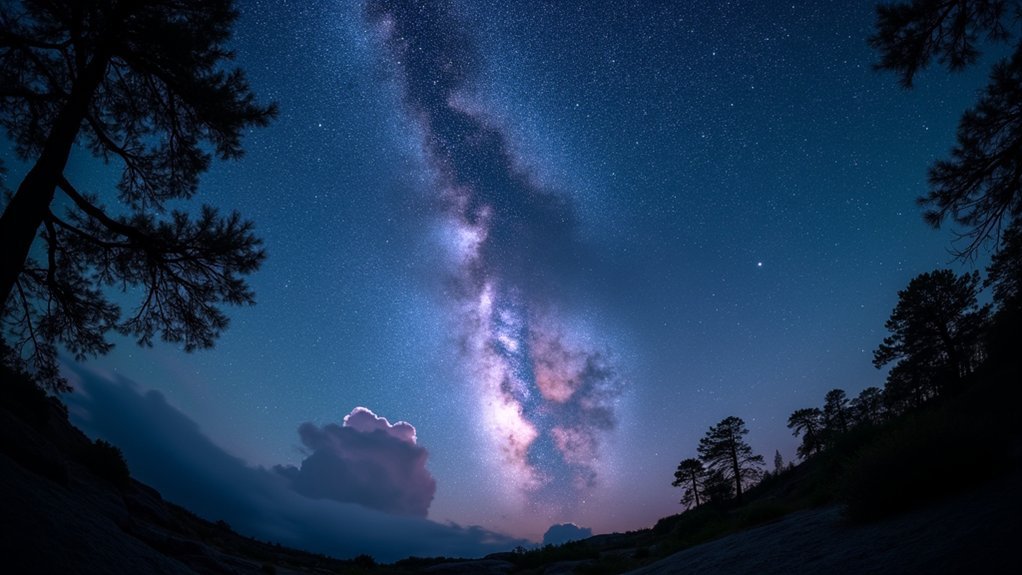
While traditional DSLR cameras once dominated astrophotography, modern smartphone wide-angle lenses have revolutionized night sky photography for enthusiasts.
These lenses capture more of the night sky, perfectly showcasing celestial events like meteor showers and the Milky Way with enhanced perspective.
For best results, choose lenses with a wide aperture (f/2.8 or lower) to maximize light capture in dark conditions.
You’ll reduce noise and improve image quality noticeably.
Don’t forget to incorporate foreground elements like trees or buildings to add depth to your compositions, creating a storytelling image that engages viewers.
Experiment with creative compositions using leading lines or symmetry to direct attention toward celestial features.
This approach dramatically increases the visual impact of your night shots while apps like NightCap let you control exposure for stunning results.
Capturing the Milky Way With Smartphone Stacking Techniques
Despite what many believe, you don’t need expensive DSLR equipment to photograph the breathtaking swirls of the Milky Way. Your smartphone, with proper techniques, can capture stunning cosmic images.
Download a dedicated astrophotography app that allows manual mode control over long exposure (10-20 seconds) and ISO settings (800-3200).
For impressive results, try smartphone stacking techniques:
- Set up your phone on a tripod to eliminate movement during long exposures
- Take multiple shots of the same scene using manual mode for consistent settings
- Use higher ISO to capture more light while maintaining reasonable exposure times
- Blend your images in post-processing software like Lightroom or Photoshop
This stacking approach reduces noise, enhances details, and creates clearer, more vibrant Milky Way photos without investing in expensive camera gear.
Minimizing Noise in Smartphone Night Photography
Even the most breathtaking night sky can appear grainy and underwhelming if your smartphone captures too much digital noise. To combat this, always activate your phone’s built-in night mode, which extends exposure times and gathers more light for better image clarity.
Stabilization is essential—mount your device on a tripod to eliminate camera shake during longer exposures. You’ll notice immediate improvements in sharpness and noise reduction.
Lower your ISO settings as much as possible while maintaining proper exposure. Higher ISO values introduce unwanted graininess, especially in dark scenes.
For best results, use apps that offer manual control over shutter speed and other camera parameters. These allow precise adjustments tailored to challenging nighttime conditions.
Don’t hesitate to enhance your smartphone photography further with specialized noise reduction apps during post-processing.
Timing Your Shots: Moon Phases and Celestial Events
Now that your smartphone is fine-tuned for clear, noise-free images, the timing of your shoot becomes your next consideration. The moon phases dramatically impact your results—the new moon phase offers the darkest skies and maximum visibility of stars.
For capturing the Milky Way, plan your outings between late April and early September when it’s most prominent.
- Track moonrise and moonset times to avoid the moon’s brightness washing out delicate celestial details
- Consult astronomical calendars to identify meteor showers and planetary alignments for unique compositions
- Target the summer months when the Milky Way creates a breathtaking backdrop for landscape astrophotography
- Use apps like PhotoPills to predict ideal shooting conditions and plan your locations accordingly
Don’t let smartphone limitations discourage you—proper timing can compensate for equipment constraints, delivering stunning night sky images.
Accessories That Enhance Smartphone Astrophotography
While your smartphone alone can capture basic night sky images, the right accessories will transform your celestial photography from ordinary to extraordinary.
A smartphone tripod is essential for minimizing camera shake during long exposures, delivering sharper images of stars and planets.
Expand your phone’s capabilities with external lens attachments—wide-angle for capturing more sky or telephoto for closer views of celestial bodies.
Use a remote shutter release or timer function to eliminate vibrations when taking photos.
Make the most of your device’s night mode feature or download a specialized astrophotography app for optimizing camera settings in low-light conditions.
Don’t forget a red-filtered headlamp to preserve your night vision while adjusting your setup under the stars.
Sharing and Preserving Your Smartphone Night Sky Images
Once you’ve captured stunning night sky images with your smartphone and accessories, the next step is preserving and sharing these celestial treasures.
After adjusting ISO and shutter speed with specialized smartphone apps like NightCap, and stabilizing your device on a tripod, you’ll want to maximize their impact through thoughtful sharing and preservation.
- Create a dedicated cloud album for your night sky photography, organizing shots by celestial events or locations.
- Export edited images in full resolution from editing apps like Lightroom Mobile to preserve the detailed work you’ve done.
- Share your work on astrophotography communities where you can discuss techniques with night mode and external lenses.
- Print your best shots on metal or glass surfaces which enhance the contrast and depth of astronomical images.
Frequently Asked Questions
How to Take Perfect Night Sky Photos?
For perfect night sky photos, you’ll need a tripod, manual phone settings (low ISO, slow shutter), dark location, new moon timing, and post-processing. Stability is essential during long exposures to capture stars clearly.
What Is the 500 Rule for Night Photography?
The 500 rule helps you determine maximum exposure time before stars show trails. Divide 500 by your lens focal length (in mm) to get your maximum shutter speed in seconds. It’s primarily for full-frame cameras.
How Can I Take Pictures at Night Without a Flash DSLR?
You can take night pictures without a flash by using a tripod, setting longer exposure times, increasing ISO, opening your aperture wide, and using your phone’s night mode or a compact camera’s manual settings.
How to Make a Picture of the Night Sky?
Use your smartphone on a tripod, enable manual mode, set high ISO and 15-30 second exposure. Focus manually on stars, avoid light pollution, and try apps like NightCap for better results.
In Summary
You don’t need expensive DSLR equipment to capture stunning night sky photos. With today’s smartphone capabilities, proper techniques, and the right accessories, you’ll achieve impressive results. Remember to use manual settings, stabilize your device, and plan around celestial events. Keep practicing with different apps and settings—you’ll soon develop your unique style. The cosmos is waiting for you to document its beauty with the camera that’s already in your pocket.


Leave a Reply