Remote release controls are essential tools for every astrophotographer because they eliminate camera shake from manually pressing the shutter, resulting in sharper images. They enable Bulb Mode for exposures beyond 30 seconds—crucial for capturing faint celestial objects. Many models include intervalometer functions for time-lapses and automated sequences. You’ll avoid blurry star trails, reduce noise, and gain flexibility to trigger your camera from a distance. Discover how these simple devices can dramatically transform your night sky photography results.
Why Every Astrophotographer Needs Remote Release Controls

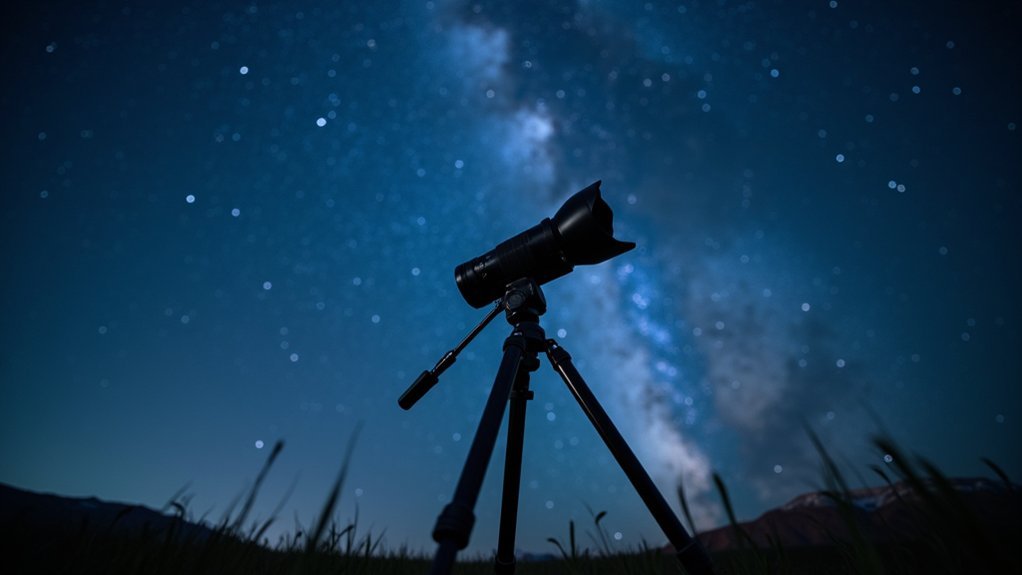
When capturing the cosmos through your camera lens, every subtle movement becomes your enemy. That’s why a remote shutter release is essential for your astrophotography toolkit. By eliminating the vibrations caused when pressing the shutter button manually, you’ll achieve markedly sharper images during long exposures.
Beyond stability, remote releases enable Bulb Mode for exposures exceeding 30 seconds—critical for capturing faint celestial objects that remain invisible with standard exposure times. Many include intervalometer functions that automate consecutive shots for time-lapses and image stacking techniques.
You’ll also benefit from noise reduction features that combat heat-related degradation during extended exposures.
Whether you choose wired or wireless options, the flexibility to trigger your camera from a distance will transform your astrophotography, especially in remote shooting locations.
Understanding Camera Shake in Astrophotography
Camera shake creates exposure blur that can ruin your meticulously planned astrophotography session when you physically press the shutter button.
These vibrations ripple through your entire setup, affecting stars and deep-sky objects most severely during the critical initial seconds of exposure.
Your ability to maintain absolute stability directly determines the fine detail captured in celestial objects, with even microscopic movements drastically reducing the sharpness and clarity that distinguish amateur photos from professional-quality images.
Exposure Blur Sources
Despite your best planning and equipment setup, microscopic movements can ruin hours of careful preparation in astrophotography. These subtle vibrations primarily come from two sources: your physical interaction with the camera and the camera’s internal mechanics.
When you press the shutter button manually during long exposure shots, you introduce vibrations that translate into blurry star trails and unclear celestial details. Even with a stable tripod, the simple act of touching your camera creates enough movement to compromise image sharpness.
Additionally, DSLRs generate internal vibrations from mirror movement that further degrade image quality. A remote shutter release eliminates both problems by allowing you to trigger exposures without physical contact, maintaining camera stability throughout extended shooting sessions.
This simple tool becomes essential when capturing faint objects requiring exposure times of several seconds or longer.
Vibration Ripple Effects
Even the slightest tremor during an astrophotography session can propagate into devastating image degradation. When you press your camera’s shutter button, you’re introducing vibrations that amplify throughout your setup, especially during long exposures of celestial objects.
| Vibration Source | Effect on Image Quality |
|---|---|
| Shutter press | Star trails and blurring |
| Wind | Smeared details |
| Footsteps | Loss of fine structures |
| Mount movement | Reduced sharpness |
| Nearby traffic | Diminished contrast |
Using a remote shutter release eliminates the most controllable source of vibration—your finger. This small investment pays enormous dividends in image clarity, particularly when capturing exposures exceeding 30 seconds. You’ll notice immediately sharper stars, cleaner nebula details, and more defined galaxy structures as vibration-induced noise diminishes.
Stability Vs Detail
The battle between stability and detail defines successful astrophotography. When you’re capturing celestial objects, even the slightest movement can transform crisp star points into blurry streaks. This trade-off becomes more pronounced during long exposures, where camera shake creates compounding problems.
Your remote shutter release serves as the essential bridge between these competing elements. By eliminating physical contact with your camera, you prevent the micro-vibrations that would otherwise cascade throughout your imaging system.
This becomes particularly important when photographing faint deep-sky objects that require exposures of several minutes. Without proper stability control, you’ll sacrifice the fine details that separate amateur shots from breathtaking cosmic portraits.
The remote release empowers you to maximize exposure time while maintaining the structural integrity of delicate celestial features that make your images truly compelling.
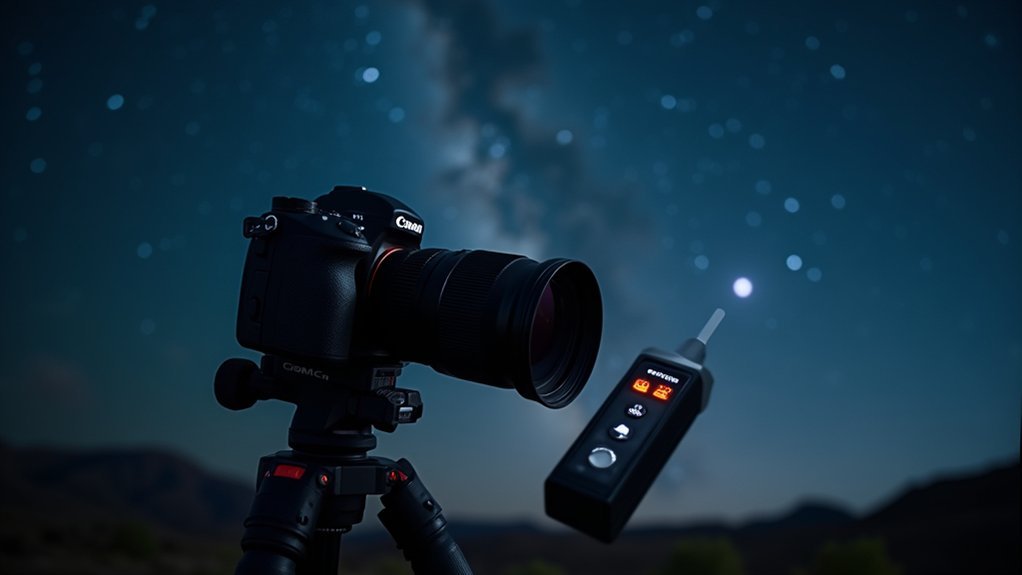
Wireless vs. Wired Release Controls: Pros and Cons
When choosing between wireless and wired release controls, you’ll need to weigh the extended range of wireless systems against the superior reliability of wired connections.
Wireless remotes let you operate from greater distances but might suffer from signal interference or battery issues during long astrophotography sessions.
In contrast, wired releases offer consistent performance with minimal setup complexity, simply requiring you to plug them into your camera before shooting.
Range vs. Reliability
Although wireless remote releases offer greater freedom of movement, photographers must carefully weigh this advantage against the superior dependability of wired options when shooting celestial subjects.
When you’re capturing long exposures of the night sky, reliability becomes paramount—a single disconnection can ruin hours of setup.
Wired remote controls provide consistent performance without concerns about battery failure or signal interference, making them ideal for extended astrophotography sessions in remote locations. You’ll never need to worry about range limitations or line-of-sight requirements.
However, if you value mobility and flexibility, wireless remotes allow you to position yourself away from your equipment, which can be advantageous when managing multiple cameras.
Just remember that environmental factors may impact signal strength and reliability, potentially compromising your carefully planned shoot.
Setup Complexity Comparison
Despite their straightforward appearance, remote release controls vary considerably in setup complexity depending on whether you’ve chosen wired or wireless options.
Wired remote shutter releases offer simplicity at its finest—just plug in and you’re ready to shoot. This plug-and-play functionality makes them ideal for astrophotography sessions where reliability matters more than range.
In contrast, wireless systems require more preparation. You’ll need to manage batteries, pair devices, and potentially troubleshoot signal interference issues.
While they reward you with smartphone connectivity and intervalometer functions, these features add layers of setup complexity that might be unwelcome during late-night shooting sessions.
When you’re standing under dark skies with cold fingers, you’ll appreciate how quickly a wired system gets you operational.
For beginners especially, this simplicity can be worth sacrificing the freedom of wireless technology.
Budget-Friendly Remote Trigger Options for Beginners

Many aspiring astrophotographers worry that remote trigger solutions will break the bank, but you’ll find several affordable options to get started. Wired shutter releases offer reliability at under $30, making them perfect first purchases for budget-conscious beginners.
Don’t overlook these wallet-friendly alternatives:
- Wireless remote shutter releases provide flexibility at around $50, letting you trigger your camera without standing beside it.
- Free or low-cost smartphone apps transform your existing device into a remote control, eliminating additional equipment costs.
- DIY solutions using Arduino or Raspberry Pi components offer customizable functionality for tech-savvy photographers on a budget.
If your DSLR includes a built-in intervalometer, you’re already equipped for time-lapse photography without spending extra on remote triggers.
Setting Up Remote Controls for Star Stacking Sequences
When capturing multiple exposures for star stacking, proper remote control setup becomes essential to your success. An intervalometer will automate your capturing sequence, allowing you to control my setup without constant manual intervention.
Remote control automation transforms star stacking from tedious to effortless, preserving your focus for creative decisions rather than repetitive tasks.
Connect your remote shutter release securely to minimize camera shake during long exposures. For advanced stacking, integrate specialized software like APT or PHD2 with your remote desktop capabilities to manage automatic image capture and guiding from a distance.
Always test your remote control’s range and connection stability before beginning your session. Ascertain you have a reliable power supply, as interruptions during lengthy exposure sequences can ruin hours of work.
These precautions will help you achieve consistent, high-quality frames across your entire stacking sequence, resulting in spectacular celestial composites.
Extending Battery Life During Remote Operation

Because astrophotography sessions often last several hours under cold night skies, battery management becomes a critical component of your remote setup.
Remote release controls greatly extend battery life by keeping your camera in standby mode until you trigger an exposure, dramatically reducing power consumption during your remote imaging sessions.
When optimizing battery life for extended shooting, consider:
- Using interval shooting features to schedule efficient exposure timing with longer rest periods
- Combining battery-saving camera settings with remote controls to avoid power-hungry LCD activation
- Leveraging intervalometer functions in your remote release to manage power usage intelligently
You’ll also find that many remote release systems allow for external power connections, giving you virtually unlimited shooting time without depleting your camera’s internal battery during those marathon celestial imaging sessions.
Weather-Proofing Your Remote Control System
Properly sealing your remote release controls against moisture, dust, and debris is essential for maintaining reliable operation during extended astrophotography sessions.
You’ll need to invest in weatherproof housings or cases rated for outdoor use, ensuring all cable connections are protected with appropriate weatherproof boxes or trunking systems.
For cold-weather operation, consider insulating battery compartments and using silica gel packets to prevent condensation, as temperature drops can drastically reduce battery performance and introduce unwanted moisture to sensitive electronic components.
Sealing Against Elements
Since astrophotography often requires extended exposure to harsh outdoor conditions, weatherproofing your remote release control system isn’t optional—it’s vital. Your electronic components need proper protection to maintain functionality during those critical night shoots.
Implementing weatherproof housing around your control system creates a reliable barrier against moisture, dust, and temperature fluctuations that would otherwise damage sensitive electronics.
Effective weatherproofing strategies include:
- Using high-quality weatherproof boxes with proper sealing gaskets
- Implementing thoughtful cable management to prevent strain and exposure
- Regularly inspecting and maintaining weatherproof seals to prevent degradation
Don’t overlook connection points where power and data lines enter your equipment—these are particularly vulnerable areas.
Cold-Weather Operation Essentials
Cold-weather astrophotography presents unique challenges that extend beyond basic weatherproofing.
You’ll need to equip your remote control system with specialized weatherproof housings designed to shield sensitive electronics from moisture and freezing temperatures that can render them inoperable.
When cable running between components, select weather-resistant insulation that won’t crack or fail in extreme cold.
Don’t overlook the importance of surge-protected power ports and robust extension cords to prevent electrical issues during temperature fluctuations.
Monitor battery levels vigilantly—cold environments greatly reduce battery efficiency and operating time.
Consider adding heat packs or insulated covers to maintain ideal operating temperatures for your equipment.
These preventive measures will also minimize condensation problems when moving gear between warm indoor and frigid outdoor environments.
Troubleshooting Common Remote Release Issues
Even the most reliable remote release controls can experience problems during astrophotography sessions. When your remote shutter release fails to trigger your camera, first check the battery—low power is often the culprit.
For wired models, inspect connections for damage or looseness that might interrupt signal transmission.
With wireless remotes, you’ll need to take into account:
- Distance between remote and camera
- Potential obstructions blocking the signal
- Line-of-sight limitations affecting reliability
Don’t overlook your camera’s firmware—outdated software can cause compatibility issues with newer remote releases.
Before committing to lengthy star trail captures or deep sky imaging, always test your setup with shorter exposures. This practice guarantees everything works properly and helps you become familiar with your equipment under actual shooting conditions.
Advanced Intervalometer Settings for Deep Sky Imaging
Once you’ve resolved any troubleshooting issues with your remote release, mastering advanced intervalometer settings becomes your gateway to capturing stunning deep sky objects. Your intervalometer allows precise control over exposure times, intervals, and shot sequences—essential for revealing faint nebulae and galaxies.
| Setting | Purpose |
|---|---|
| Bulb Mode | Extends exposures beyond 30 seconds |
| Interval Timing | Automates sequential captures for stacking |
| Shot Count | Defines total images in your imaging run |
| LENR | Reduces thermal noise in long exposures |
Smartphone Apps as Cost-Effective Remote Alternatives

Why invest in expensive dedicated hardware when your smartphone can double as a powerful remote shutter release? Your existing mobile device can transform into a versatile control center for your astrophotography sessions through various smartphone apps.
Your smartphone is already the ultimate astrophotography tool – no need for expensive specialized remotes.
These apps connect to your camera via WiFi or Bluetooth, offering functionality that rivals dedicated remote release devices.
- Access timer settings, interval shooting, and bulb mode directly from your phone’s screen
- Make quick setting adjustments without touching your camera, eliminating vibration risks
- Control your camera from a comfortable distance while monitoring results in real-time
Popular options like DSLR Controller and Camera Connect provide seamless integration with most camera models.
You’ll appreciate the streamlined workflow as you capture deep sky objects without fumbling with additional equipment in the dark.
Integrating Remote Releases With Tracking Mounts
Smartphone apps offer excellent control options, but their true potential emerges when paired with tracking mounts for astrophotography.
When you integrate your remote shutter release with a tracking mount, you’ll eliminate camera shake that would otherwise ruin long exposures of distant celestial objects.
Modern tracking mounts seamlessly connect with remote release controls through ASCOM software, streamlining your workflow while maintaining perfect alignment of your equipment.
You won’t need to physically touch your setup, preserving that precise positioning you worked so hard to achieve.
The combination offers practical benefits too—intervalometer features automate multiple exposures for image stacking, while the mount keeps your target centered.
This integration minimizes manual adjustments during your session, giving you consistent results even during extremely long exposure times.
Frequently Asked Questions
Why Do Astrophotographers Prefer Remote Shutter Release Rather or Release Timer in Astrophotography?
You’ll prefer remote shutter releases because they allow immediate triggering for unpredictable astronomical events, while timers rely on preset delays. They also offer Bulb mode and intervalometer functions for enhanced creative control.
What Is the 500 Rule in Astrophotography?
The 500 rule helps you calculate the maximum exposure time to avoid star trails. You’ll divide 500 by your lens’s focal length in millimeters. For example, with a 50mm lens, you’d limit exposure to 10 seconds.
What Does a Remote Shutter Release Do?
A remote shutter release lets you trigger your camera without touching it, reducing vibrations during long exposures. You’ll get sharper images as it eliminates camera shake that can blur your photos.
What Is the 400 Rule in Astrophotography?
The 400 rule helps you calculate maximum exposure time without star trails. You’ll divide 400 by your lens focal length in millimeters. With a 50mm lens, you’d get 8 seconds before stars streak.
In Summary
Don’t underestimate the impact of a quality remote release on your astrophotography. Whether you choose wireless freedom or wired reliability, you’ll eliminate camera shake, simplify exposure sequences, and enhance your workflow. They’re not just accessories—they’re essential tools that elevate your cosmic imagery. Start with simple options and upgrade as your skills advance. Your stunning, shake-free night sky images will prove they’re worth every penny.


Leave a Reply