Mastering night sky stacking requires strategic preparation and execution. Choose locations away from light pollution and bring essential gear like a sturdy tripod and wide-angle lens. Set your ISO between 6400-10000, use manual focus on bright stars, and apply the 500 rule for shutter speed. Capture 10-15 consistent exposures and utilize free software like Sequator or Startrails. Blend layers with “Lighten” mode and manage noise with dedicated masks. These foundational techniques will transform your astrophotography results.
Finding the Perfect Dark Sky Location

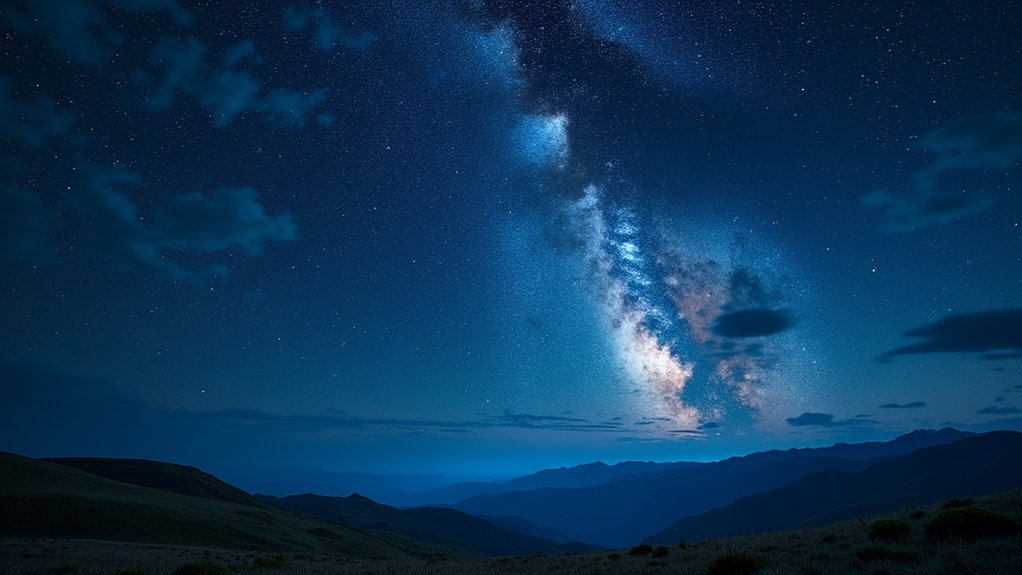
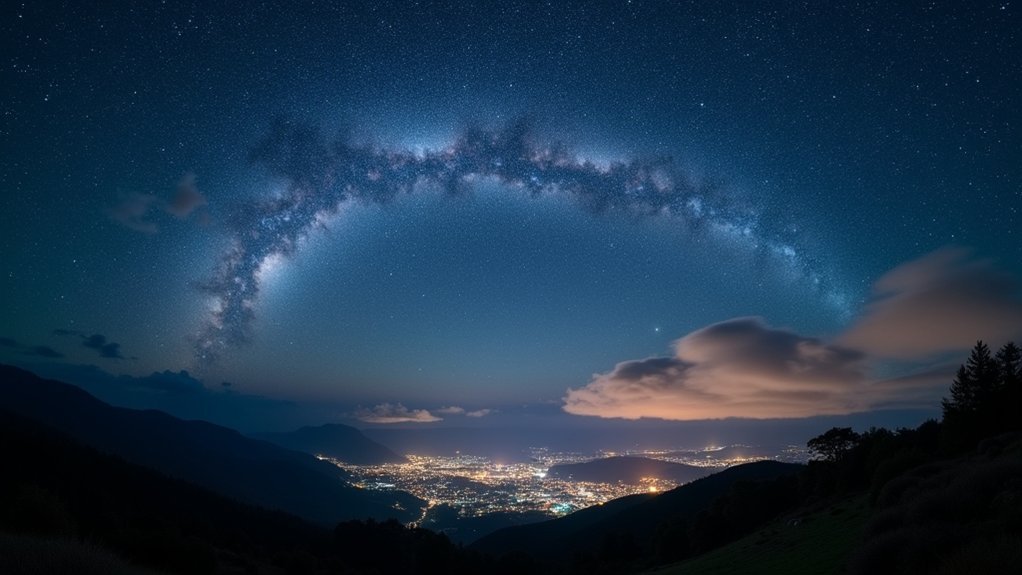
Where you choose to set up your camera can make or break your night sky photography. For stunning star stacks, seek locations with minimal light pollution, ideally at least an hour away from city lights. The Dark Site Finder map is an invaluable tool for identifying these pristine dark skies.
National parks often provide ideal stargazing conditions, with many offering designated observation areas. Research these locations in advance, as they’re specifically protected from light pollution.
Protected from the glow of modern life, national parks serve as natural observatories for the celestial wonders above.
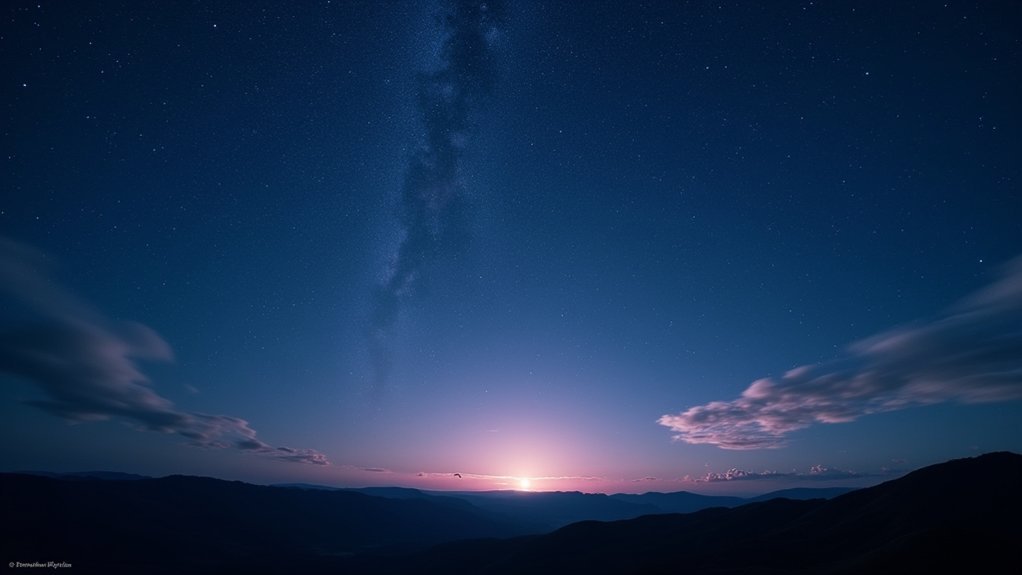
Always check weather forecasts before heading out—clouds and fog will ruin your shoot. Plan around the moon phase too; a new moon provides the darkest canvas for your stars.
Scout your chosen spot during daylight hours to familiarize yourself with the terrain, ensuring safe and efficient navigation when darkness falls.
Essential Gear for Night Sky Stacking
Successful star stack photography demands specialized equipment to capture the subtle light of distant celestial bodies. You’ll need a DSLR or mirrorless camera with manual controls to adjust settings precisely for those faint star trails.
| Equipment | Purpose | Importance |
|---|---|---|
| Sturdy tripod | Prevents camera shake | Essential |
| DSLR/mirrorless camera | Manual control capability | Critical |
| Wide-angle lens (14-24mm) | Captures expansive sky views | Necessary |
| Remote shutter release | Minimizes vibration | Important |
| Extra batteries | Counters cold-weather drain | Crucial |
Mount your camera and lens on a sturdy tripod—this isn’t negotiable for crisp star images. Choose lenses with wide aperture (f/1.4-f/4) to maximize light collection. Don’t forget spare batteries as cold nights quickly drain power during long exposures.
Understanding Camera Settings for Star Photography

You’ll need to find the sweet spot for ISO settings, typically between 6400-10000, while balancing light sensitivity against digital noise.
Master manual focus by zooming in on a bright star through your camera’s live view and adjusting until it appears sharp.
Calculate your ideal shutter speed using the 500 Rule (500 divided by your lens’s focal length) to capture stars as points of light rather than trails.
ISO and Sensitivity
The three most critical camera settings for night sky photography begin with ISO, which directly affects your camera’s ability to capture faint starlight.
Within the exposure triangle, ISO determines your sensor’s sensitivity to light, making it vital for capturing dim celestial objects.
Set your ISO between 3200 and 6400 for most night sky situations. This range offers enough sensitivity to record stars without introducing excessive noise. Higher ISO settings allow for shorter exposure times, helping minimize star trails in your images.
After shooting, apply noise reduction either in-camera or during post-processing to clean up any graininess.
Always check your histogram to verify you’re not clipping shadows or highlights. Take test shots at different ISO values to find the sweet spot for your specific camera model.
Manual Focus Techniques
Achieving sharp, pinpoint stars requires mastering manual focus, as autofocus systems typically fail in low-light night sky conditions.
Switch to manual focus and activate your camera’s live view mode to locate the brightest star in the frame. Zoom in digitally for a closer look, then slowly turn the focus ring until the star appears as a tiny, crisp point of light.
Take multiple test shots at slightly different focus positions to confirm you’ve achieved ideal sharpness. If your camera offers focus peaking, use this feature for visual confirmation of sharp stars.
Practice these techniques before your actual shoot to familiarize yourself with your camera’s controls in darkness.
Once you’ve achieved perfect focus, lock it in place to prevent accidental adjustments that can easily occur when shooting in the dark.
Optimal Shutter Speeds
Finding the perfect shutter speed sits at the heart of successful night sky photography, balancing between capturing enough light and preventing unwanted star trails. The Rule of 500 offers a reliable starting point—divide 500 by your lens focal length to determine your maximum shutter speed. For a 24mm lens, that’s about 20 seconds.
If you’re using a crop-sensor camera, remember to factor in the crop multiplier when calculating ideal shutter speeds. For sharp, pinpoint stars, aim for exposures under 15 seconds. Long exposures beyond this threshold will begin to show movement unless that’s your artistic intention.
Test different settings during your shoot and adjust based on your results.
When shooting at high ISO (6400-10,000), carefully balance your shutter speed to control noise while maintaining proper exposure.
Mastering Manual Focus in Low Light Conditions

You’ll need to switch to manual focus when photographing stars since pinpoint accuracy makes the difference between crisp celestial points and fuzzy blobs.
Finding perfect focus demands patience as you’ll want to use your camera’s live view to zoom in on the brightest star and make micro-adjustments until it appears as a sharp point of light.
Your results will improve dramatically once you’ve mastered this critical skill, allowing you to capture the night sky with the clarity and definition it deserves.
Focus Techniques Matter
The difference between a stunning star-filled masterpiece and a blurry mess often comes down to one critical skill: manual focusing in darkness.
When shooting astrophotography, you’ll need to switch your camera settings from autofocus to manual, as AF systems typically struggle in low light conditions.
Use these proven focus techniques to capture crisp night sky images:
- Engage live view mode and locate the brightest star, then use the magnifier tool to zoom in for precise adjustments
- Turn the focus ring slowly until the star appears as a sharp point of light
- Utilize focus peaking if your camera offers this feature to highlight areas of highest contrast
- Review test shots at 100% magnification to verify sharpness before committing to your final exposures
Stars Demand Precision
Manual focus precision represents the cornerstone of successful night sky photography.
You’ll need to switch to manual mode immediately, as autofocus issues plague even professional cameras in darkness—resulting in blurry, unusable star images.
Start by engaging your camera’s live view mode to locate the brightest star, then zoom in using the magnifier tool for precise focus adjustments.
Slowly rotate the focus ring until the star appears as a sharp pinpoint. If your camera offers focus peaking, enable it to highlight in-focus areas.
Take test shots at slightly different focus positions and review them at high magnification before committing to longer exposures.
This methodical approach guarantees your night photography captures crisp, detailed stars rather than disappointing blobs.
With practice, you’ll develop the muscle memory needed for quick, accurate focusing in the field.
The Art of Composition in Astrophotography
Creating stunning astrophotography involves more than just capturing stars and celestial objects; it requires thoughtful composition that balances earthly elements with heavenly wonders.
When framing your night sky images, incorporate foreground elements like trees or rock formations to add depth and context to your cosmic scenes. The rule of thirds works brilliantly in astrophotography—position your Milky Way or moon at key intersections to create visual harmony.
- Scout locations during daylight to identify compelling framing opportunities
- Shoot from low angles to emphasize foreground features against the vast sky
- Try light painting techniques to highlight interesting terrestrial elements
- Experiment with different perspectives to find the perfect balance between land and sky
Capturing Multiple Exposures for Effective Stacking
Successful night sky stacking begins with capturing high-quality source material that gives your software something substantial to work with. For ideal results in night sky photography, maintain consistent camera settings across all exposures—keep your ISO, aperture, and shutter speed unchanged throughout your shooting session.
Apply the 500 rule to determine your maximum shutter speed based on your lens focal length, preventing unwanted star trails while guaranteeing sharp stars for stacking. Capture at least 10-15 exposures to greatly reduce noise and enhance star definition in your final image.
For crisp, stackable star photos, follow the 500 rule and shoot 10-15 exposures minimum to dramatically enhance definition while suppressing noise.
When shooting multiple exposures, verify each frame is properly focused and sharp.
Later, use specialized stacking software or Photoshop with the Lighten blending mode to combine your frames, revealing the brightest stars while minimizing noise and artifacts.
Processing Software Options for Budget Photographers
Many aspiring astrophotographers mistakenly believe they need expensive software to process stunning night sky stacks. The truth is, several powerful free and affordable options can produce professional results without breaking the bank.
Your processing software choices include:
- RawTherapee and Darktable – Free raw processing powerhouses that offer advanced editing capabilities similar to premium programs.
- Sequator and Startrails – Specialized free options designed specifically for star stacking multiple exposures.
- Capture One Express – A free version with essential tools for raw processing and color enhancement.
- Affinity Photo – A one-time purchase alternative to Photoshop with robust layer management for complex stacking projects.
These budget-friendly alternatives provide everything you’ll need to transform your night sky captures into breathtaking cosmic compositions.
Step-by-Step Star Stacking Workflow
Your star stacking journey begins by organizing and pre-processing your images in Lightroom before transferring them to Photoshop for the actual stacking process.
When working with layers in Photoshop, you’ll want to use the Lighten blending mode to showcase star trails while carefully managing digital artifacts with masking techniques.
Save your masterpiece in a high-quality format like TIFF or PSD to preserve all your hard work and maintain the integrity of your night sky photograph.
Processing Star Photos
Once you’ve captured your nighttime images, transforming them into stunning star trails requires a methodical approach to processing.
Start by importing your photos into a dedicated Lightroom folder, where you can edit your images while preserving raw file advantages. Apply global adjustments and use the Sync button to guarantee consistency across all frames before stacking.
- Download star photos to an organized Lightroom folder for efficient workflow
- Make initial edits in Lightroom, avoiding excessive adjustments that might create moiré
- Transfer to Photoshop, select all layers, and change blending mode to “Lighten” to combine the brightest elements
- Save your finished composition as PSD or TIFF to preserve layers, or PSB for larger files
This systematic approach assures your star trails achieve maximum impact while maintaining image quality throughout the stacking process.
Layer Blending Techniques
After capturing your series of night sky images, the real magic happens in Photoshop where proper layer blending transforms individual frames into mesmerizing star trails.
Import your sequence as separate layers, then select all layers and set their blending mode to “Lighten” – this vital technique reveals only the brightest elements from each frame, creating seamless star paths across the night sky.
Toggle layer visibility individually to fine-tune your composition and assess each frame’s contribution.
For light painting elements in your foreground, apply strategic masking: select your light painting layer, use “Select Inverse” to isolate the sky, and create a mask that preserves only the illuminated landscape features.
Save your final image as PSD or TIFF to maintain layer information, or choose PSB format for exceptionally large files.
Managing Digital Artifacts
Three common digital artifacts can sabotage your star stacking results: hot pixels, airplane trails, and satellite streaks.
When toggling layer visibility in your editing process, carefully inspect each frame for these unwanted elements that can disrupt your beautiful star trails.
- Toggle layer visibility to identify frames containing light pollution that needs removal
- Use masking techniques to isolate problem areas without affecting the rest of your image
- Apply the “Select Inverse” function when working with layers that contain both artifacts and desired elements
- Check the final composite thoroughly before flattening to guarantee all digital distractions have been eliminated
For persistent artifacts that appear across multiple frames, consider creating a dedicated mask layer.
This approach preserves the integrity of your star trails while effectively managing the visual noise that could otherwise diminish your final image.
Noise Reduction Techniques for Cleaner Images
While capturing the stunning details of the night sky, you’ll inevitably encounter digital noise that can diminish your final image quality. Employing noise reduction software like Adobe Lightroom or Topaz DeNoise can preserve critical details while minimizing unwanted artifacts.
Stacking exposures is particularly effective—use programs like DeepSkyStacker to average out random noise across multiple frames. Keep your ISO between 1600-3200 for the best balance of sensitivity and noise control.
| Technique | Benefit | Best Practice |
|---|---|---|
| Software Reduction | Preserves details | Use during post-processing |
| Image Stacking | Averages out noise | Maintain consistent settings |
| Lower ISO | Reduces initial noise | Stay within 1600-3200 range |
| Long Exposure NR | Camera-level reduction | Enable for single shots |
| Consistent Conditions | Prevents stacking artifacts | Monitor environmental factors |
Enhancing Details Without Creating Digital Artifacts
Revealing the subtle intricacies of celestial objects requires a delicate balance between detail enhancement and artifact avoidance.
When processing your night sky stacks, always start with high-quality raw images to maximize available data. Apply sharpening with restraint—overdoing it produces halos and emphasizes noise instead of actual details.
- Choose stacking software with robust noise reduction features that intelligently combines exposures.
- Apply sharpening selectively only to areas of interest, preserving smooth gradients in the sky.
- Monitor your work at 100% zoom to catch moiré patterns and unwanted artifacts as they appear.
- Save your finished work in lossless formats like TIFF or PSD to prevent compression degradation.
You’ll achieve considerably cleaner results by focusing on preserving natural detail rather than artificially enhancing it through aggressive post-processing.
Frequently Asked Questions
What Is the 500 Rule in Night Sky Photography?
The 500 rule helps you determine maximum exposure time to avoid star trails. You’ll divide 500 by your lens’s focal length (in mm) to calculate how many seconds you can expose before stars streak.
What Is the 400 500 Rule?
The 400/500 rule helps you determine maximum shutter speed for star photography. Divide 400 or 500 by your lens focal length (mm) to find how many seconds you can expose without creating star trails.
What Shutter Speed to Use for Night Sky?
For night sky photography, use the 500 rule: divide 500 by your lens focal length. With a 24mm lens, you’d need about 20 seconds. For best results, try 6-15 seconds with wide aperture and high ISO.
How to Focus for Night Sky Photography?
Switch to manual focus, use live view to find a bright star, zoom in, and carefully adjust the focus ring until the star appears as a sharp point. Take test shots to verify sharpness.
In Summary
You’re now equipped to capture breathtaking cosmic vistas with stacked exposures. Don’t be discouraged by initial results—each session improves your technique. Experiment with different settings, locations, and processing methods to develop your signature style. Remember, the most stunning astrophotography comes from patience and practice. The universe awaits your unique perspective—so grab your gear and look up!


Leave a Reply