Mountain peaks provide ideal night sky photography conditions with minimal light pollution, thinner air, and stunning foreground elements. You’ll capture crisper images above cloud layers with reduced atmospheric distortion. Higher elevations enhance star visibility and color vibrancy while offering unobstructed 360-degree panoramas. The colder temperatures stabilize air, minimizing image turbulence. Many accessible peaks feature established viewpoints with parking. The combination of elevated vantage points and dramatic features creates the perfect canvas for your astrophotography adventures.
Why Mountain Peaks Offer Perfect Night Sky Photography
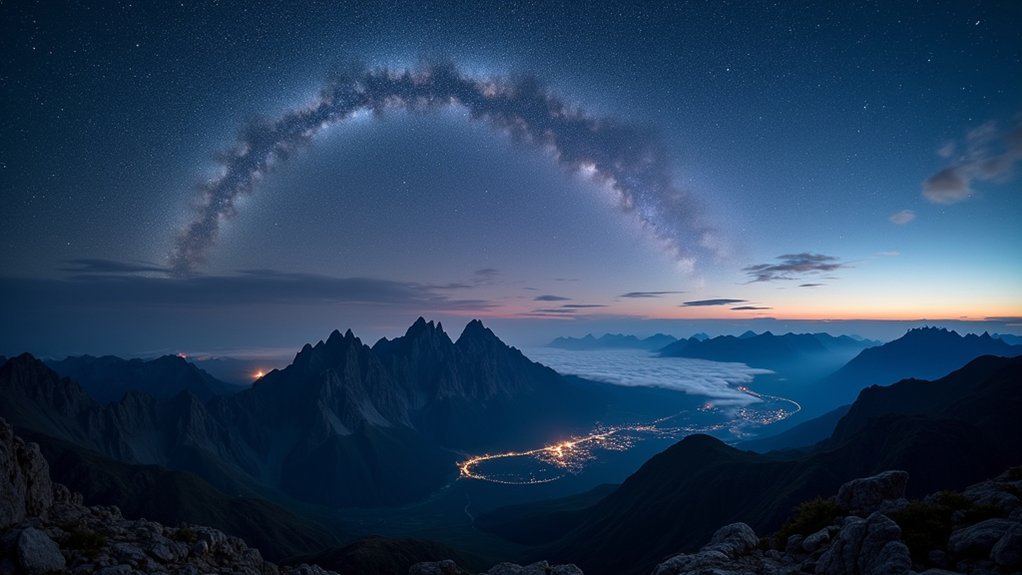
While urban photographers contend with the orange glow of city lights, mountain peaks stand as natural observatories for spectacular night sky photography. At these elevated locations, you’ll escape the light pollution that plagues cities, revealing celestial details often invisible elsewhere.
The thin mountain air dramatically reduces atmospheric distortion, allowing your camera to capture crisper images of stars and planets. Positioned above the cloud line, you’re less likely to have your night photography session ruined by weather, giving you more opportunities to shoot the Milky Way in all its glory.
Mountain terrain provides compelling foreground elements—jagged ridges, alpine lakes, and isolated trees—that transform ordinary astrophotography into extraordinary compositions.
With unobstructed 360-degree views, you’ll capture more expansive night sky panoramas than possible from lowland locations.
Elevation Advantages: Reduced Atmospheric Interference
Because Earth’s atmosphere acts as a natural filter, ascending to higher elevations greatly improves your night photography results. At mountain peaks, you’ll experience considerably less atmospheric interference, allowing your camera to capture celestial objects with remarkable clarity.
The thinner air at high elevations reduces light scattering, enhancing the brightness and detail of stars in your night sky photography. You’ll notice that the colder temperatures stabilize the air, minimizing turbulence that would otherwise blur your images.
When you position yourself above the cloud layer, you’ll gain unobstructed views of the Milky Way and other astronomical features.
The remote nature of these elevated locations also means you’ll escape the light pollution that plagues lower altitudes, resulting in more vibrant star colors and finer details in your photographs.
Finding Dark Sky Locations in Accessible Mountain Ranges
You’ll find darker skies at higher elevations where mountain peaks naturally shield you from city light pollution.
Mountain access roads often lead to established viewpoints that combine convenient parking with minimal light interference, especially in designated dark sky preserves within national parks.
Timing your visit during winter or early spring can provide the clearest night skies, as mountain air contains less moisture and dust during these seasons.
Elevation Reduces Light Pollution
When seeking pristine views of the night sky, altitude becomes your greatest ally against the encroaching glow of civilization. Mountain peaks naturally distance you from urban light pollution, creating ideal conditions for astrophotography. The higher elevation you achieve, the clearer your atmospheric window becomes, revealing celestial details often invisible at lower altitudes.
- As you ascend, the atmosphere thins, reducing light scatter and enhancing star visibility.
- Mountain ranges like the Rockies and Sierra Nevada offer designated dark sky locations perfect for Milky Way photography.
- National parks in mountainous regions actively maintain dark sky preservation initiatives.
- Higher vantage points provide both darker skies and dramatic landscape elements for compelling foreground composition.
This natural isolation from artificial light makes mountain peaks the premier destination for photographers seeking to capture the universe’s full brilliance.
Mountain Access Roads Help
Convenience defines the modern astrophotographer’s approach to mountain landscapes. Mountain access roads eliminate the need for grueling nighttime hikes while still delivering you to prime dark sky locations.
You’ll find designated pullouts and parking areas specifically designed for setting up your equipment safely, letting you focus on capturing stunning night sky photos rather than traversing treacherous terrain.
These well-maintained roads typically wind through mountainous terrain just a short drive from urban centers, making even weeknight shooting sessions practical. As you ascend in elevation, light pollution diminishes dramatically, revealing celestial details impossible to capture in lower areas.
For best results, use planning apps like The Photographer’s Ephemeris to identify exactly where and when to position yourself along these access roads, ensuring you arrive at the perfect location when cosmic conditions align.
Seasonal Timing Matters
Selecting the ideal season dramatically impacts your night sky photography results in mountain environments.
When planning your mountain expeditions for night photography, timing your visit between late spring and early fall will provide you with the clearest skies and best Milky Way visibility. Apps like The Photographer’s Ephemeris can help you pinpoint exactly when and where to position yourself for the perfect shot during these prime seasons.
- Summer months (June-August) offer the most vibrant Milky Way core visibility.
- Late spring provides a balance of manageable temperatures and good celestial views.
- Early fall captures stunning galactic details against cooling mountain landscapes.
- Dark Sky Areas like Rocky Mountain and Yosemite National Parks are best photographed during new moon phases.
Planning Your Trek: Timing Mountain Visits With Celestial Events

Scheduling your mountain trek during a new moon phase will reward you with dramatically darker skies, perfect for capturing the Milky Way’s intricate details without lunar interference.
Time your expedition between May and September when the galactic core rises prominently in the Northern Hemisphere, offering the most photogenic compositions of our galaxy.
For an extra touch of magic, plan your visit to coincide with major meteor showers like the Perseids in August or Geminids in December, when you’ll capture stunning streaks of light across your mountain landscape compositions.
New Moon Expedition Scheduling
To capture the breathtaking majesty of the night sky from mountain peaks, the dark canvas of a new moon provides ideal conditions for your photographic adventure.
You’ll want to schedule your mountain visits specifically around new moon phases when minimal moonlight creates perfect conditions for night sky photography, revealing celestial details that would otherwise remain hidden.
- Check moon rise/set times using apps like Planit! to maximize your shooting windows during darkness
- Plan your trek timing based on hiking duration—remember that reaching locations like Minaret Lake requires starting early to set up before nightfall
- Look for clear nights after sunny days for superior visibility at high altitudes
- Align your expeditions with seasonal events like meteor showers or planetary alignments for unique astronomical captures
Milky Way Season Planning
When planning your mountain treks for Milky Way photography, you’ll need to align your expeditions with the galaxy’s prime visibility season from April through October.
During these months, you’ll experience the best time to capture the luminous cosmic band stretching across dark mountain skies.
Schedule your adventures during new moon phases to prevent moonlight from washing out the stars. Low light conditions are essential for revealing the Milky Way’s intricate details.
Before setting out, check astronomy apps like Planit! to identify peak visibility windows and ideal shooting angles relative to mountain features.
Monitor weather patterns in the days preceding your trip—clear skies following sunny weather create perfect conditions.
Don’t forget to scout locations in daylight to find perfect vantage points with unobstructed horizon views for your night shoot.
Meteor Shower Peak Timing
Beyond the Milky Way’s seasonal appearance, meteor showers offer spectacular opportunities for night sky photography from mountain vantage points.
Planning your mountain treks around specific meteor shower peaks can transform your night photography portfolio. The Perseids in August and Geminids in December are prime events to mark on your calendar.
- Higher elevations provide clearer views with considerably reduced light pollution, making mountain peaks ideal for capturing meteor streaks.
- Schedule your photography sessions between midnight and dawn when meteor activity typically reaches its maximum intensity.
- Check astronomy apps for both meteor shower timing and moon phases—new moons create ideal dark conditions.
- Position your camera toward the shower’s radiant point to capture the greatest number of meteors in your frame.
Essential Topographical Features That Enhance Night Compositions
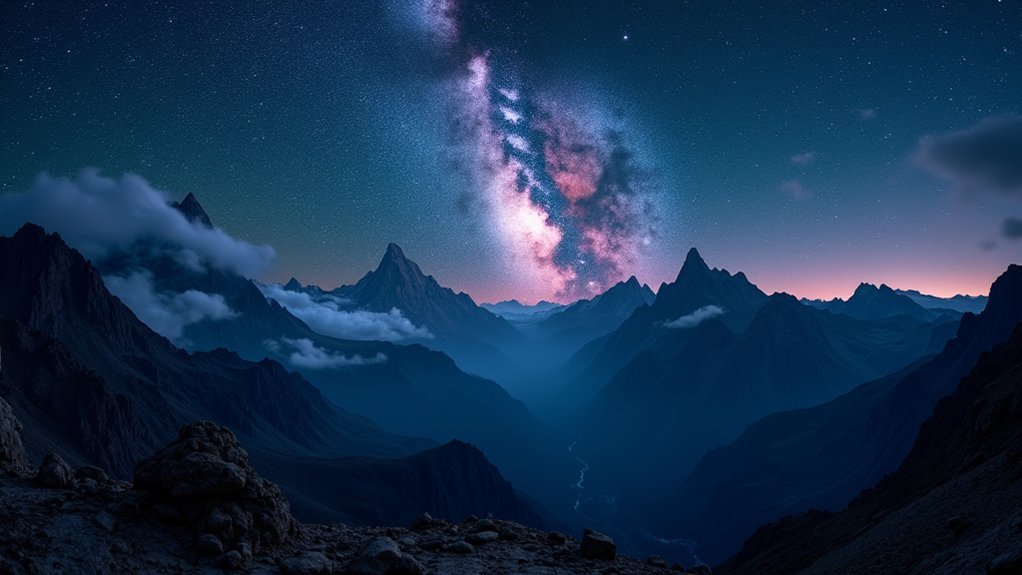
The grandeur of mountain peaks offers night sky photographers distinct advantages that simply can’t be found at lower elevations. When you’re positioned high above the landscape, you’ll benefit from unobstructed views and markedly clearer air, reducing atmospheric distortion that often plagues astrophotography.
Elevated vantage points yield pristine astronomical views, free from the atmospheric interference that hampers valley-based stargazing.
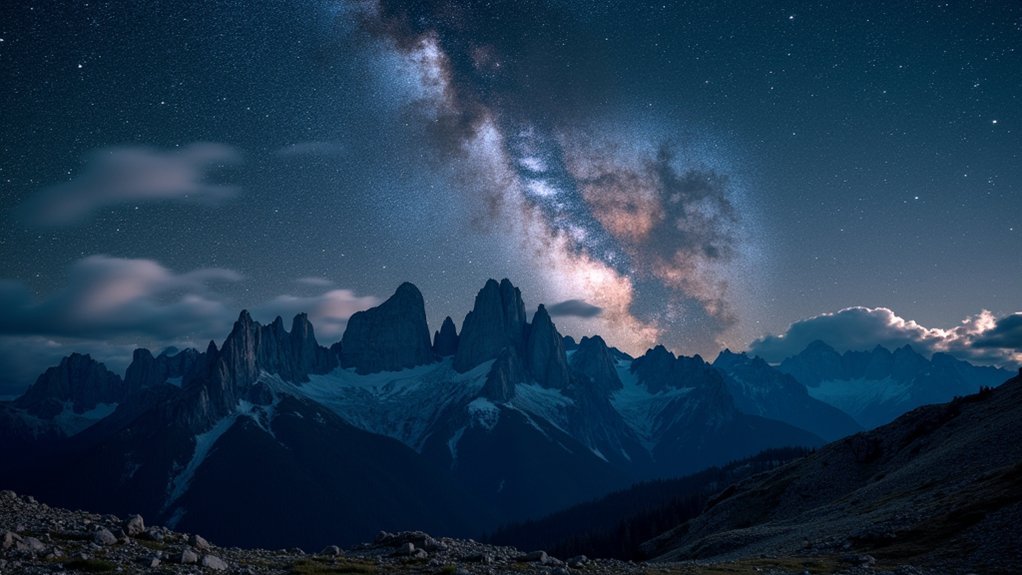
Look for peaks with dramatic topographical features like jagged ridges or angular rock formations that create compelling silhouettes against the star-filled sky. These natural elements provide essential compositional depth and scale.
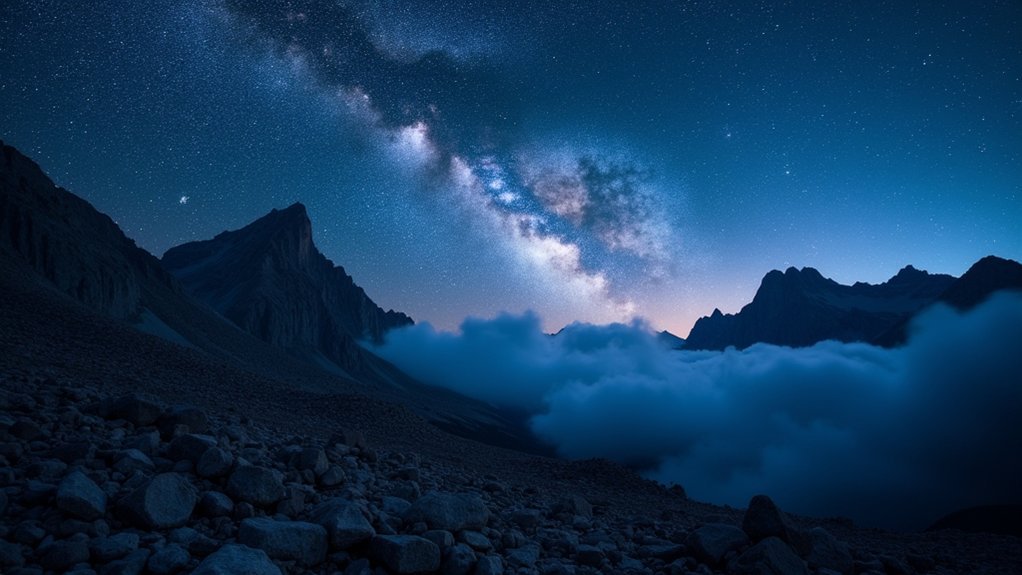
You’ll also want to seek out locations that rise above typical cloud and fog layers, ensuring your celestial subjects remain visible when valleys below are shrouded.
For truly spectacular compositions, position yourself near alpine lakes or other reflective surfaces that mirror the night sky, effectively doubling the visual impact of your astronomical subjects.
Weather Patterns and Predicting Clear Mountain Nights
Successful night sky photography depends largely on your ability to anticipate clear mountain nights through understanding high-altitude weather patterns.
Mountain peaks offer superior stargazing conditions compared to valleys, with more stable atmospheric conditions and reduced cloud cover at elevation. You’ll find clearer skies following high-pressure systems that stabilize the atmosphere and minimize moisture.
- Track mountain-specific weather forecasts using specialized apps for more accurate predictions
- Look for periods after weather fronts pass, when air pressure rises and visibility improves
- Monitor humidity levels—lower humidity at higher elevations typically signals better transparency for astrophotography
- Pay attention to wind patterns, as gentle high-altitude winds often indicate atmospheric stability
The absence of light pollution in remote mountain locations further enhances your ability to capture spectacular night sky photographs when you’ve correctly predicted clear nights.
Low-Cost Transportation and Camping Options for Remote Peaks
Accessing remote mountain peaks for night sky photography doesn’t have to drain your bank account if you explore budget-friendly transportation and camping alternatives. Public buses and shuttles offer affordable access to many mountain areas, while carpooling with fellow photographers splits costs and creates shared experiences.
| Option | Benefit | Approximate Cost |
|---|---|---|
| Public shuttles | Regular schedules to popular areas | $5-15 per trip |
| Carpooling | Split gas expenses, shared gear | $20-40 per person |
| Park buses | Direct access to trailheads | Free-$10 |
Budget-friendly campgrounds in national parks provide ideal overnight bases close to your shooting locations. Pack a lightweight camping setup to minimize what you’ll carry while setting up your remote shutter. Consider visiting during off-peak seasons when fees drop considerably and you’ll encounter fewer crowds disturbing your night photography sessions.
Safety Considerations for Nighttime Mountain Photography
Venturing into mountain darkness for astrophotography requires serious safety planning that many enthusiasts overlook in their excitement to capture stunning celestial images.
Always tell someone your exact location and expected return time before heading out. This simple step could save your life if you encounter trouble in remote areas.
Never venture solo into remote mountain areas without sharing your location and return timeline.
- Scout your shooting location during daylight to identify hazardous terrain features like unstable rocks or steep dropoffs.
- Pack essential safety gear including a headlamp with spare batteries, first aid supplies, and a multi-tool.
- Dress in layers to adapt to rapidly changing weather conditions as mountain temperatures often plummet after sunset.
- Keep your phone fully charged and bring a portable power bank to maintain communication capabilities throughout your shoot.
Maximizing Limited Equipment in High-Altitude Conditions
Mountain heights offer spectacular night sky opportunities, but they also present unique challenges for photographers with minimal gear. The good news is that the naturally reduced light pollution and thinner atmosphere at elevation actually work in your favor, allowing your camera to capture sharper, more vivid celestial images even with basic equipment.
Prioritize fast, wide-angle lenses with low f-stop values to gather maximum light when shooting the night sky.
You’ll want to invest in a carbon fiber tripod that balances stability with weight—crucial when hiking to remote locations. Remember that cold mountain air dramatically reduces battery life, so keep spare batteries warm in inner pockets.
These simple shooting techniques will help you maximize your limited gear while taking advantage of the pristine viewing conditions that make mountain peaks ideal for night photography.
Frequently Asked Questions
How Do You Take Good Mountain Pictures?
To take good mountain pictures, you’ll need a sturdy tripod, wide-angle lens, and proper timing for golden hour light. Frame with interesting foregrounds, use a small aperture for depth, and experiment with different perspectives.
How to Get Good Night Sky Photos?
You’ll get stunning night sky photos with a tripod, fast lens, and manual focus. Set long exposures during new moons, avoid light pollution, and use post-processing to enhance colors and details in your celestial captures.
How to Focus for Night Sky Photography?
To focus for night sky photography, set your lens to infinity, zoom in on the brightest star to confirm sharpness, use manual focus mode, and consider testing during twilight for easier adjustments. Don’t rely on autofocus.
How to Take Long Exposure to the Night Sky?
You’ll need a tripod for stability, manual mode with wide aperture (f/2.8), ISO 800-6400, and exposure times of 20 seconds to minutes. Use the 500 rule to avoid unintended star trails.
In Summary
You’re now equipped to capture the cosmos from Earth’s natural pedestals. As you ascend beyond light pollution and atmospheric density, you’ll discover views that few witness and fewer photograph. Don’t wait for perfect conditions—mountain weather changes rapidly. Pack light, stay safe, and you’ll create images that showcase both terrestrial grandeur and celestial wonder. Your mountaineering astronomy adventure isn’t just about photos; it’s about experiencing our universe’s true magnificence.


Leave a Reply