
Moonset timing dictates the quality of your night sky photos because moonlight drowns out stars and celestial details—even a quarter moon is 100 times brighter than starlight. For ideal results, plan shoots during the 4-5 days before or after a new moon when early moonsets create true darkness. Use apps like TimeAndDate.com or The Photographer’s Ephemeris to predict moonset times accurately. Understanding these lunar cycles opens up a universe of stellar photography opportunities you might otherwise miss.
Why Moonset Timing Controls Your Night Sky Photos
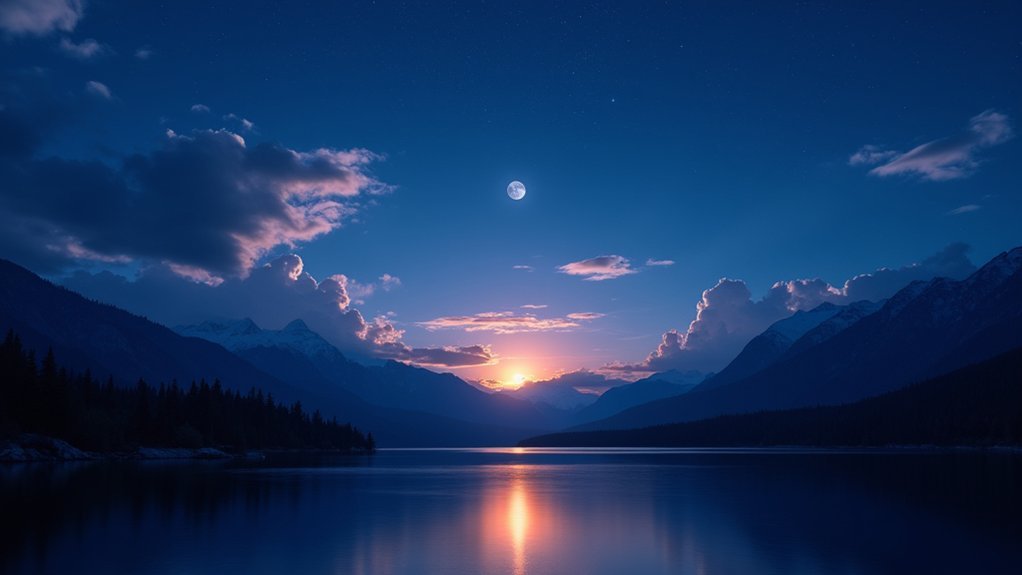
When planning your night sky photography, nothing influences your results more than the moon’s position. The timing of moonset is essential because it determines when true darkness falls, allowing stars to shine without competition.
The moon dictates your night sky photography success – its absence reveals the universe, its presence erases it.
A half-full moon produces light over 100 times brighter than starlight, effectively washing out the delicate celestial details you’re trying to capture.
For best results, schedule your shoots during the 4-5 days before or after a new moon. This strategy maximizes darkness since full moons can obscure stars for about 70% of the year.
Use resources like TimeAndDate.com to track exact moonrise and moonset times, ensuring you’re set up and ready when the moon dips below the horizon. This precise timing will transform your night sky photography, revealing stars and galaxies otherwise invisible to both camera and eye.
The Moon’s Light Impact on Stellar Visibility
Despite its serene beauty, the moon acts as a powerful celestial floodlight that dramatically affects what your camera can capture at night.
Even a quarter moon produces light over 100 times stronger than starlight, effectively washing out the delicate details you’re trying to photograph.
For ideal night photography results, you’ll want to plan your shoots 4-5 days before or after a new moon.
During full moon phases, you’ll find your stellar photography opportunities limited to only about 30% of the year—a significant restriction for dedicated astrophotographers.
Check resources like TimeAndDate.com to track moonrise and moonset times precisely.
Remember that moonlight combines with urban light pollution, so finding truly dark locations becomes essential for capturing the stars’ full brilliance in your images.
Calculating Ideal Moonset Windows for Maximum Darkness
To find the darkest night sky conditions for your astrophotography, you’ll need to track both the moon phase and its setting time.
You’ll achieve ideal darkness by scheduling shoots during the 4-5 day window surrounding a new moon, when moonlight interference is minimal.
For maximum flexibility, use resources like TimeAndDate.com to identify nights when the moon sets early enough to provide several hours of truly dark skies before dawn.
Finding Dark Windows
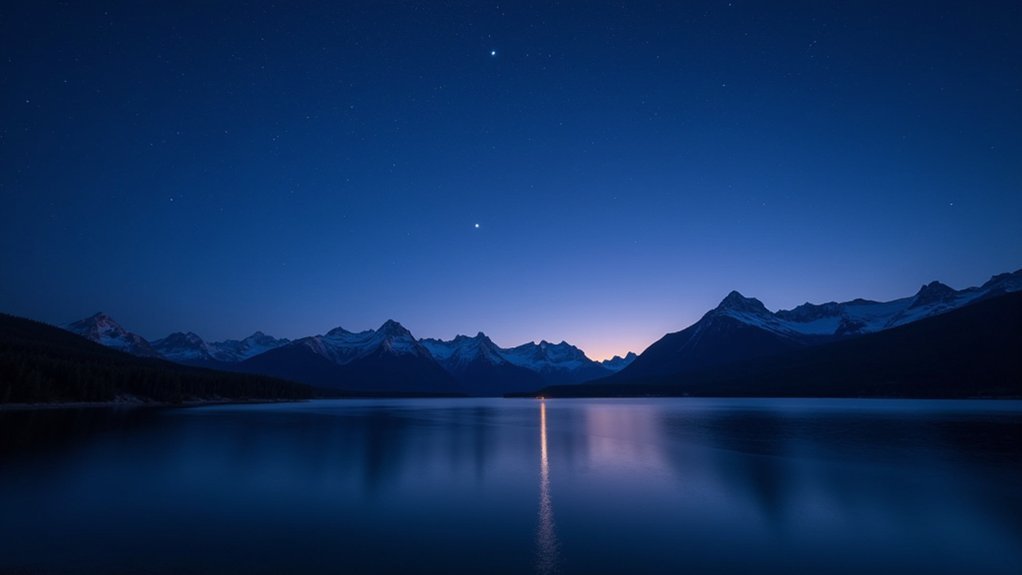
The perfect night sky photograph depends largely on your ability to find and utilize dark windows—those precious hours when the moon’s absence allows stars to shine their brightest.
After moonset, you’ll experience ideal darkness for capturing celestial details with maximum clarity.
Plan your photography sessions within 4-5 days of a new moon when the moon remains below the horizon for longer periods. TimeAndDate.com offers precise moonset schedules to help you pinpoint these prime photography hours.
For best results, position yourself at your shooting location before moonset and prepare to capture images during the shift to complete darkness.
Don’t forget to check Dark Site Finder to identify locations with minimal light pollution, which, when combined with strategic moonset timing, will dramatically enhance your night sky photographs.
Moon Phase Planning
While serious night photographers often track lunar cycles months in advance, understanding moon phases remains essential for anyone hoping to capture stunning starscapes.
For best results, plan your shoots 4-5 days before or after a new moon when darkness reaches its peak. Full moons drastically reduce star visibility, washing out celestial details and effectively eliminating 70% of potential shooting nights throughout the year.
To maximize your opportunities, calculate precise moonrise and moonset times using resources like TimeAndDate.com or The Photographers Ephemeris. The sweet spot often comes shortly after moonset, when the sky achieves maximum darkness without lunar interference.
How Moon Phases Affect Your Photography Calendar
You’ll need to mark your calendar for New Moon shooting windows, which offer the darkest skies roughly 4-5 days before and after the lunar absence.
Planning around lunar stages means avoiding full moons entirely, effectively limiting your prime photography opportunities to about 70% of the year.
Moon-free Milky Way opportunities happen when the moon sets early or rises late, giving you that perfect dark window to capture the galaxy’s breathtaking details.
New Moon Shooting Windows
Planning your night sky photography around new moon phases dramatically increases your chances of capturing stunning celestial images. The ideal window extends about 4-5 days on either side of a new moon, giving you approximately 8-10 days per month for perfect night sky shots.
During these periods, the absence of moonlight allows stars to shine with maximum visibility against the dark canvas. Remember that a quarter moon’s light is over 100 times stronger than starlight, which can wash out the delicate details you’re trying to capture.
To maximize your success, use resources like TimeAndDate.com to check upcoming moon phases and plan your outings accordingly. Knowing exactly when moonrise and moonset occur lets you coordinate with other conditions like weather and location to perfect your astrophotography timing.
Planning Around Lunar Stages
Because the moon’s cycle follows a predictable 29.5-day pattern, establishing a photography calendar around lunar stages becomes essential for capturing pristine night skies.
You’ll want to target the 8-10 day window surrounding each new moon, which provides approximately 70% of the year with ideal shooting conditions.
Avoid planning shoots during full moon periods when moonlight washes out delicate celestial details. Instead, track both moonrise and moonset times to identify those perfect windows when the moon is below the horizon during your planned shooting hours.
Tools like TimeAndDate.com are invaluable for checking upcoming moon phases and planning sessions weeks in advance.
Moon-Free Milky Way Opportunities
While the moon’s illumination creates beautiful landscapes, it markedly limits opportunities for capturing the Milky Way’s delicate details. To photograph the night sky effectively, you’ll need to plan around both the moon’s phases and the Milky Way’s seasonal visibility.
| Season | Milky Way Visibility | Best Moon Phases |
|---|---|---|
| Spring (Mar-May) | Rising visibility, visible late night | 4-5 days before/after new moon |
| Summer (Jun-Aug) | Peak visibility, most of night | New moon periods essential |
| Fall (Sep-Oct) | Decreasing visibility | Plan carefully around moonset times |
Remember that the moon is over 100 times brighter than starlight, restricting your prime Milky Way shooting opportunities to about 30% of the year. Use TimeAndDate.com to track moon phases and Dark Site Finder to locate areas with minimal light pollution.
Tools and Apps for Tracking Moonset Predictions
Successful night sky photography depends on accurate prediction of moonset times, which can make the difference between capturing brilliant stars or washing them out with moonlight.
The Photographers Ephemeris has become an essential tool for serious astrophotographers, providing precise moonset time calculations that help you plan your shooting schedule effectively.
TimeAndDate.com offers thorough moon phase information to complement your planning process. You’ll want to align these moonset predictions with other conditions like clear skies to maximize your chances of success.
For real-time data while in the field, Star Walk 2 delivers up-to-the-minute moon position information.
Balancing Moonset Timing With Milky Way Positioning

You’ll achieve stunning Milky Way photos when you time your shoot precisely as the moon sets and the galaxy core reaches its ideal position in the sky.
This critical timing creates a “darkness shift advantage” where the landscape remains subtly illuminated while the stars emerge in full brilliance.
Timing The Perfect Alignment
Finding the perfect alignment between moonset and the Milky Way requires careful planning and precise timing.
You’ll achieve the best results by shooting 4-5 days around the new moon phase, when moonlight interference is minimal.
To capture both elements harmoniously, understand how moonset times interact with the Milky Way’s visibility window.
Use tools like the Photographers Ephemeris to pinpoint exact moonset times for your location.
Ideally, schedule your shoot when the moon sets just before the Milky Way becomes fully visible after sunset.
Remember that the Milky Way’s position shifts throughout the night, so adjust your timing accordingly.
For ideal conditions, plan your photography sessions between March and October when our galaxy’s core is most prominent in the night sky.
Darkness Transition Advantage
When the moon sinks below the horizon, a magical transformation occurs in the night sky that photographers can leverage for stunning Milky Way captures.
This moonset change creates a window of exceptional darkness that’s perfect for astrophotography.
You’ll find the greatest advantage when timing your shoot to coincide with the moon’s departure just before the Milky Way becomes most visible.
From March to October, plan your session using tools like Photographers Ephemeris to pinpoint exact moonset times for your location.
The brief period following moonset dramatically reduces light pollution, allowing stars to pop against the blackened sky.
Creating Dramatic Foregrounds With Partial Moonlight
Three distinct advantages emerge when photographing landscapes during moonset: natural illumination, depth creation, and atmospheric enhancement.
When you time your shots with the moon in the sky but low on the horizon, you’ll capture foregrounds bathed in gentle, directional light without overwhelming the stars above.
During the 4-5 days around a new moon, the waning crescent provides just enough illumination to reveal texture and dimension in your landscape photography.
This subtle glow adds depth to your composition while preserving the brilliance of celestial elements.
Tools like Photographers Ephemeris can help you plan precisely when this magical balance occurs.
Position yourself to capture the interplay between moonlight-illuminated terrain and star-filled skies—creating compelling contrasts that transform ordinary landscapes into dramatic nocturnal scenes.
Night Sky Photography During Different Lunar Cycles
Understanding the lunar cycle’s profound impact on night sky photography can dramatically improve your results.
You’ll achieve the darkest skies when shooting around the new moon phase, ideally 4-5 days before or after. During these periods, the moon’s minimal presence won’t wash out the stars, allowing celestial elements to shine brilliantly in your images.
- New Moon Phase: The best time for night sky photography with maximum star visibility
- Partial Moon: Plan your shoots according to moonset times to capture dark skies after the moon disappears
- Full Moon Avoidance: Skip these nights (70% of the year) when the moon’s brightness overpowers stars
Checking resources like TimeAndDate.com helps you time your night sky photography sessions perfectly around moonset and favorable lunar phases, ensuring your celestial captures achieve their full potential.
Planning Multi-Hour Shoots Around Moonset Progression
Successful night photographers map out their shooting schedules around moonset progression to maximize star visibility. You’ll want to check resources like TimeAndDate.com or Photographers Ephemeris to determine exact moonset times for your location.
| Time Period | Moon Status | Photography Strategy |
|---|---|---|
| 4-5 Days Pre-New Moon | Minimal Brightness | Prime shooting conditions |
| During Moonset | Moon Disappearing | Position camera toward darkening sky |
| Post-Moonset | Moon Below Horizon | Ideal for Milky Way shots |
| Full Moon Phase | Maximum Brightness | Avoid night sky photography |
| 1-2 Hours Post-Moonset | Complete Darkness | Best long exposure opportunities |
Common Moonset Timing Mistakes to Avoid
Even with careful planning, night photographers frequently stumble into moonset timing mistakes that compromise their shots.
When shooting the night sky, you might miscalculate how quickly darkness conditions change after moonset, missing prime photography windows. Understanding moonrise and moonset cycles prevents wasting hours waiting for perfect conditions that won’t materialize.
Darkness falls rapidly after moonset – be prepared or risk missing your critical shooting window.
- Attempting shoots during full moon phases, which washes out stars for most of the year regardless of when the moon sets
- Failing to check moonrise timing alongside moonset, creating unexpected light interference from opposite horizons
- Neglecting local weather patterns that might create cloud cover during ideal moonset timing periods
Remember to consult TimeAndDate.com for precise timing and plan your shoots 4-5 days before or after new moons for truly spectacular star visibility.
Location-Specific Considerations for Moonset Planning
While moonset timing calculations appear straightforward, each shooting location presents unique variables that dramatically affect your photography results. Your local topography can obstruct the moon’s path, causing actual moonset to differ from predicted times by up to 30 minutes.
| Location Type | Effect on Moonset Timing | Planning Strategy |
|---|---|---|
| Mountains | Earlier visual moonset | Add buffer time |
| Open Plains | True astronomical timing | Follow apps exactly |
| Urban Areas | Light pollution concerns | Scout locations first |
Use tools like Photographers Ephemeris to calculate precise moonset timing for your exact coordinates. Don’t forget to monitor weather forecasts, as cloud cover can render perfect timing calculations useless. The combination of accurate moonset predictions and understanding your location’s specific features will dramatically improve your night sky photography outcomes.
Frequently Asked Questions
What Is the Best Setting for Night Sky Photography?
You’ll get the best night sky photos using f/2.8 aperture, 20-25 second shutter speed (following the Rule of 500), and ISO 3200-4000. Shoot in RAW with manual mode and set white balance between 4000-5500K.
How Do You Photograph the Moonset?
To photograph the moonset, use a tripod and set your camera to 1/125 at f/8 and ISO 200. Plan with apps like Photographers Ephemeris, scout locations with interesting foregrounds, and guarantee clear weather conditions.
How to Get Sharp Star Photos?
To get sharp star photos, you’ll need to use a fast lens (f/2.8), shoot in manual mode with RAW format, keep shutter speeds under 15-30 seconds, and apply the Rule of 500 to prevent star trails.
What Is the Best ISO for Night Sky Photography?
For night sky photography, you’ll get the best results using ISO 3200-4000. Start at ISO 800 and adjust upward as needed. Don’t rely on high ISO alone—combine with wider apertures and appropriate exposure times.
In Summary
By mastering moonset timing, you’ll transform your night photography from mediocre to magnificent. Don’t underestimate how those lunar cycles dictate when stars truly shine. Use the apps and calculations we’ve discussed to plan your shoots strategically around moonset windows. Remember, it’s not just about equipment—it’s about understanding when darkness provides its ideal canvas. Your patience with lunar planning will reward you with breathtaking celestial images.


Leave a Reply