For light pollution photography, set your intervalometer to capture 20-30 RAW exposures with 20-30 second durations in summer and 45-60 seconds in winter. Use a 1-2 second interval between shots to allow sensor cooling. Keep ISO between 800-1600 for balanced sensitivity and noise control. Enable a 2-second self-timer to eliminate vibration. These settings offer the foundation for successful urban astrophotography, with fine-tuning adjustments creating even more spectacular results.
Best Intervalometer Settings For Light Pollution Photography

When shooting in light-polluted areas, your intervalometer settings can make or break your astrophotography results. Set your exposure time between 20 to 90 seconds to capture more light from celestial objects while minimizing ambient light pollution’s impact.
The difference between stunning and subpar astrophotography often comes down to proper intervalometer settings when fighting urban light pollution.
Program a 1-second interval between shots to allow your camera’s sensor to cool down and reduce noise—crucial when using higher ISO settings in light-polluted environments.
Always shoot in RAW format to retain maximum data for effective post-processing.
Enable a 2-second self-timer to eliminate vibration-induced blur, which is particularly problematic in urban settings.
For best results, plan to stack multiple images from your intervalometer sequence during editing, which greatly enhances details and decreases noise, helping overcome the challenging conditions that light pollution creates.
Understanding Light Pollution’s Impact on Astrophotography
Despite our best efforts as photographers, light pollution remains the single most challenging obstacle in modern astrophotography.
When shooting in light polluted environments, the artificial glow from urban areas overwhelms faint celestial details, particularly affecting galaxies more severely than emission nebulae.
You’ll need to adjust your exposure length carefully – longer exposures capture more detail but also more pollution.
Working with higher ISO settings increases sensitivity but introduces noise, creating a delicate balancing act for your intervalometer programming.
Modern duoband filters offer some relief when photographing emission nebulae by isolating specific wavelengths, but they won’t help with broadband targets.
Post-processing becomes essential, with gradient reduction techniques helping to salvage images that might otherwise be lost to the urban glow.
Essential Intervalometer Functions for Urban Night Sky Photography

Although urban photographers face numerous challenges with light pollution, mastering your intervalometer’s key functions can dramatically improve your night sky results.
When shooting in light-polluted environments, you’ll need to configure several critical settings. Set your intervalometer for long exposures between 20 seconds and several minutes to collect adequate light despite urban glow.
Program a short 1-second interval between shots to maintain image continuity while minimizing gaps. This approach is essential for creating clean stacked images in urban night sky photography.
Don’t forget to activate the self-timer function to eliminate vibration-induced blur, particularly important in cities with constant movement.
Finally, configure the shot count to capture at least 20-30 exposures, ensuring you’ll have sufficient frames to effectively combat light pollution through stacking.
Optimal Exposure Times When Shooting Through Light Pollution
The battle against light pollution requires strategic exposure times to capture celestial objects without overwhelming your sensor. When shooting in light-polluted environments, aim for exposure times between 10 to 30 seconds. This range helps prevent excessive noise and minimizes light bleed from artificial sources.
Set your ISO between 800 and 1600 to balance sensitivity with noise control. For even better results, program your intervalometer with shorter 5 to 15-second exposures with 1-second intervals between shots. This approach reduces sensor heat while allowing you to stack multiple images later.
Always shoot in RAW format when working through light pollution—you’ll need the extra data for effective post-processing.
Your intervalometer becomes essential for executing these precise timing sequences without introducing camera shake or operational fatigue.
Calculating Ideal Intervals Between Shots in Bright Urban Areas

When shooting in bright urban environments, carefully calculated intervals between shots become essential for maintaining image quality while combating light pollution.
You’ll want to set your intervalometer between 1-5 seconds in these conditions, allowing your camera to capture sufficient detail without overwhelming each exposure with ambient light.
Consider extending intervals to 5+ seconds when possible—this gives your sensor valuable cooling time between shots, reducing noise especially on warm urban nights.
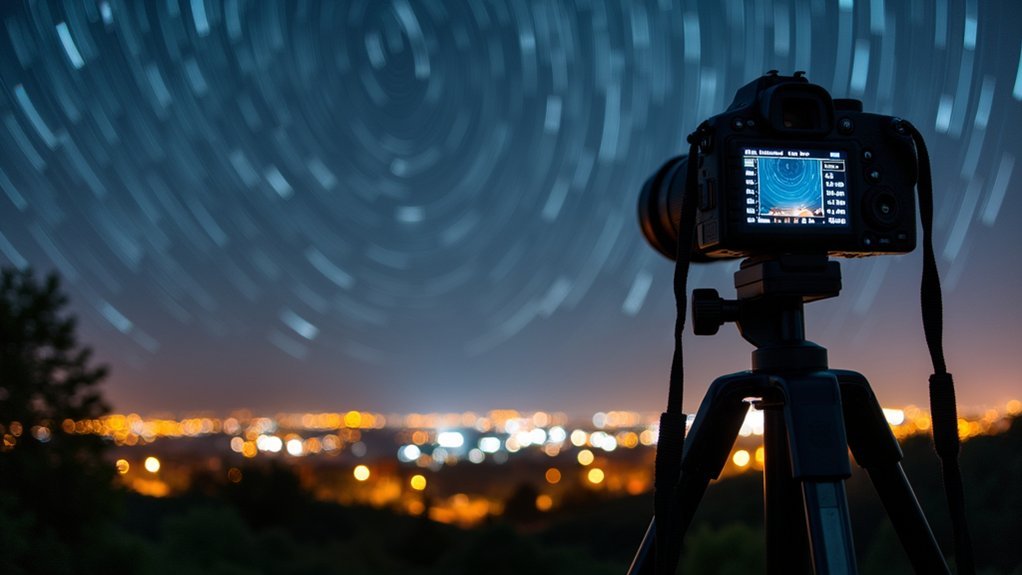
For star trails photography, try longer intervals around 30 seconds to accumulate more starlight despite the light pollution.
Always adjust your intervals based on your aperture and ISO settings. Wider apertures and higher ISO values increase light sensitivity, requiring you to shorten intervals accordingly.
Experiment with your intervalometer’s customizable settings to find the perfect balance for your specific urban location.
Determining Shot Quantities for Effective Image Stacking
You’ll need at least 30 exposures when stacking images for astrophotography in light-polluted areas to achieve a significant improvement in signal-to-noise ratio.
Setting your intervalometer to capture 30-50 frames with 1-second intervals between 20-90 second exposures creates an ideal balance between total acquisition time and final image quality.
The more frames you can reasonably collect, the better your stacked result will be, though returns diminish somewhat after approximately 100 exposures.
Calculating Optimal Exposure Count
Several critical factors determine how many exposures you’ll need for effective image stacking in astrophotography. The amount of time you spend capturing frames directly impacts your final image quality. Your intervalometer to take consistent shots while maintaining proper shutter speed depends on your specific subject and conditions.
- For general light pollution photography, aim for at least 20-30 exposures to greatly improve signal-to-noise ratio.
- When capturing star trails, set longer 4-5 minute exposures with 1-second intervals between frames.
- For Milky Way photography, take 15-20 images at 20 seconds each to balance detail and star trailing.
- Apply the “500 rule” (500÷focal length) to determine maximum exposure time for pinpoint stars.
- Experiment with different quantities (10, 20, 30 frames) to find your ideal balance between processing demands and image quality.
Balancing Quantity With Quality
The ideal balance between shot quantity and image quality often eludes even experienced photographers in astrophotography. When battling light pollution, you’ll need to capture enough frames to effectively stack images without sacrificing detail.
Aim for 20-30 exposures as your baseline, which provides sufficient data to average out noise while enhancing signal. Set your intervalometer for night sessions with minimal gaps—typically 1-second intervals between shots—to guarantee continuous data collection.
Keep individual exposure times between 15-30 seconds to prevent light pollution from overwhelming your images. For Milky Way photography specifically, try stacking 15-20 photos at 20-second exposures, which often yields better results in light-polluted environments.
Remember that your cumulative exposure time impacts final image quality, so experiment with different combinations until you find your sweet spot.
Camera-Specific Intervalometer Settings for Light Pollution

When photographing under light-polluted skies, your intervalometer settings can make the difference between muddy, washed-out images and striking night shots with visible celestial details.
Your camera’s sensitivity to ambient light requires careful configuration to combat urban glow while preserving stellar detail.
- Set exposure times between 30 seconds and 1 minute to minimize light pollution effects
- Choose a lower ISO setting (800-1600) to reduce noise in your long exposure shots
- Program a 1-second interval between frames for smoother stacking workflows
- Configure your intervalometer to capture 20-30 consecutive images for effective stacking
- Enable long exposure noise reduction if your camera offers this feature
These camera-specific adjustments will help you extract maximum detail from light-polluted environments, allowing your astrophotography to reveal celestial features that would otherwise be lost in the urban glow.
Seasonal Adjustments for Light-Polluted Sky Photography
As the seasons change, you’ll need to adapt your intervalometer settings for ideal results in light-polluted environments.
During summer months, opt for faster exposures (20-30 seconds) to compensate for the brighter night skies, while winter calls for longer intervals (60-90 seconds) to take advantage of extended darkness and clearer atmospheric conditions.
Around the equinoxes, you’ll want to adjust your settings to compensate for the shifting brightness levels, typically starting with 45-second exposures and fine-tuning based on your local light pollution intensity.
Summer Fast Exposure Settings
Light pollution presents unique challenges during summer months, requiring strategic intervalometer adjustments to capture impressive night sky images. Your camera settings need careful calibration to combat the combined effect of seasonal light and urban glow during long night shoots.
- Keep exposure times short (15-30 seconds) to prevent washing out celestial details.
- Set ISO between 800-1600 to balance sensitivity against light pollution noise.
- Use apertures of f/2.8-f/4 to gather sufficient light while minimizing pollution effects.
- Program 1-2 second intervals between shots to prevent camera overheating.
- Capture at least 20-30 exposures for effective image stacking and noise reduction.
These settings create the ideal balance for summer astrophotography in light-polluted areas, allowing you to reveal more stars and celestial objects that would otherwise be obscured by ambient light.
Winter Sky Interval Adjustments
Cold winter air creates exceptional opportunities for night sky photography, even in light-polluted environments. The clearer atmospheric conditions allow you to extend your exposure times to 30 seconds up to 2 minutes, capturing more detail through the light pollution veil.
When configuring your intervalometer settings, set shorter intervals between shots (1-2 seconds) to combat the increased sensor noise that cold temperatures produce. Lower your ISO setting to 800-1600 to further reduce noise while maintaining adequate light sensitivity.
For star trails or image stacking techniques, program longer intervals of 5-10 minutes per exposure. This approach helps you effectively blend multiple frames and overcome light pollution’s effects.
Always plan your sessions during the new moon phase when possible—this natural darkness will maximize your ability to capture winter’s brilliant celestial details.
Equinox Brightness Compensation
During equinox periods, the night sky’s brightness fluctuates dramatically, forcing photographers to recalibrate their intervalometer settings for ideal results in light-polluted environments.
You’ll need to adapt your exposure settings to account for seasonal light pollution variations, typically reducing exposures by 10-20% during brighter periods.
- Shorten your exposure times by 10-20% during equinox periods to prevent overexposed images
- Program your intervalometer for shorter intervals between shots, allowing more images for stacking
- Lower your ISO settings to 800-1600 during brighter seasons to minimize noise
- Monitor your histogram closely to guarantee proper exposure as light pollution levels change
- Test different combinations of interval timing and exposure length to find the best balance for your specific location’s light pollution conditions
Balancing Battery Life and Image Quality in Extended Sessions
When starting on lengthy astrophotography sessions, you’ll constantly face the challenge of maximizing both battery life and image quality.
Shooting in RAW format gives you post-processing flexibility without quality loss, making it worth the extra storage space.
Configure your intervalometer wisely—30-second exposures with 1-second intervals strike an excellent balance between capturing sufficient light and preventing camera overheating.
The sweet spot for astrophotography: 30-second exposures with 1-second intervals—perfect for gathering starlight while keeping your camera cool.
Disable in-camera noise reduction as it drains power unnecessarily; you’ll achieve better results handling noise during post-processing anyway.
Always pack 5-6 spare batteries for uninterrupted shooting sessions.
A sturdy tripod complements your setup by allowing longer exposures without camera shake, indirectly preserving battery life by reducing the need for reshoots and frequent adjustments.
Frequently Asked Questions
What Is the 300 Rule in Photography?
The 300 rule helps you avoid star trails in astrophotography by dividing 300 by your lens’s focal length to determine the maximum exposure time in seconds you’ll need for sharp star images.
What Is the 400 Rule in Photography?
The 400 Rule helps you avoid star trails in astrophotography by dividing 400 by your lens focal length. You’ll get the maximum shutter speed in seconds before stars start to streak across your image.
How to Shoot Milky Way in Light Pollution?
You’ll need a fast lens (f/2.8 or wider), ISO 1600-3200, and 20-second exposures. Use multiple shots with an intervalometer for stacking later. Consider using a light pollution filter to reduce artificial light effects.
What Is the Best ISO for Star Trail?
For star trail photography, you’ll want to use ISO 500-800 in dark skies or 1600-3200 in light-polluted areas. Lower settings reduce noise, but you’ll need to balance this with capturing enough star detail.
In Summary
You’ll find light pollution photography requires a careful balance of intervalometer settings. Keep exposure times shorter (15-30 seconds), maintain consistent 2-5 second intervals between shots, and plan for 50-100 images to enable effective stacking. Don’t forget to optimize for your specific camera model and adjust seasonally as needed. With these settings, you’ll capture stunning night skies despite urban light challenges.


Leave a Reply