A DIY star tracker can be built over a weekend using a 28BYJ-48 stepper motor, Arduino Pro Mini, and basic materials. You'll need to create a gear train with a 480:1 ratio, program the Arduino for 15° rotation per hour, and properly align with Polaris for tracking. Mount your camera securely, aim for smooth motion with bearings at contact points, and start with short test exposures. The following guide unpacks everything you need for sharp, trail-free astrophotography.
Understanding Star Tracker Fundamentals
While looking up at the night sky, you might wonder how photographers capture those stunning celestial images without star trails. The answer lies in star trackers—devices designed to counteract Earth's rotation during long-exposure photography.
Star trackers require proper polar alignment, typically using Polaris in the Northern Hemisphere as a reference point. They operate on equatorial coordinates (RA and DEC), which can be converted to altazimuth coordinates for your specific location. Sophisticated star trackers often use 9-axis sensors to calculate precise offsets for heading and pitch when targeting specific stars.
Unlike fixed tripods, these trackers enable exposures lasting several minutes by precisely rotating your camera at the same rate as Earth, but in the opposite direction.
This mechanical compensation notably reduces digital noise while enhancing image quality—letting you capture the cosmos in breathtaking detail without the blur that Earth's constant movement would otherwise create.
Gathering Components and Tools
Before commencing your star tracker build, you'll need to collect all the necessary electronic and mechanical components.
Start with a 28BYJ-48 stepper motor and ULN2003 driver for precise movement control. An Arduino Pro Mini will serve as your controller, paired with a DS3231 RTC for accurate timing.
For power, acquire 18650 LiPo batteries and a TP4056 charger module. Don't forget small pushbuttons for user input and an active piezo beeper for feedback.
On the mechanical side, gather wooden parts, brass tubing for axles, and mounting hardware like bolts and nuts. For the two-axis design, you'll need a second stepper motor to control the altitude rotation while the first handles azimuth.
You'll need drilling tools, soldering equipment, and appropriate adhesives like epoxy. Consider adding counterweights using aluminum rods for better balance.
Building the Motor Drive Assembly
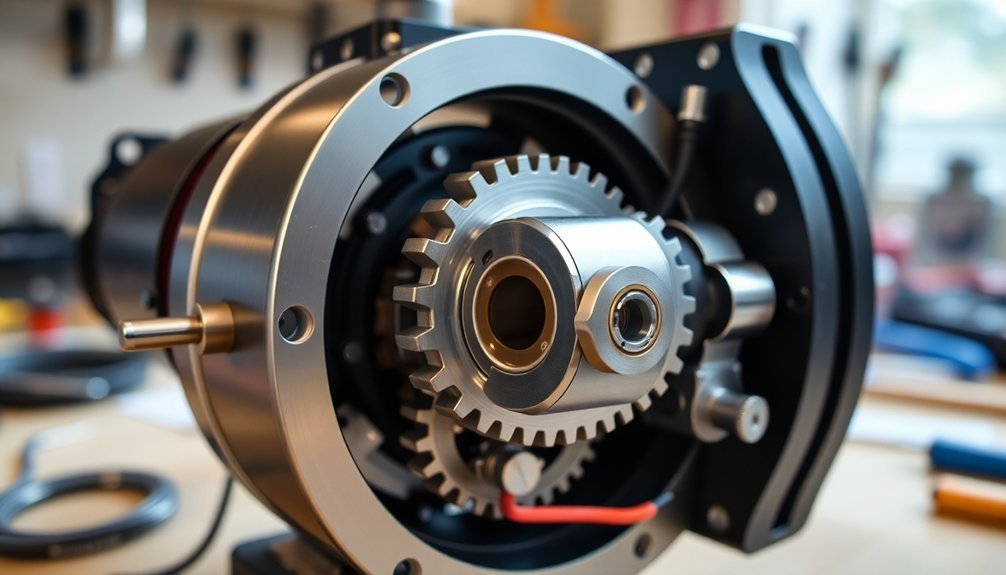
Once you've gathered all components, the motor drive assembly becomes the heart of your star tracker system.
You'll need to select a motor that can maintain precise rotation speeds—DC motors or 28BYJ-48 steppers are popular choices for beginners due to their affordability and control precision.
Your gear train will translate the motor's rotation into the slow, steady movement needed for star tracking. Aim for these critical steps:
- Mount your motor securely to the base frame
- Assemble gear train with proper ratios (aim for 480:1 for ideal tracking)
- Connect Arduino and motor driver circuit following manufacturer pinouts
- Test rotation speed—you'll need approximately 15 degrees per hour for proper star tracking
Avoid setting up gears flush against the boards as this could cause the mechanism to lock up during operation.
Use bearings at contact points to reduce friction and maintain smooth operation.
Calibrating Your Tracker for Precision
After completing the motor assembly, proper calibration becomes vital for achieving accurate tracking results.
You'll need to focus on two key areas: ground calibration before use and ongoing adjustments during operation.
Start by calibrating the motor's azimuth elements using a simple star point simulator or, if available, a multi-star simulator.
You don't need expensive equipment—a parameter model with nonlinear least squares estimation works well for hobby projects.
Address common errors including distortion, focal length, and principal point errors.
Camera calibration is essential—adjust your camera settings and optimize using available algorithms.
For best results, use actual star images which can greatly improve performance.
The coupling of various model parameters often makes parameter decoupling and analysis complicated, so focus on one calibration element at a time.
Remember that precise calibration can enhance your tracker's accuracy dramatically, making the difference between blurry and crystal-clear astrophotography.
Field Setup and First Light Testing
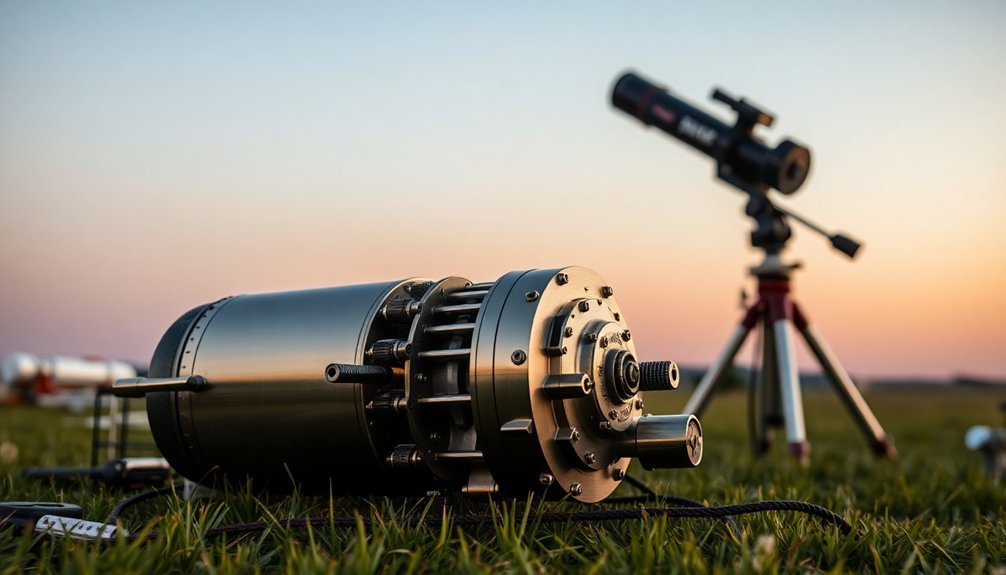
When you're ready to test your newly calibrated star tracker, proper field setup becomes critical to your success.
Choose a location away from light pollution and verify clear weather conditions before heading out. Plan to arrive during twilight so you'll have enough light to set up while still having darkness for imaging.
Timing is everything—twilight gives you setup light, while darkness delivers the celestial canvas you need.
For the best first-light experience:
- Mount your camera securely on the tracker and check that weight is evenly distributed.
- Align your tracker with the North Star using a red dot sight.
- Start with short test exposures (15-30 seconds) to verify tracking accuracy.
- Review your initial images immediately and make alignment adjustments as needed.
Don't be discouraged if your first images need improvement—fine-tuning is part of the process. Comparison tests will show significantly longer exposure times are possible with tracked images, resulting in much clearer star photography than untracked methods.
Frequently Asked Questions
Can I Modify the Tracker for Deep-Sky Astrophotography?
Yes, you can modify your tracker for deep-sky astrophotography. You'll need to improve tracking accuracy, increase payload capacity, add motorization, and implement autoguiding software for the long exposures required for deep-sky imaging.
How Do I Weatherproof My Star Tracker for Outdoor Use?
To weatherproof your star tracker, apply silicone waterproof coatings, use IP65+ rated enclosures with proper drainage, seal all joints, add cable glands, and install surge protectors. Don't forget regular maintenance checks after use.
What's the Maximum Camera Weight My DIY Tracker Can Support?
Your DIY star tracker can typically support 2-5 pounds, depending on your materials and build quality. Test gradually with increasing weight, and make certain your hinge and mounting system can handle the load without flexing.
Can I Automate Meridian Flips With This Basic Setup?
No, you can't automate meridian flips with your basic DIY tracker setup. Basic star trackers lack the software interfaces and motor control systems needed for automated flips. You'll need to reposition manually.
How Do I Troubleshoot Gear Backlash Affecting Tracking Precision?
To troubleshoot gear backlash, check for play by manually moving your mount back and forth. Tighten gear meshes carefully, adjust electronic compensation settings if available, and consider adding weights to pre-load the gears.
In Summary
You've now built your very own star tracker that'll revolutionize your astrophotography. With this simple weekend project, you're ready to capture stunning deep-sky images free from star trails. Don't be discouraged by initial calibration challenges—they're part of the learning curve. Keep practicing and tweaking your setup. Soon you'll be showing off impressive galaxy and nebula shots that'll amaze your friends!


Leave a Reply