To prevent dew ruining your night shots, check weather apps for the temperature-dew point gap, aiming for several degrees difference. Pack anti-fog wraps, heating strips, and silica gel packs as essential gear. Use USB-powered heaters or hand warmers wrapped around your lens. Set up on elevated, paved areas away from water sources and vegetation. Choose windy locations to disperse moisture. Monitor conditions throughout your session. These practical strategies will transform your astro-photography results under challenging conditions.
7 Essential Dew Point Tips For Night Photography

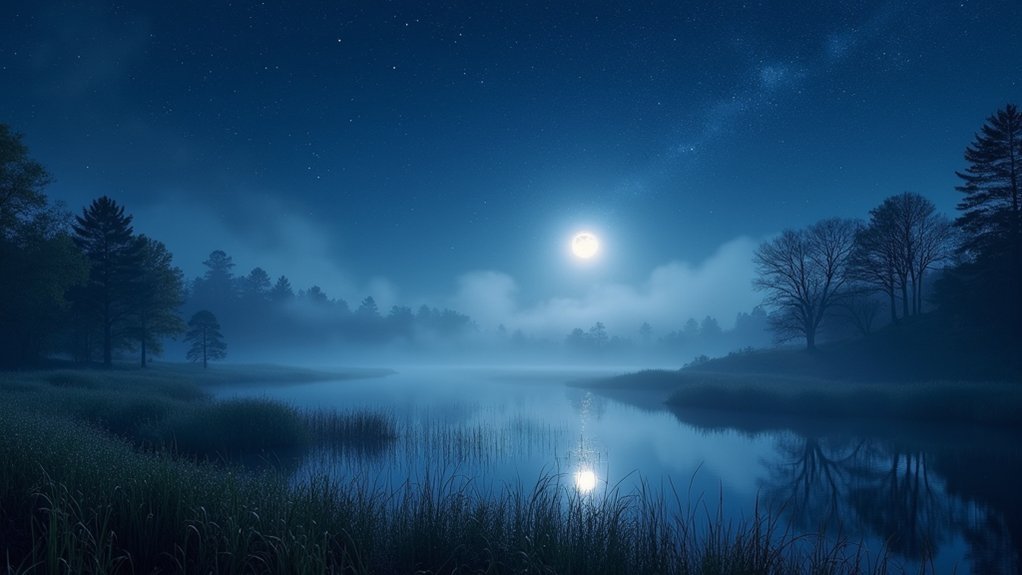
While capturing breathtaking night photographs requires skill and patience, understanding the dew point might be the difference between crystal-clear images and frustratingly foggy ones.
When your lens temperature drops below the surrounding air’s dew point, condensation forms, creating blurry shots that ruin your work.
Before heading out, check local humidity levels and weather resources to predict potential dew formation. Always monitor the ambient temperature against the dew point throughout your session.
In humid conditions, use lens hoods as temporary shields against colder air to delay condensation.
For extended shooting, especially in challenging conditions, hand warmers or heating strips wrapped around your lens can maintain its temperature above the dew point.
This simple solution prevents moisture buildup and keeps your night photography crisp and clear.
Understanding Dew Point Science for Photographers
As temperatures drop during a night shoot, understanding the science behind dew point becomes essential for maintaining image quality. When your lens temperature falls below the dew point of surrounding air, condensation forms on glass surfaces, resulting in foggy, unusable images.
The dew point represents the temperature at which air becomes fully saturated with water vapor. For successful night photography, you’ll need to keep your lens temperature above this critical threshold. The wider the gap between air temperature and dew point, the safer your equipment will be from condensation.
Keep lens temperatures above the dew point to prevent condensation, which can ruin your night shots.
Pay close attention to humidity levels before heading out. Higher humidity means the dew point is closer to the ambient temperature, increasing condensation risk.
Clear, still nights often create perfect conditions for dew formation, so plan accordingly.
How to Monitor Weather Conditions Before Your Shoot

Properly monitoring weather conditions before your night photography session can mean the difference between capturing stunning star trails and spending hours fighting condensation.
Check local meteorological websites for the current temperature and dew point—a smaller gap between these values signals higher dew risk.
The Clear Outside app provides real-time data specific to your observing location, allowing you to assess conditions precisely where you’ll be shooting.
Watch humidity levels closely, as high humidity combined with cooling temperatures creates the perfect environment for lens condensation.
Track weather forecasts for several days before your shoot, noting any predicted temperature drops that might trigger dew formation.
Aim for nights with at least a few degrees separation between temperature and dew point to keep your equipment dry and your night photography session productive.
Essential Gear for Combating Lens Condensation
When battling lens condensation during night photography, you’ll need reliable anti-fog solutions like specialized lens wraps that repel moisture while maintaining optical clarity.
Battery-powered heating strips offer precise temperature control and can be attached directly to your lens barrel for continuous protection throughout your shooting session.
Don’t forget to pack silica gel packs as a passive defense against humidity, as they effectively absorb moisture in your camera bag and can be placed near vulnerable equipment during breaks.
Anti-Fog Lens Wraps
The battle against lens condensation often determines whether your night photography session succeeds or fails.
Anti-fog lens wraps provide an effective defense by maintaining your lens temperature above the dew point, preventing moisture in humid air from condensing on glass surfaces.
These insulating wraps keep your lens warm while maintaining clear visibility for shooting.
For maximum effectiveness in high-humidity conditions, consider these practical tips:
- Secure the wrap snugly around your lens barrel to trap heat effectively
- Insert hand warmers into designated pockets for additional heating power
- Apply the wrap before condensation forms – prevention beats remediation
- Choose wraps with adjustable fasteners for different lens diameters
Battery-Powered Heating Strips
Battery-powered heating strips represent the next evolution in dew prevention technology for night photography enthusiasts.
These specialized devices provide consistent warmth directly to your lens, maintaining its temperature above the dew point to prevent condensation during long exposure sessions.
Most heating strips feature USB power connectivity, allowing you to connect them to portable power banks for extended shooting without needing wall outlets.
Unlike passive solutions, these strips deliver controlled heat precisely where needed, giving you significant advantages during challenging night photography conditions.
You’ll appreciate the adjustable heat settings that let you fine-tune temperature based on environmental conditions.
Though they require minimal setup and a power source, modern battery-powered heating strips have become more affordable and user-friendly, making them a worthwhile investment for serious night photographers seeking reliable dew prevention.
Silica Gel Packs
Among the simplest yet most effective dew prevention solutions, silica gel packs offer night photographers reliable protection against lens condensation.
These powerful desiccants work silently to absorb excess moisture around your gear, creating a low-humidity microenvironment that keeps your lenses clear throughout your session.
To maximize their effectiveness:
- Place several packs strategically in your camera bag and lens cases to create moisture barriers
- Rotate them regularly during high-humidity shoots to maintain ideal dew prevention
- Rejuvenate used packs by heating them in an oven, making them cost-effective for repeated use
- Always carry extras when shooting in particularly damp conditions to swap out as needed
Don’t let condensation ruin your night photography—these humble packets might be your most valuable accessory.
DIY Lens Warming Solutions on a Budget
While expensive commercial lens heaters dominate the market, you’ll find several budget-friendly DIY solutions that effectively prevent condensation during night photography.
Hand warmers offer exceptional value—simply wrap them around your lens or lens hood and secure with an elastic band. Position them close to the front element for maximum effectiveness in cold conditions.
For extended sessions, create a custom insulation system using beer cozies or insulated cloth to hold your hand warmers, prolonging their heat output.
When you’re below the dew point, consider using a small battery-powered fan to keep air circulating around your lens, reducing moisture buildup.
Don’t forget the simplest trick: when swapping lenses, store your unused equipment in warm pockets to maintain temperature and prevent condensation when you reconnect.
Strategic Setup Locations to Minimize Dew Formation

Choosing the right location for your night photography setup can greatly reduce dew problems before they begin. Your positioning strategy is just as important as your equipment when battling moisture issues during nighttime shoots.
- Seek elevated or paved setup areas instead of grass or dirt to minimize ground moisture contact with your photography gear.
- Avoid water-adjacent locations where higher humidity levels raise the dew point and increase condensation risk.
- Choose windy areas where moving air helps disperse moisture and maintains temperature differentials between your lens and surrounding air.
- Minimize vegetation exposure since plants release moisture that elevates local humidity and dew points.
Remember that microclimates matter—small differences in elevation or light exposure can greatly impact dew formation, so scout your location carefully before committing to your final setup position.
Real-Time Dew Prevention Techniques During Long Exposures
Even with strategic location selection, you’ll need active techniques to combat dew during actual shooting sessions. When capturing star trails or deep-sky objects, lens condensation can ruin hours of exposure time.
| Technique | Application |
|---|---|
| USB-powered dew heaters | Wrap around lens to maintain temperature above dew point |
| Chemical hand warmers | Secure to lens hood with elastic bands |
| Small circulation fan | Position nearby to reduce humidity around equipment |
| Temperature monitoring | Check weather apps regularly for dew point changes |
| Pre-warming spare lenses | Keep in jacket pocket before swapping during night sky photography |
Monitor the ambient temperature throughout your session, especially when conditions change. The difference between lens temperature and dew point is critical—keeping optics just a few degrees warmer prevents condensation formation and guarantees crisp, clear night photography results.
Frequently Asked Questions
How to Stop Condensation on Camera Lens at Night?
To stop condensation on your camera lens at night, use a lens heater powered by a USB bank, wrap hand warmers around your lens, or add a lens hood to shield it from cold air.
What F Stop Is Good for Night Photography?
F/2.8 to f/4 works best for night photography. You’ll want wider apertures to allow maximum light in low conditions. This helps you achieve faster shutter speeds while maintaining quality with ISO 1600-6400.
What Are the Best Settings for Night Photography?
For night photography, you’ll want to use f/2.8-f/4 aperture, shutter speeds following the 500 rule, ISO 1600-6400, and manual focus. These settings maximize light capture while minimizing blur and noise in your images.
What ISO Should I Use for Night Photography?
Use ISO 1600-3200 as your starting point for night photography. You’ll need to experiment based on your camera’s capabilities. Try lower (800) for less noise, or higher (6400) when capturing fainter celestial objects.
In Summary
Don’t let dew point challenges ruin your night photography adventures. By understanding the science, monitoring conditions, and preparing with the right gear, you’ll capture stunning night images without condensation issues. Remember, prevention is easier than fixing fogged lenses in the field. Apply these seven tips consistently, and you’ll soon master shooting in humid conditions, keeping your glass clear and your compositions crisp throughout those magical nighttime shoots.


Leave a Reply