
You can capture stunning night sky photos without a telescope using just a DSLR camera, tripod, and wide-angle lens. Try shooting star trails, the Milky Way, lunar phases, constellations, meteors, silhouettes against starry backgrounds, light painting with stars, the Moon rising, foreground-framed stars, and star reflections on water. Set your camera to manual mode with high ISO, wide aperture, and appropriate shutter speed. These accessible techniques open up an entire universe of photographic possibilities.
Essential Equipment for Budget Star Photography
While expensive telescopes might seem necessary for astrophotography, you can capture stunning night sky images with just a few affordable pieces of equipment.
An entry-level DSLR camera like the Canon 1300D or Sony Alpha 6300 offers the manual controls you’ll need for night photography.
A sturdy tripod is non-negotiable—consider the Manfrotto 190 series to eliminate vibrations during long exposure times.
Pair your camera with a fast wide-angle lens (f/2.8 or lower) to gather more light from celestial objects.
Don’t forget a remote shutter release or use your camera’s self-timer to prevent camera shake.
For more advanced shots, an intervalometer will automate multiple exposures for star trails and time-lapses without requiring you to stand by your camera all night.
Finding Dark Sky Locations Near You
Where you shoot matters just as much as your equipment when capturing night sky photos.
Start by checking light pollution maps like the Dark Sky Finder to identify areas with minimal artificial illumination near your home.
Local parks and nature reserves away from city lights often provide excellent vantage points for astrophotography.
Escape the urban glow at nearby parks and reserves for truly spectacular night sky captures.
Don’t overlook rural areas, which typically offer clearer viewing conditions than urban settings.
Connect with fellow enthusiasts through astronomy forums and social media groups to discover hidden gems for stargazing in your region.
These communities frequently share their favorite shooting locations.
Plan your outings during new moon phases when stars appear brightest against the dark sky.
Finally, leverage astronomy apps to track celestial events and find ideal shooting times for specific night sky phenomena.
Camera Settings for Capturing Celestial Objects
Setting your camera correctly will make or break your night sky photography, starting with finding the sweet spot between ISO sensitivity and exposure time to capture celestial objects without excessive noise.
You’ll need to master manual focus techniques that produce pinpoint stars rather than fuzzy blobs, which often means using Live View with digital zoom to achieve perfect clarity.
Shooting in RAW format gives you significant advantages during post-processing, allowing you to extract more detail from shadows and adjust white balance without degrading image quality.
ISO and Exposure Balance
Because the night sky presents unique challenges for photographers, mastering ISO and exposure settings becomes essential for capturing celestial objects without specialized equipment. Set your ISO between 400-800 to balance sensitivity with noise control in your DSLR. For exposure time, apply the 500 Rule to prevent star trails—divide 500 by your focal length for maximum seconds.
| ISO Setting | Benefit | Best For |
|---|---|---|
| 400 | Lower noise | Darker skies |
| 600 | Balanced | General use |
| 800 | Higher sensitivity | Light pollution |
For wide-field shots at 24-50mm, experiment with long exposures up to 5 minutes to gather more light. Always shoot RAW for post-processing flexibility, enabling effective noise reduction while preserving detail. Remember to slightly stop down your aperture from maximum to enhance sharpness while still collecting sufficient light.
Focus for Pinpoint Stars
Achieving razor-sharp stars in your night photography requires mastering manual focus techniques since autofocus systems typically fail in the darkness of night.
With your DSLR or mirrorless camera, switch to manual focus mode and use digital zoom on your camera’s live view to fine-tune focus on the brightest star you can find.
Set a wide aperture (f/2.8-3.2) to collect maximum light while maintaining sharpness.
Calculate your exposure time using the 500 Rule: divide 500 by your lens’s focal length to determine maximum seconds before star trails appear. Start with ISO 400-800 for a good balance between sensitivity and noise.
Monitor your results after each shot—if stars appear as small dots rather than streaks, you’ve achieved proper focus.
Remember that even slight vibrations can blur your carefully focused stars, so use a sturdy tripod.
Raw Format Advantages
With your stars now perfectly in focus, the file format you choose becomes your next powerful ally in night sky photography. Shooting in raw format gives you remarkable flexibility during post-processing, allowing you to adjust exposure, contrast, and color balance without degrading image quality.
Unlike JPEGs, raw files preserve considerably more detail and dynamic range—crucial when capturing the subtle brightness variations of celestial objects in the night sky. This format excels at reducing noise during the long exposures typically needed at higher ISO settings.
Always set your camera to manual mode when shooting raw to maintain consistent settings across your images.
While raw files require dedicated software for processing, mastering these tools is worth the effort. Your final night sky images will showcase dramatically improved detail and color depth.
Star Trails Technique With Basic DSLR
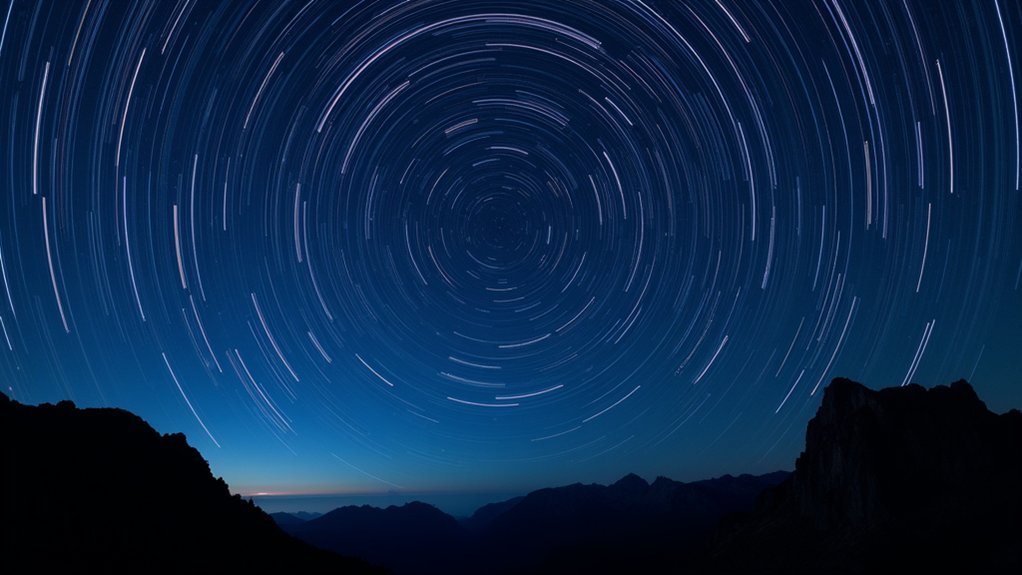
The magic of star trails photography lies within reach of anyone who owns a basic DSLR camera. Set your camera to manual mode with a wide aperture (f/2.8) and high ISO (1600-3200) to capture enough light.
For best results, aim your lens toward the celestial pole—north in the Northern Hemisphere or south in the Southern Hemisphere—to create circular star trails. Use the rule of 500 (divide 500 by your lens focal length) to determine maximum exposure time before stars begin to streak.
An intervalometer lets you press the shutter button once to capture multiple 15-60 second exposures automatically.
Include interesting foreground elements like trees or buildings to add depth to your composition. This technique transforms ordinary nightscapes into stunning visual records of Earth’s rotation beneath the stars.
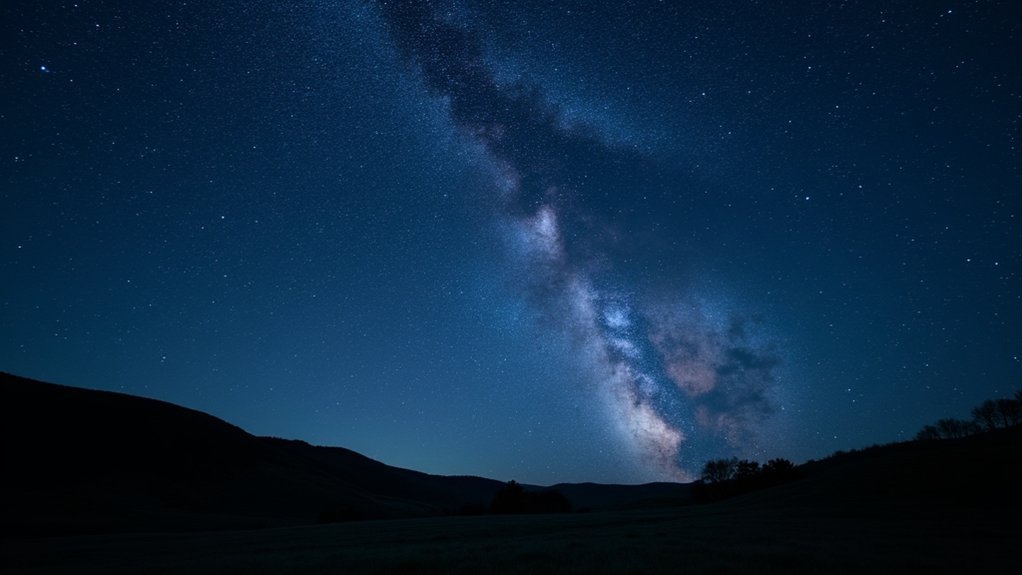
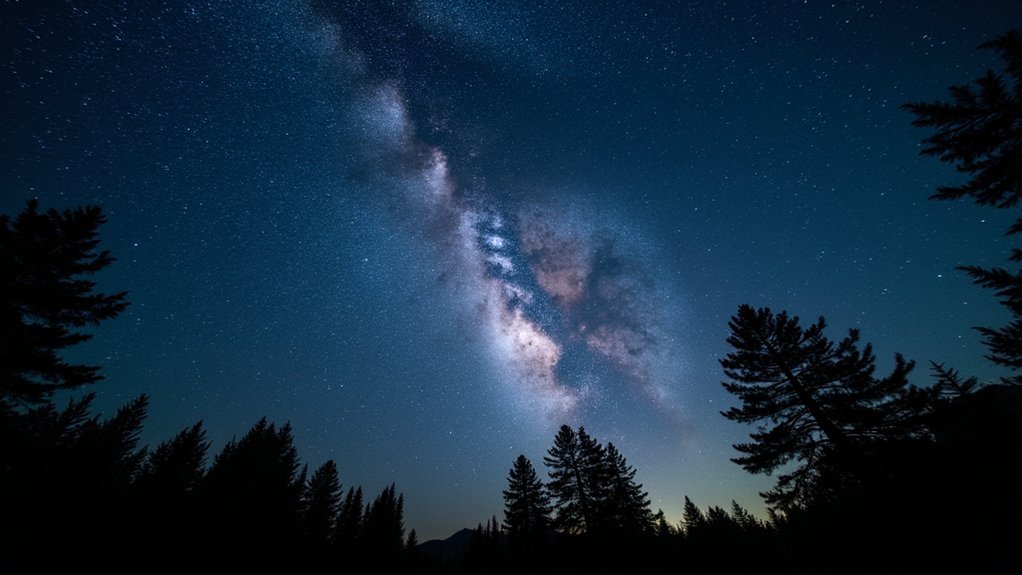
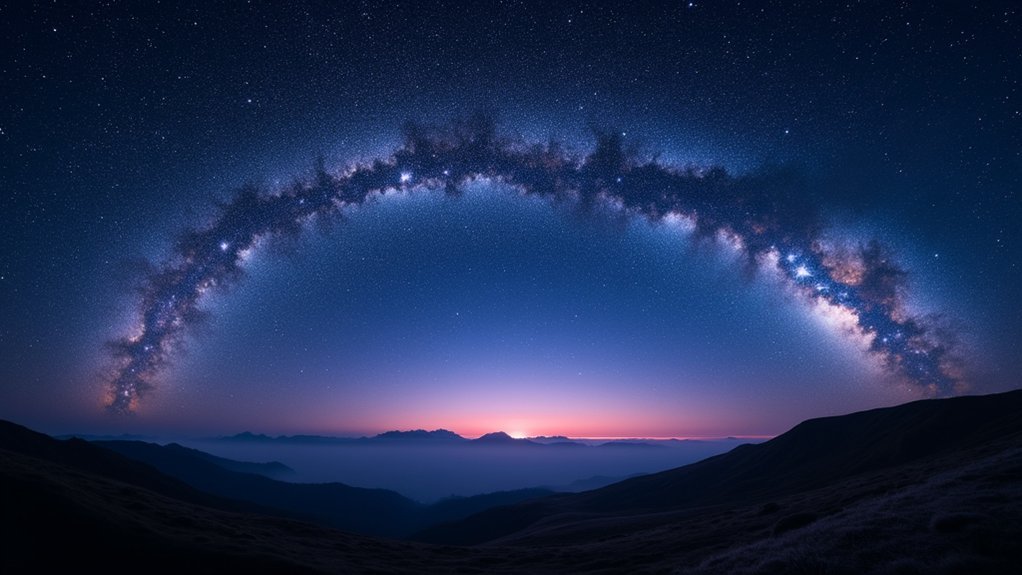
Milky Way Photography on a Budget
Spectacular Milky Way photos don’t require expensive equipment or professional training. With a basic DSLR or mirrorless camera and wide-angle lens (14-24mm), you’re ready for budget Astrophotography. Choose lenses with fast apertures (f/2.8 or wider) to capture more light from the night sky.
Escape light pollution by heading to remote locations or high altitudes where the Milky Way appears most vibrant. Set your ISO between 1600-3200 and keep exposure time between 15-30 seconds to prevent star trails while maximizing detail.
A sturdy tripod is essential for sharp images during long exposures. Use a remote shutter or self-timer to eliminate camera shake.
After shooting, enhance your Milky Way photos with software like Lightroom or free alternatives like GIMP to bring out details in your celestial captures.
Meteor Shower Shooting Guide
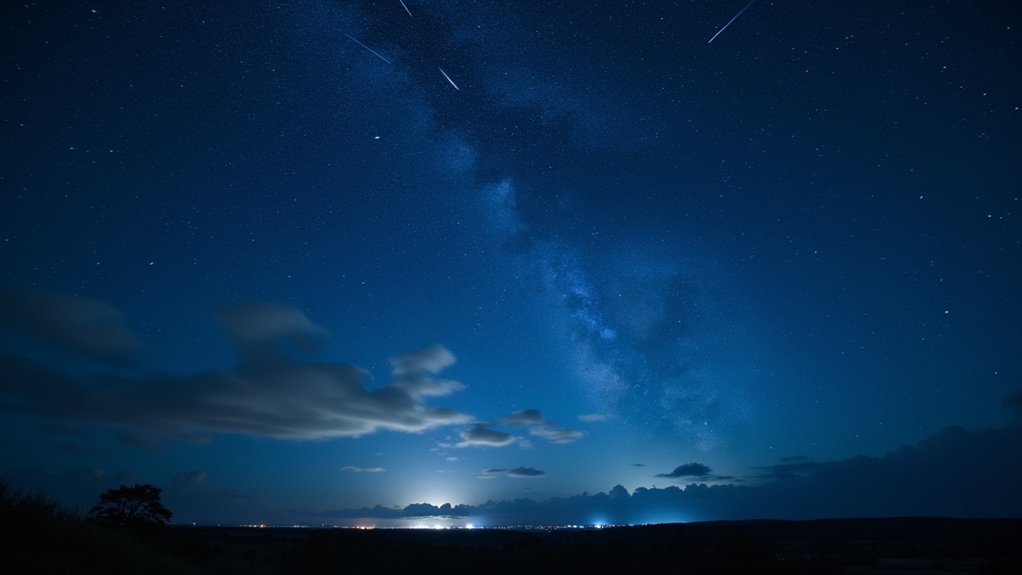
Capturing breathtaking meteor showers depends largely on finding the darkest possible location away from city lights. The further you get from light pollution, the more meteors you’ll see and photograph.
Use a wide-angle lens (14-24mm) with a fast aperture to maximize your field of view and light gathering ability.
To get the best results:
- Set your camera to manual mode with ISO 800-3200 and exposure times between 10-30 seconds
- Mount your camera on a sturdy tripod and use a remote shutter or self-timer to prevent vibrations
- Plan your shoot for after midnight when meteor activity typically peaks
Don’t forget to check meteor shower forecasts before heading out. The right timing and location will dramatically increase your chances of capturing those fleeting streaks across the night sky.
Moon Phase Photography Without Telescopes
You’ll capture the Moon’s dramatic surface changes throughout its phases using just a camera with a telephoto lens and proper manual settings.
For the clearest shots of craters and mountains, try photographing during the first or last quarter when shadows create natural contrast across the lunar landscape.
Remember to keep your ISO low, shutter speed fast, and camera steady on a tripod to turn ordinary moonlight into extraordinary photographs that reveal surprising detail without telescope assistance.
Capturing Lunar Changes
The Moon transforms dramatically throughout its 29.5-day cycle, offering photographers endless opportunities to document its changing face without specialized equipment.
You’ll need a camera lens in the 200-300mm range to reveal detailed craters and maria. Set your camera to ISO 100-400 with aperture between f/8-f/11, and adjust shutter speeds from 1/125 to 1/1000 seconds to prevent overexposure.
For the clearest shots:
- Use manual focus instead of autofocus, which often struggles in night conditions.
- Mount your camera on a tripod to eliminate movement blur.
- Photograph different phases (crescent, quarter, gibbous) to capture varying shadows and textures.
Telescope-free Moonlight Tricks
While lunar features fascinate photographers, there’s a world of creative possibilities in capturing the moon’s light itself without telescopes. Your DSLR or smartphone mounted on a sturdy tripod creates the foundation for stunning moonlight photography.
Control your exposure time using the Rule of 500—with a 55mm focal length, limit exposures to about 9 seconds to prevent motion blur.
Switch to manual mode, select a low ISO (100-400), and adjust your aperture to f/2.8-f/4 for ideal detail without overexposure.
For the most dramatic shadows and surface details, target crescent or half-moon phases rather than the full moon.
Remember to use a remote shutter release or your camera’s self-timer to eliminate vibrations that could ruin your shot’s clarity during these longer exposures.
Capturing Constellations With Wide-Angle Lenses
Capturing the vast beauty of constellations requires specific equipment and techniques that any amateur astrophotographer can master.
You’ll need a wide-angle lens (24-50mm focal length) with an aperture as wide open as possible—ideally f/2.8 or wider—to gather maximum light when shooting constellation Orion or other stellar patterns.
Set your camera to manual mode and determine your exposure time using the 500 Rule. For example, a 24mm lens allows approximately 20 seconds before stars begin to trail. Focus manually on a bright star using live view zoom for perfect sharpness.
For best results:
- Shoot in RAW format to retain detail for post-processing
- Take multiple exposures of the same constellation for stacking later
- Use the widest aperture possible to capture more stars and nebulosity
Nightscape Composition Tips and Tricks
Finding the perfect spot for foreground elements like silhouetted trees or rock formations will transform your night sky images from plain star fields into compelling visual stories.
You’ll need to balance artificial lighting carefully, using minimal flashlight painting to highlight landscape features without washing out celestial details.
Consider taking multiple exposures at different settings, allowing you to blend a properly exposed foreground with a crisp, detailed sky in post-processing.
Foreground Element Placement
The difference between ordinary night sky photos and striking nightscapes often comes down to thoughtful foreground element placement. When composing your shot, utilize the rule of thirds by positioning the horizon at either the lower or upper third of your frame to create visual balance and draw attention to either the landscape or the stars above.
Choose well-lit foreground elements that add scale and perspective to your composition. Trees, mountains, or buildings create depth and enhance the storytelling aspect of your nightscape, contrasting beautifully against the vastness of the night sky.
- Position leading lines like paths, rivers, or fences to guide the viewer’s eye from the foreground into the starry background.
- Light your foreground using ambient light, flashlights, or light painting techniques.
- Select elements that complement rather than compete with the night sky.
Light Balance Techniques
While foreground elements establish the foundation of your nightscape composition, mastering light balance techniques will elevate your images from merely visible to truly breathtaking.
Start with exposure time—aim for 20-30 seconds with a wide aperture to capture stellar details without creating star trails.
You’ll need to combat light pollution by seeking darker locations and stacking multiple exposures to preserve both sky and landscape details.
Experiment with your camera’s white balance settings to achieve natural color tones that minimize artificial light’s orange cast.
For truly dynamic composition, apply the rule of thirds by positioning your horizon along the lower grid line, allowing the vast night sky to dominate your frame.
This approach creates visual balance between your carefully chosen foreground elements and the celestial display above, resulting in nightscapes with professional depth and drama.
Post-Processing Night Sky Images for Maximum Impact
Once you’ve captured your raw night sky images, post-processing becomes the magical tool that transforms good photographs into breathtaking masterpieces.
Software like Adobe Lightroom or Photoshop allows you to enhance contrast, brightness, and color balance, revealing details invisible in the original capture.
Post-processing software reveals the hidden universe waiting within your raw captures, transforming invisible details into visual poetry.
Image stacking is particularly powerful for night photography, combining multiple exposures to reduce noise while preserving details.
Try these essential techniques:
- Use curves and levels adjustments to bring out hidden features and improve tonal range.
- Apply targeted sharpening to emphasize stars and celestial objects without amplifying noise.
- Experiment with creative cropping to strengthen composition and direct attention to key elements.
Don’t be afraid to experiment with your photo editing workflow—sometimes unexpected adjustments create the most striking images of the night sky.
Frequently Asked Questions
Can You Do Astrophotography Without a Telescope?
Yes, you can do astrophotography without a telescope! You’ll need a DSLR or mirrorless camera, wide-angle lens, sturdy tripod, and manual focusing skills to capture stunning night sky images effectively.
What Is the 500 Rule in Night Sky Photography?
The 500 rule helps you avoid star trails in astrophotography. You’ll divide 500 by your lens’s focal length to determine the maximum exposure time in seconds before stars appear to move.
What Are the Basic Night Sky Photography Settings?
For basic night sky photography, you’ll need: manual mode, wide aperture (f/2.8-f/4), ISO 400-800, shutter speed following the 500 rule, and manual focus on stars using Live View with digital zoom.
Can You Do Astrophotography With a Phone?
Yes, you can do astrophotography with your phone! Modern smartphones have night modes, long exposure settings, and advanced cameras that capture the Milky Way and stars when paired with a tripod for stability.
In Summary
You don’t need expensive telescopes to capture the wonders above. With basic equipment, dark skies, and the techniques we’ve covered, you’ll transform ordinary nights into extraordinary images. Remember to experiment with settings, be patient, and enjoy the process. The universe is waiting for your unique perspective—so grab your camera, find your spot, and let the cosmos inspire your creativity.


Leave a Reply