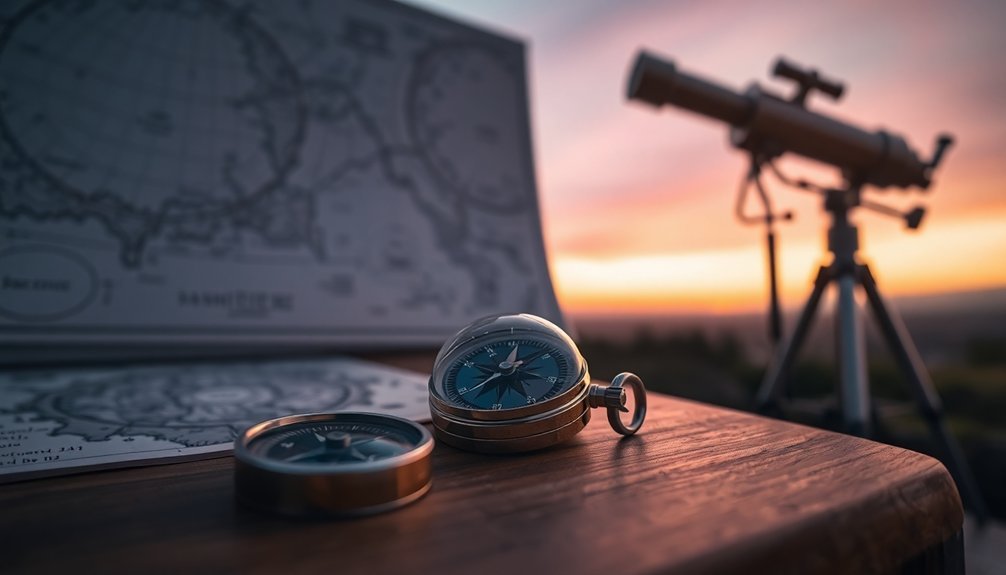
For successful EQ mount polar alignment: Choose a stable location with clear northern views, level your tripod thoroughly, set your mount's latitude accurately, use a compass for initial orientation, make small adjustments with altitude/azimuth knobs, verify with test exposures, utilize smartphone apps for precision, position Polaris correctly, tighten all connections, and periodically check alignment throughout your session. These fundamental techniques will transform your astrophotography results from frustrating star trails to pinpoint stars.
10 Simple Tips For EQ Mount Polar Alignment

While equatorial mount setup might seem intimidating at first, achieving a rough polar alignment doesn't require expensive equipment or complex procedures. Start by pointing your tripod approximately north (or south in the Southern Hemisphere) and make certain it's level for stability.
Don't let equatorial mounts intimidate you – basic polar alignment requires only simple steps and no specialized gear.
Set your mount's latitude to match your location using the scale on the mount. Position the declination setting circle at 90 degrees before you begin alignment. If you're in the Northern Hemisphere, use Polaris as your reference point by centering it in your finderscope. Proper alignment allows for easier tracking of celestial objects as they move across the night sky.
During alignment, move only the entire mount—not the telescope tube—to maintain your declination settings. Once aligned, you'll only need to adjust the right ascension axis to track celestial objects.
Keep your tripod low for better stability against wind.
Choose the Right Location for Your Setup
You'll need a location with a clear view of Polaris (or Sigma Octantis in the Southern Hemisphere) for proper alignment of your EQ mount.
Make sure your setup rests on level, stable ground that won't shift during observation, as even slight movement can disrupt your careful alignment.
Position your telescope away from sources of interference like bright lights, heat sources, or areas with significant vibration to maximize your viewing experience.
Consider using a compass for more accurate direction finding when initially orienting your telescope's polar axis toward celestial north or south.
Clear View of Polaris
Where you set up your telescope greatly impacts your ability to properly align with Polaris.
You'll need a location that offers an unobstructed view of the northern sky, especially if you're observing near the equator where Polaris sits low on the horizon.
For ideal polar alignment results:
- Choose a spot away from light pollution for better visibility, even though Polaris is bright enough to see in moderately light-polluted areas.
- Confirm no buildings, trees, or other obstacles block your northern view.
- Northern Hemisphere observers have a distinct advantage, as Polaris remains visible year-round.
- Set up on stable ground that allows proper leveling of your mount.
- Begin your session with enough time before dark to complete alignment while still seeing your equipment.
Remember that atmospheric refraction can add approximately 0.57 degrees to Polaris's apparent altitude, which can be helpful when observing from locations close to the equator.
Level, Stable Ground
Once you've found a spot with a clear view of Polaris, the foundation of your mount setup becomes just as important.
Select level ground to minimize adjustments needed for your EQ mount. Keep tripod legs as short as possible to maximize stability. Ensuring your mount is properly leveled before beginning the polar alignment process will significantly improve your tracking accuracy.
Choose grass or firm soil over loose gravel or sand. Use a spirit level to confirm your mount sits perfectly horizontal. Creating triangulation points with nearby landmarks will help you quickly set up in the same spot next time.
Consider seasonal changes that affect ground stability. Look for locations with natural wind protection, and avoid areas prone to erosion or waterlogging.
For enhanced stability, use anti-vibration pads and verify weight is evenly distributed across tripod legs. Before committing to a location, test the ground firmness to avoid frustrating stability issues during imaging.
Away From Interference
The three greatest enemies of polar alignment are light pollution, electromagnetic interference, and human activity. Find a location that minimizes these disruptions while offering clear views of Polaris (Northern Hemisphere) or Octans (Southern Hemisphere).
For ideal viewing conditions:
- Choose a spot with minimal light pollution, away from streetlights and buildings.
- Keep electronic devices at a distance and turn off unnecessary equipment to reduce RF interference.
- Set up where you'll have unobstructed views of the celestial pole for precise alignment.
- Seek locations with minimal foot traffic to avoid bumps and disturbances.
- Position yourself where you're protected from glare but still have access to power if needed.
Your mount's performance depends greatly on location—a few minutes spent finding the right spot saves hours of frustration later. When taking compass readings to align your mount, make sure to step away from iron or steel objects that could interfere with accurate measurements.
Level Your Tripod Before Starting
You'll want to guarantee your tripod sits firmly on stable ground before attempting polar alignment, as uneven terrain can compromise your entire imaging session.
Use your mount's bubble level to confirm proper orientation, adjusting each leg individually until the bubble centers perfectly.
Remember that different surfaces require different approaches—soft grass might need wider leg spreads while rocky terrain may benefit from strategic leg placement to maximize stability. However, it's important to understand that extensively leveling your tripod is not critical since polar alignment alone determines tracking accuracy in equatorial mounts.
Tripod Stability Fundamentals
Every successful stargazing session begins with a properly leveled and stable tripod. This foundation is essential for accurate tracking and clear imaging. Your mount can only perform as well as the platform it sits on.
When setting up your tripod, remember these vital points:
- Choose firm, level ground and mark leg positions for consistent setup
- Tighten all screws and connections before beginning alignment
- Adjust legs incrementally using your mount's built-in spirit level
- Keep extensions minimal—shorter legs provide better stability
- Check levelness periodically throughout your session
A level tripod dramatically simplifies polar alignment, reducing drift and tracking errors. Proper leveling is crucial for beginners who want to achieve quality 1-2 minute exposures without star trails.
You'll find that your mount's ability to precisely follow celestial objects improves markedly, especially during longer exposures. This attention to fundamentals pays dividends in sharper images and more enjoyable observing.
Bubble Level Usage
With your tripod's foundation established, let's examine the role of bubble levels in your alignment process.
While EQ mounts don't require perfect leveling, using a quality bubble level provides accuracy around 0.045° – typically better than digital inclinometers for initial latitude adjustments.
Your mount's latitude scale likely has large increments that make precise alignment difficult. A bubble level offers a straightforward solution for rough leveling before fine-tuning. This simplifies subsequent polar alignment steps and creates a consistent starting point for your setup routine.
Although not critical for tracking, proper leveling makes adjustments easier when orienting toward the celestial pole. Some users may find that built-in bubble levels on mounts do not always provide accurate readings.
Consider using a bubble level alongside a compass for initial positioning, then refine with specialized tools like a Polemaster for the most accurate alignment.
Terrain Consideration Matters
When setting up your telescope, proper terrain assessment should be your first consideration before any alignment procedures begin. A level tripod isn't just about polar alignment—it's fundamentally about stability and creating a solid foundation for your entire setup.
- Extend tripod legs minimally to enhance stability while maintaining comfortable access.
- Keep your setup low to the ground whenever possible to reduce wind susceptibility.
- Level the tripod completely before attempting any polar alignment adjustments.
- Pay extra attention to leveling when operating on uneven ground or in windy conditions.
- Remember that improper leveling can lead to tracking errors and blurred images.
Using the mount's bubble level for verification helps ensure precise horizontal positioning before moving to the next alignment steps.
Proper leveling prevents your mount from becoming unstable during use and guarantees your polar alignment remains consistent throughout your observing session.
Set Your Mount's Latitude to Match Your Location
The foundation of proper polar alignment begins with setting your mount's latitude correctly.
Find your exact latitude using maps or smartphone apps, then locate the latitude scale on your equatorial mount. This vital adjustment guarantees your polar axis will parallel Earth's rotational axis.
Precise latitude calibration aligns your mount with Earth's axis—the foundation of accurate astronomical tracking.
Loosen the mount's latitude adjustment screws, carefully set the indicator to match your location's latitude, then retighten securely.
For precision, use a bubble level to confirm your mount is perfectly horizontal before making adjustments.
This process is essential for equatorial mounts to function effectively when tracking celestial objects.
If your mount includes a polar scope, you'll use it later to refine alignment by centering Polaris (Northern Hemisphere) or Sigma Octantis (Southern Hemisphere).
Consider marking your tripod position once properly aligned to save time during future sessions.
Using a Compass for Initial North Alignment

Proper polar alignment begins with finding true north, which you can quickly establish using a standard compass. Remember that compasses point to magnetic north, so you'll need to adjust for your local magnetic declination using NOAA's calculator.
Once you've determined your declination value, follow these basic steps:
- Select a compass with adjustable declination settings for accuracy
- Point the compass needle to magnetic north, then adjust for your local declination
- Create a physical north-south reference line on the ground using sticks or rope
- Verify your tripod is perfectly level before aligning the mount
- Position your mount's polar axis directly over this reference line
This initial compass alignment provides a solid foundation before you refine your polar alignment using more precise methods. Accurate polar alignment is essential when using an equatorial mount as it allows for more efficient tracking of celestial objects.
Properly Positioning Polaris in Your Polar Scope
Once you've established your initial north alignment with a compass, achieving accurate polar alignment requires properly positioning Polaris within your polar scope's reticle.
First, set your declination axis to exactly 90 degrees to guarantee stable tracking and proper alignment.
Remember that Polaris isn't precisely at the celestial pole but orbits around it. You'll need to position Polaris correctly within the reticle based on its current position, which changes throughout the year.
Use a polar clock reference by setting zero at 12 o'clock and six at 6 o'clock for proper orientation.
For greater precision, especially for astrophotography, consider using tools like the PoleMaster camera or alignment apps that can pinpoint Polaris' exact placement in your scope's field of view. Perform alignment on solid surfaces rather than soft ground to maintain stability throughout your observing session.
Making Fine Adjustments With Altitude and Azimuth Knobs

After positioning Polaris correctly in your polar scope, you'll need to make precise adjustments using your mount's altitude and azimuth knobs.
These fine-tuning controls are essential for accurate polar alignment, especially for astrophotography.
- Altitude knobs adjust your mount to match your local latitude, properly aligning the polar axis with Earth's rotation.
- Azimuth knobs provide east-west positioning, ensuring your mount points precisely at the celestial pole.
- Make small, sequential adjustments while monitoring star drift to detect misalignment.
- Pre-align roughly before dark to save time, then fine-tune when stars become visible.
- Check your adjustments using the drift method—proper alignment will show minimal declination drift.
Unlike altazimuth mounts, an equatorial mount with proper alignment requires minimal movement to track celestial objects throughout your observation session.
Verifying Your Alignment With Test Exposures
The ultimate test of your polar alignment comes from capturing actual test exposures with your imaging setup. Start with short 30-second exposures of a bright star near the celestial equator, using a remote shutter release to prevent camera shake.
Examine your images carefully for star trails or elongation, which indicate imperfect alignment. If you spot trails, make incremental adjustments to your mount's altitude and azimuth knobs, then capture another test shot. Gradually increase exposure times to challenge your alignment's precision.
Use astrophotography software to analyze your results objectively. Document which adjustments improved your images so you can refine your process over time. For proper tracking, make sure to utilize RA slow motion controls when making slight adjustments during longer exposures.
Remember that environmental factors like wind can affect results, so choose calm conditions when possible. With practice, you'll develop consistency that pays dividends in your imaging sessions.
Smartphone Apps That Simplify Polar Alignment

Your equatorial mount alignment process can be streamlined with specialized smartphone apps that utilize GPS and compass features to guide you toward proper polar alignment.
Apps like PolarFinder for Android and Polar Scope Align Pro for iOS offer user-friendly interfaces that walk you through each alignment step while accounting for your specific location.
For more precise results, camera-based alignment tools employ plate-solving technology to analyze star patterns and provide corrective adjustments that minimize tracking errors. The ZWO ASIAIR provides user-friendly polar alignment through its smartphone app interface, utilizing plate-solving to guide precise mount adjustments.
Polar Alignment Apps
Modern smartphone technology has revolutionized how astronomers approach polar alignment, offering elegant solutions to what was once a challenging technical process.
These specialized apps transform your smartphone into a powerful alignment tool, saving you significant setup time while improving accuracy.
Popular options to evaluate:
- PolarFinder Pro excels with precision and supports multiple telescope reticles
- Polar Scope Align Pro offers atmospheric refraction correction for enhanced accuracy
- PSAlign provides exact Polaris positioning calculations essential for proper alignment
- GPS integration automatically determines your location for precise calculations
- Offline functionality lets you manually input coordinates when internet isn't available
These apps are particularly valuable for astrophotography, where precise alignment prevents star trailing during long exposures. Polar Scope Align Pro is available as a one-time purchase of $3.99, making it more cost-effective than competitors that typically require annual subscriptions.
You'll find versions available for both iOS and Android platforms.
Camera-Based Alignment Tools
Building upon simple smartphone apps, camera-based alignment tools represent a considerable advancement in polar alignment technology. These dedicated devices offer greater precision and convenience than traditional methods, with options like the QHY PoleMaster providing alignment in under five minutes. The PoleMaster system completely eliminates the need to rotate the telescope or peer through a polar scope during the alignment process.
| Tool | Field of View | Key Advantage |
|---|---|---|
| PoleMaster | 11×8 degrees | 30 arc second resolution |
| SharpCap Pro | Varies with setup | Uses existing guide camera |
| PHD2 | Varies with setup | Drift alignment refinement |
| Traditional Scope | ~1-2 degrees | No additional cost |
| Camera + Mount | Varies | Real-time monitoring |
You'll appreciate how these tools eliminate awkward positioning while delivering superior accuracy. After alignment, you'll only need a single-star sync for mount calibration, considerably reducing setup time while maintaining imaging performance through minimal declination drift.
Troubleshooting Common Drift Problems
Three primary factors contribute to frustrating drift issues when polar aligning your EQ mount. Equipment flaws, environmental changes, and setup errors can all sabotage your careful alignment efforts.
You'll need to systematically diagnose the source of any persistent drift.
- Check all mount connections – loose bolts or improper locking can cause subtle movement
- Verify your payload is properly balanced and within your mount's weight capacity
- Inspect cable management to eliminate tugging or flexure during tracking
- Monitor for ground instability or temperature shifts that affect alignment
- Confirm your guide scope is orthogonally aligned with RA and DEC axes
Regular maintenance and consistent rechecking throughout your imaging session will help maintain stability.
Software tools like PHD2 or SharpCap can provide visual feedback to identify drift sources quickly.
For problematic setups, try using the drift alignment method which can provide more precise polar alignment than standard procedures.
Frequently Asked Questions
How Long Does a Typical Polar Alignment Process Take?
You'll spend about 3 minutes for basic polar alignment, while complete setup takes several minutes. If you're using drift alignment for higher accuracy, expect 15-20 minutes of your time.
Can Polar Alignment Be Done During Daylight Hours?
Yes, you can perform polar alignment during daylight hours. Use a compass (adjusted for magnetic declination), set your mount's latitude correctly, and utilize solar tracking with proper solar filters for safety and accuracy.
How Often Should I Realign During a Viewing Session?
You should check alignment every 1-2 hours during casual viewing, but more frequently for astrophotography. Temperature changes, wind, and high magnification work all require more frequent realignment to maintain accuracy and tracking quality.
What's the Minimum Alignment Accuracy Needed for Visual Observing?
For visual observing, you'll only need rough alignment—within 2-3 degrees of true north. You can simply level your mount, set your latitude correctly, and point north using a compass with declination adjustment.
Will Polar Alignment Work in Partly Cloudy Conditions?
Yes, you can polar align in partly cloudy conditions. Use gaps between clouds to sight Polaris, or rely on alternatives like a polar scope, compass, smartphone apps, or the NOAA Magnetic Field Calculator when necessary.
In Summary
When you've followed these ten alignment tips, you'll find your astrophotography sessions more productive and enjoyable. Remember, perfect polar alignment takes practice, so don't get discouraged if your first attempts aren't flawless. Keep refining your technique each time you set up. With patience and these simple steps, you'll soon be capturing stunning, star-trail-free images of the night sky.


Leave a Reply