Entry-level DSLRs excel at shooting stars by offering you professional features at an affordable price point. You'll get full manual control over ISO, aperture, and shutter speed, plus essential Live View focusing that helps capture sharp star images. Their large sensors perform well in low light, while modern noise reduction keeps your shots clean at high ISOs. These cameras' versatility lets you shoot both day and night, making them perfect for learning astrophotography. The journey to capturing stunning night skies starts with understanding your DSLR's key capabilities.
The Cost-Effective Gateway to Astrophotography
While specialized astronomy cameras can cost thousands of dollars, entry-level DSLRs offer an affordable gateway into astrophotography that won't break the bank.
You'll find these cameras widely available, both new and used, making it easy to begin your cosmic photography journey without a massive investment. Used models are readily available for as low as $250 for DSLRs.
Beyond their lower cost, DSLRs give you remarkable versatility. You can use them for daytime photography and seamlessly shift to capturing the night sky.
DSLRs excel at both earthbound and celestial photography, making them an ideal choice for photographers who explore multiple genres.
Their lightweight design means you won't struggle when traveling to dark-sky locations, and their user-friendly interfaces help you master essential settings quickly.
If you're concerned about power requirements, you'll appreciate that DSLRs run on standard camera batteries, eliminating the need for specialized power setups that many astronomy cameras demand.
Essential Features That Make DSLRs Perfect for Night Sky
Your entry-level DSLR's Live View feature lets you precisely focus on stars using the LCD screen's magnified view, making manual focusing much easier than with a traditional viewfinder.
You'll have complete control over essential manual settings like ISO, aperture, and shutter speed, allowing you to adapt to changing night sky conditions.
The larger sensors in DSLRs excel at gathering light and managing noise in dark conditions, helping you capture clearer, more detailed images of the stars even at higher ISO settings. The wide-angle lens capability of most entry-level DSLRs helps photographers avoid star trails during longer exposures, capturing more of the night sky in a single frame.
Live View Focusing Benefits
When shooting the night sky, a DSLR's Live View feature proves invaluable for achieving precise focus on stars and celestial objects.
You'll find that Live View outperforms traditional optical viewfinders by offering up to 10x magnification and real-time feedback for your focus adjustments. Setting the exposure to manual mode prevents autofocus from struggling with dim starlight.
Key benefits you'll experience when using Live View for astrophotography:
- Sharp image acquisition through magnified view for precise manual focusing
- Enhanced visibility of stars, even in low-light conditions, especially with higher ISO settings
- Immediate feedback on your focus adjustments without reviewing each shot
- Real-time digital preview that helps you frame and compose your shots effectively
Manual Settings Control Access
Successfully capturing the night sky requires full manual control over your camera's settings, a fundamental advantage that entry-level DSLRs provide.
You'll need to adjust your aperture to let in more light, typically using wider settings like f/2.8 or f/3.5, while maintaining control over your depth of field. An effective technique is using the Rule of 500 to calculate optimal exposure times.
Your shutter speed choices are equally critical – use shorter exposures around 20-30 seconds for pinpoint stars, or longer exposures if you're aiming to create artistic star trails.
You can also fine-tune your ISO settings, balancing between light sensitivity and noise levels.
Most importantly, entry-level DSLRs let you shoot in RAW format, giving you extensive control during post-processing to adjust white balance, reduce noise, and maximize dynamic range for the best possible results.
Low-Light Sensor Performance
While shooting the night sky demands specialized equipment, entry-level DSLRs pack impressive sensor technology that makes them ideal for astrophotography. Modern sensors deliver exceptional low-light performance through larger pixel sizes and advanced signal processing, helping you capture crisp star trails and celestial objects. Sensors with large pixel sizes provide superior photon collection for capturing dim star light.
- Full-frame sensors collect more light and produce less noise compared to smaller sensor formats.
- High ISO capabilities let you shoot in extremely dark conditions while maintaining image quality.
- Advanced noise reduction algorithms preserve details even at higher sensitivity settings.
- Image stacking features help combine multiple exposures for enhanced clarity.
You'll find that entry-level DSLRs now rival professional cameras when it comes to their low-light capabilities, with sensors that effectively balance resolution and light sensitivity – vital factors for capturing the night sky's intricate details.
Navigating Camera Settings for Stellar Results
You'll want to start with ISO settings between 400-1600, finding the sweet spot that captures faint stars while keeping digital noise under control.
When focusing manually, use your camera's 10X zoom feature on a bright star to achieve precise focus, then lock it in place to prevent accidental adjustments.
For consistently sharp results, remember to disable auto-focus completely and set your lens to infinity as a starting point before fine-tuning. Using a remote shutter release will help eliminate any camera shake that could blur your stellar shots.
Optimal ISO Selection Tips
Selecting the right ISO settings for astrophotography can make the difference between capturing stunning star fields and ending up with a noisy, unusable image.
You'll find that ISO 1600 serves as an excellent starting point for most entry-level DSLRs, offering a balanced compromise between light sensitivity and noise control. Remember that increasing ISO simply amplifies the sensor signal rather than making your camera more sensitive to light.
- Start at ISO 1600 and adjust between 1000-3200 based on your camera's performance
- Stack multiple exposures to minimize noise at higher ISO settings
- Use manual mode for complete control over your exposure triangle
- Consider your camera's ISO variant capabilities when pushing higher settings
While higher ISOs can brighten your shots, they'll also increase noise.
You can offset this by combining multiple exposures through stacking techniques.
Manual Focus Best Practices
Precision in manual focusing stands as a cornerstone of successful astrophotography.
You'll need to switch your DSLR to manual focus mode and initially set your lens to infinity, though this alone won't guarantee sharp stars.
Using your camera's live view feature with digital zoom, you can zero in on bright stars like Sirius or Vega for precise focusing.
If your DSLR lacks live view, consider using a Bahtinov mask – it's an invaluable tool for achieving crisp focus in dark conditions.
To maximize visibility while focusing, set your aperture wide open (f/4 or lower) and use a longer exposure of around 30 seconds.
Consider securing your lens's focus ring with gaffers tape to prevent any accidental adjustments during your shoot.
Don't forget to check your focus periodically throughout your session, as temperature changes can affect your lens's focus position over time.
Building Your Basic Star-Shooting Kit
While capturing stunning star photographs doesn't require professional-grade equipment, building a basic kit with the right essentials will set you up for success.
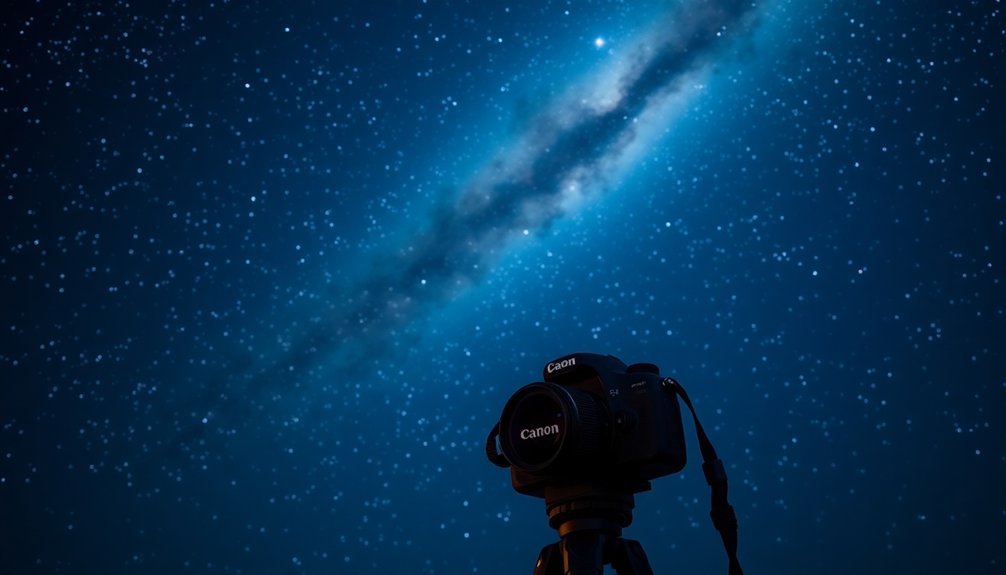
Start with an entry-level DSLR like the Canon EOS Rebel series, which offers manual controls at an affordable price point. You'll need a sturdy tripod to prevent camera shake during long exposures, and a remote timer to avoid touching the camera when shooting. Using broadband filters can help reduce light pollution and enhance image quality.
- Wide-angle lens (kit lens or budget options like Rokinon 14mm)
- Basic star tracker (iOptron SkyTracker Pro recommended for beginners)
- Remote timer for hands-free operation
- Free post-processing software for editing RAW files
Don't forget to turn off image stabilization and shoot in RAW format to preserve maximum detail for post-processing.
With these fundamentals in place, you're ready to start photographing the night sky.
Maximizing Your DSLR's Potential for Space Photography
Once you've assembled your basic kit, understanding how to maximize your DSLR's capabilities will transform your star photography from ordinary to extraordinary. You'll need to master key settings and techniques specific to astrophotography. Switch to manual mode and RAW format for maximum control and post-processing flexibility. A sturdy tripod setup is absolutely essential for achieving sharp, clear astro images.
| Setting | Recommended | Why It Matters |
|---|---|---|
| Format | RAW | Better editing control |
| ISO | 500-1600 | Balances light/noise |
| Exposure | 30s-15min | Captures faint objects |
| Focus | Manual | Precise star sharpness |
For deep-sky shots, you'll want to integrate your DSLR with a telescope using T-rings. Stack multiple exposures to improve image quality, and don't forget to use the 10-second timer to prevent camera shake. Modern DSLRs' ISO invariance means you can push higher ISOs without excessive noise.
Learning Curves and Growth Opportunities
Although astrophotography can seem intimidating at first, entry-level DSLRs offer an approachable path into this rewarding hobby.
You'll find that regular practice with basic equipment helps you master essential techniques without overwhelming financial investment. Your technical skills will grow as you learn to control manual settings and process RAW files. Maximizing your limited time during clear weather conditions is crucial for developing your skills.
- Start with wide-angle lenses to capture broad night sky scenes
- Join online communities for valuable feedback and guidance
- Utilize free post-processing software to enhance your images
- Focus on mastering manual focus techniques using live view
As you progress, you'll discover that entry-level DSLRs combined with affordable manual lenses like Rokinon can produce impressive results.
Your growth will accelerate through consistent practice and engagement with experienced astrophotographers who can help refine your techniques and expand your knowledge.
Frequently Asked Questions
How Long Do DSLR Sensors Typically Last When Used for Astrophotography?
Your DSLR's sensor can last 3-5 years with regular astrophotography use, though you'll likely hit the shutter count limit (100,000-200,000 actuations) before experiencing significant sensor degradation if you're shooting frequently.
Can Entry-Level DSLRS Be Modified to Capture Better Hydrogen-Alpha Emissions?
Yes, you can modify entry-level DSLRs by replacing the stock IR filter with one that transmits hydrogen-alpha light. This modification will greatly improve your camera's sensitivity to red nebulosity in deep-sky astrophotography.
What Temperature Conditions Are Safe for DSLR Astrophotography?
You'll get the best results between 0-20°C. While your DSLR can handle colder temps, you'll need to prevent condensation. Watch the dew point and let your camera adjust gradually to temperature changes.
Do Cosmic Rays Damage DSLR Sensors During Long-Exposure Night Photography?
You don't need to worry about cosmic ray damage during typical night photography on Earth. While cosmic rays can strike your DSLR sensor, Earth's atmosphere protects it from significant damage during normal exposures.
Which DSLR Brands Produce the Least Sensor Noise for Astrophotography?
You'll find Nikon and Sony DSLRs produce the least noise for astrophotography. Nikon excels with red spectrum response, while Sony's superior ISO performance helps minimize noise during long exposures at night.
In Summary
You'll find that entry-level DSLRs offer the perfect starting point for night sky photography. Their blend of affordability, manual controls, and decent low-light performance lets you capture stunning celestial images while learning essential techniques. As you grow more confident with your camera's settings and build your kit, you'll discover that even a basic DSLR can reveal the wonders of astrophotography.


Leave a Reply