
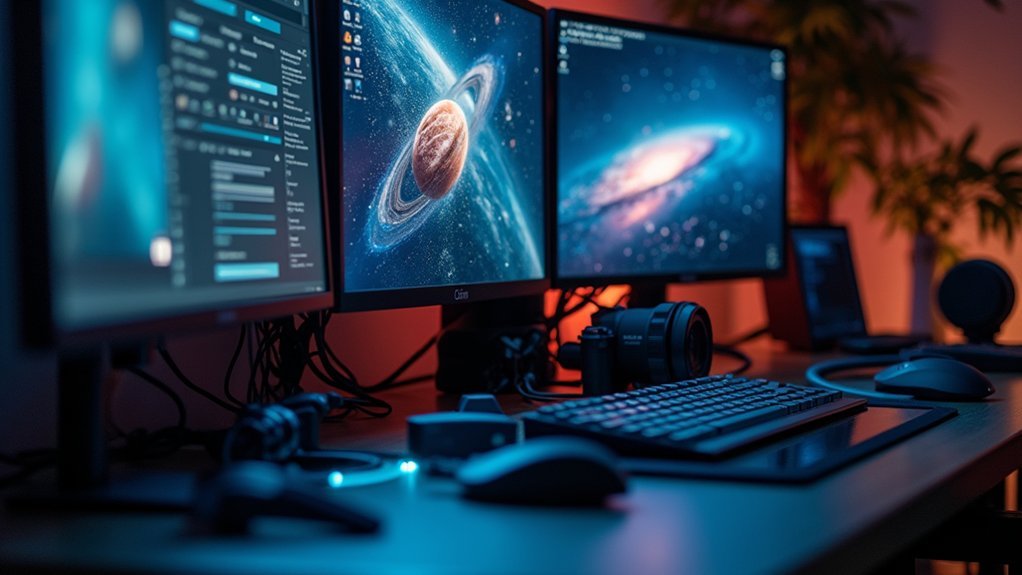
A beginner’s planetary image processing workflow follows five key steps: capture high frame rate video with SharpCap, preprocess with PIPP to optimize footage, stack the best 50% of frames using AutoStakkert, sharpen with RegiStax, and finish with color adjustments in Photoshop or Siril. You’ll need specialized free software for each stage, including WinJupos for planetary rotation correction. The proper sequence transforms blurry telescope videos into stunning celestial portraits worthy of sharing.
What Is A Beginner’s Planetary Image Processing Workflow?

A planetary image processing workflow consists of five essential steps that transform your raw telescope videos into stunning planetary photographs.
First, you’ll capture high frame rate video of your target using software like SharpCap, adjusting exposure times based on your subject (5ms for Moon, 4ms for Jupiter, 7ms for Saturn).
Next, preprocess these videos with PIPP to optimize them for stacking.
Then, use AutoStakkert to analyze and stack images, selecting approximately 50% of the best frames.
Fourth, apply RegiStax’s Wavelet filter for sharpening and RGB align features to correct color aberrations.
Finally, make aesthetic adjustments in Photoshop or GIMP to enhance contrast and brightness.
Essential Software Tools for Planetary Processing
You’ll need several free stacking programs like PIPP, AutoStakkert!, and Registax to transform your raw planetary captures into clear, detailed images.
Color adjustment tools such as Adobe Photoshop or the more budget-friendly Siril will help you enhance contrast and color balance in your final planetary photos.
For planets with faster rotation periods, consider specialized derotation software that compensates for planetary rotation during longer imaging sessions, allowing you to capture more surface details.
Free Image Stacking Solutions
Fortunately, the planetary imaging community has developed several powerful free software tools that form the backbone of any processing workflow. You’ll find these essential applications make turning your raw captures into impressive planetary images straightforward.
| Software | Primary Function |
|---|---|
| PIPP | Preprocessing videos by cropping and optimizing |
| FireCapture | Capturing high-quality video frames in SER format |
| AutoStakkert! | Selecting and stacking the best quality frames |
| RegiStax 6 | Enhancing stacked images with wavelet sharpening |
Start by using PIPP to prepare your planetary imaging videos, then stack them with AutoStakkert!, which analyzes and combines only the sharpest frames. While Siril can handle basic stacking, specialized tools like RegiStax 6 offer advanced features including RGB alignment for more refined results.
Essential Color Adjustment Tools
Once you’ve stacked your best frames, color correction becomes critical for revealing a planet’s true appearance.
After processing in AutoStakkert, you’ll need specialized tools to refine your image’s colors accurately.
Registax offers powerful RGB Balance features that correct color shifts caused by atmospheric distortion.
For free alternatives, GIMP and Paint.NET provide excellent color adjustments without the cost of professional software.
Snapseed excels at white balance corrections, helping you achieve natural planetary tones.
When noise becomes an issue, Topaz Denoise AI can be applied conservatively to maintain detail while reducing graininess.
Photoshop remains the gold standard for final color adjustments, but isn’t essential for beginners.
Your software choices should balance capability with your learning curve—each tool offers unique advantages in bringing out the vibrant details of celestial objects.
Derotation Software Options
While color correction brings out planetary details, even the best-colored image can suffer from rotation blur. As planets rotate during your capture session, derotation software becomes essential for creating sharp, high-resolution images.
WinJupos stands as the premier tool in this category, allowing you to measure and correct rotational blurring in your planetary imaging workflow. You’ll integrate it alongside other specialized software:
| Processing Stage | Software | Purpose | Difficulty |
|---|---|---|---|
| Stacking | AutoStakkert | Combine best frames | Beginner |
| Derotation | WinJupos | Correct rotation blur | Intermediate |
| Sharpening | Registax | Enhance details | Beginner |
| Final touches | Photoshop | Color and contrast | Varies |
Numerous tutorials exist online to help you master these tools, particularly WinJupos which can dramatically improve your planetary images by combining multiple frames taken at different times.
Capturing High-Quality Raw Material
The foundation of impressive planetary imaging rests on capturing excellent raw footage.
You’ll need to optimize your camera settings for each celestial target—use exposure times around 5ms for the Moon, 4ms for Jupiter, and 7ms for Saturn, adjusting gain to maintain the histogram near 45% in SharpCap.
Record in SER format using FireCapture for 3 minutes when imaging Jupiter and 5 minutes for Saturn. Always connect your camera to USB 3 ports to achieve hundreds of frames per second, which is vital for the Lucky Imaging technique to overcome atmospheric turbulence.
After capturing, run your footage through PIPP for preprocessing—cropping empty space to improve the efficiency of subsequent stacking steps.
These initial capture and preprocessing steps are significant for successful planetary image processing.
Pre-Processing and Video Conversion
After capturing your planetary videos, you’ll need to convert them using PIPP to crop unnecessary space and set appropriate frame dimensions before stacking.
You should always choose a non-lossy codec during conversion to preserve image quality that’s essential for accurate processing.
Once converted, import your AVI files into AutoStakkert!2 where you’ll select approximately 50% of the highest quality frames to create a clean, detailed TIFF image.
Converting Video Files
Before diving into the stacking process, you’ll need to convert your raw planetary capture videos into a format that’s optimized for processing. PIPP is your go-to tool for this essential pre-processing step. When saving your files as AVI, select a non-lossy codec to maintain image quality during conversion.
Take advantage of PIPP’s cropping capabilities to eliminate empty space around your planet, setting an appropriate output frame size (around 250×250 pixels). Use the Test Options feature to preview your settings before finalizing the conversion.
Once processed, your optimized videos are ready for stacking software like AutoStakkert!2, which analyzes frame quality and generates quality graphs.
The final stacked image is typically saved as a TIFF file, perfectly prepared for further refinement in Registax.
Stacking Multiple Frames
Once you’ve captured your planetary videos, stacking multiple frames becomes the critical next step in producing sharp, detailed images.
Begin by using PIPP to preprocess your videos—crop out empty space and enhance frame size for stacking efficiency.
Convert your files to a non-lossy AVI format to preserve image quality throughout processing.
Next, import your preprocessed video into AutoStakkert and analyze it to generate a quality graph. This helps you determine how many frames to stack—generally 50% of the best frames works well before noise becomes objectionable.
As a beginner, let AutoStakkert automatically set the stacking box sizes for ideal results.
When the stacking process completes, save the image as a TIFF file in the same folder as your original video for organization and further processing.
Selecting the Best Frames for Stacking
When sorting through your planetary capture session, identifying the sharpest frames becomes vital for creating a high-quality final image. AutoStakkert makes this process straightforward with its analyze feature, which generates a quality graph displaying each frame’s sharpness.
| Step | Action | Purpose | Tool | Result |
|---|---|---|---|---|
| 1 | Preprocess video | Remove empty space | PIPP | Focused image |
| 2 | Analyze frames | Generate quality data | AutoStakkert | Quality graph |
| 3 | Select percentage | Balance detail/noise | Stack options | ~50% best frames |
| 4 | Set alignment box | Focus on details | AutoStakkert | Proper tracking |
| 5 | Save output | Preserve quality | AutoStakkert | TIFF file format |
You’ll want to stack approximately 50% of your highest-quality frames to achieve ideal balance between detail preservation and noise reduction. Most planetary cameras produce hundreds of frames, making selective stacking vital for best results.
Alignment and Stacking Techniques

After you’ve identified your best frames, proper alignment and stacking becomes the critical foundation for revealing planetary details otherwise lost in atmospheric turbulence.
AutoStakkert! excels at this process, automatically analyzing and aligning your captured frames before stacking the best ones into a single, clearer image.
For ideal results, select approximately 50% of your highest quality frames when stacking. If you’re working with individual SER files, don’t hesitate to use higher stacking percentages to maximize detail retention.
Once stacked, you’ll need to properly align your RGB channels to correct atmospheric diffraction effects that cause color fringing.
The stacking process greatly improves signal-to-noise ratio, creating a solid foundation for subsequent sharpening in software like RegiStax using wavelet processing.
Wavelet Processing for Detail Enhancement
The stacked planetary image you’ve created now holds considerably more potential detail than any single frame, but much of it remains hidden. Wavelet processing is your key to revealing these details by enhancing different spatial frequencies within your image.
| Wavelet Level | Controls | Typical Use | Best For |
|---|---|---|---|
| Layer 1 | Finest details | Increase for sharpness | Surface textures |
| Layer 2-3 | Medium details | Moderate enhancement | Cloud bands, features |
| Layer 4-6 | Large structures | Subtle adjustments | Overall structure |
| Quality/Difference Cutoff | Frame selection | Exclude poor frames | Maximizing clarity |
After applying wavelet processing, use histogram and contrast adjustments to refine your results. Remember to exclude poorly aligned quality frames using the cutoff sliders—this guarantees only the best data contributes to your final image.
Noise Reduction Strategies

Despite your careful stacking and wavelet processing, unwanted noise can still persist in your planetary images, appearing as grainy artifacts that diminish overall quality.
Apply noise reduction after stacking images and sharpening to preserve fine details. Topaz Denoise AI offers conservative noise reduction that enhances clarity without sacrificing important features.
When experimenting with settings, start with minimal adjustments—excessive noise reduction can blur essential details.
Once noise is addressed, move to color correction using tools like GIMP, Paint.NET, or Snapseed’s excellent white balance features to eliminate color casts.
Remember that each image responds differently to noise reduction techniques, so don’t hesitate to try various approaches and intensity levels until you achieve the perfect balance between noise suppression and detail preservation.
Color Balancing and Saturation Adjustments
With noise successfully minimized, your focus can now shift to refining color representation and vibrancy.
Color balancing guarantees your planetary images display natural, accurate colors by adjusting RGB components appropriately. You’ll need to apply saturation adjustments conservatively to enhance details without creating an unnatural appearance.
To achieve superior image quality:
- Use Curves layers in Photoshop or similar tools in GIMP to fine-tune specific tonal ranges, giving you precise control over color balance.
- Apply color correction tools like Snapseed to achieve proper white balance, guaranteeing colors appear true to life.
- Make saturation adjustments gradually, increasing vibrancy just enough to make details pop without over-processing.
For monochrome imaging, remember to manually align RGB color channels during processing to maintain color fidelity in your final composite images.
Sharpening Without Introducing Artifacts

Once you’ve successfully balanced colors in your planetary images, sharpening becomes your critical next step to reveal fine details while maintaining image integrity. To sharpen the image effectively, you’ll need to carefully adjust the wavelet settings in software like RegiStax, starting with moderate values and increasing gradually.
| Software | Technique | Key Consideration |
|---|---|---|
| RegiStax | Wavelet filters | Control detail at different frequencies |
| RegiStax | Quality cutoff sliders | Exclude poor quality of each frame |
| MaxIm DL | Lucy-Richardson deconvolution | Input appropriate PSF radius |
When applying sharpening, always monitor for artifacts that might appear as halos or noise. The high-pass filter in Photoshop can enhance contrast but use it sparingly to reduce noise and prevent clipping. Remember that effective sharpening enhances details without compromising the natural appearance of your planetary subject.
Finishing Touches and Final Presentation
After you’ve carefully applied sharpening techniques to bring out the details in your planetary image, your work now shifts to the final refinements that will make your image truly shine.
Use software like GIMP or Photoshop to adjust brightness and contrast, enhancing your final image’s overall appearance.
Fine-tuning brightness and contrast with professional editing software elevates your planetary image from ordinary to extraordinary.
Apply noise reduction conservatively with tools like Topaz Denoise AI—preserving details while eliminating unwanted artifacts. Consider a high-pass filter to boost contrast without compromising quality.
Before you share your masterpiece:
- Save in a high-quality format (TIFF or PSD) before converting to JPEG
- Back up your work using reliable cloud storage options
- Share full-resolution versions with astronomy groups for feedback
These finishing touches transform a good planetary image into a remarkable one that accurately showcases your dedication to astrophotography.
Common Processing Mistakes to Avoid
Even the most meticulous astrophotographers can fall prey to processing pitfalls that diminish their hard-earned planetary images. When you image the planets, resist the temptation to apply aggressive noise reduction, which obliterates fine details vital to planetary photography.
Pay close attention to RGB channel alignment to prevent color fringing—a common issue that ruins otherwise excellent captures.
Be vigilant with histogram adjustments; excessive stretching leads to clipped highlights and shadows, destroying valuable data. When stacking frames, ruthlessly exclude blurry or misaligned images that would introduce artifacts into your final result.
Throughout your workflow, save in non-destructive formats like TIFF rather than compressing to JPEG prematurely. This preserves quality for future refinements and guarantees your planetary images retain the detail you worked so hard to capture.
Frequently Asked Questions
What Is Pipp Used For?
You’ll use PIPP to preprocess your planetary imaging videos by cropping, resizing, and optimizing frames before stacking. It efficiently prepares your raw footage for further processing in programs like AutoStakkert!2.
What Do I Need for Planetary Imaging?
You’ll need a telescope with good magnification, a high-speed planetary camera, a quality Barlow lens, image processing software like FireCapture and AutoStakkert, and proper solar filters if imaging the sun.
What Is the Best Software for Planetary Stacking?
For planetary stacking, you’ll want to use AutoStakkert! for its user-friendly interface, PIPP for pre-processing videos, and Registax for wavelet sharpening. These free programs form the ideal software combination for beginners.
How Does a Planetary Camera Work?
Planetary cameras capture hundreds of high-speed video frames through your telescope using small, sensitive sensors. They’re designed to work with USB 3 connections, allowing you to record detailed footage for later stacking and processing.
In Summary
You’ve now learned the essentials of planetary image processing from capture to final presentation. With practice, you’ll develop your own rhythm and style. Remember, good processing can’t fix poor raw data, so focus on capture quality first. Don’t overprocess—subtle adjustments often yield the most natural results. Keep experimenting and sharing your work with the astrophotography community for feedback and inspiration.


Leave a Reply