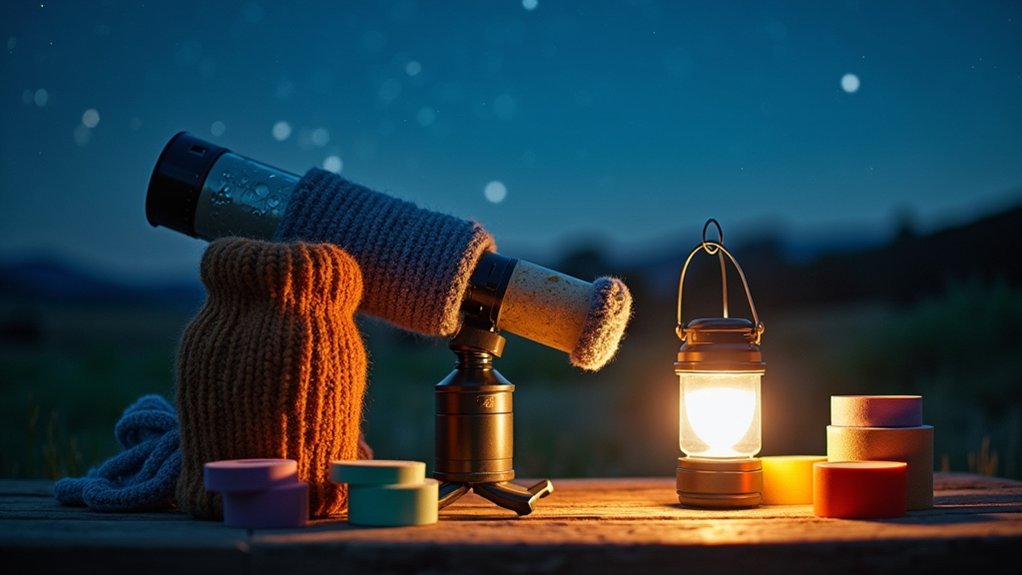
Prevent telescope dew with items from around your home. Create shields using cardboard, aluminum foil, or plastic containers to block heat loss. Make DIY heaters with resistors from old electronics, calculating 0.3 watts per centimeter for ideal heating. Repurpose insulated coffee cup sleeves, plastic wrap, or garbage bags for protection, and use silica gel packets to reduce humidity. These solutions work because they maintain your optics above the dew point temperature. The following methods have saved many stargazers hundreds of dollars on commercial equipment.
DIY Telescope Dew Solutions Using Household Items
While professional dew prevention equipment can be expensive, you’ll find effective solutions hiding in your own home. Reflectix insulation can be transformed into lightweight DIY dew shields that often outperform commercial options.
For a quick fix, cardstock and painter’s tape create temporary shields that effectively protect your optics during observation sessions.
Don’t overlook plastic garage sale signs—they’re perfect for crafting durable telescope protection solutions at minimal cost.
Foam rubber art board offers flexibility for customizing shields to fit various telescope models while maintaining minimal weight.
For storage concerns, silica gel desiccants placed in sealed containers with your telescope will reduce humidity and prevent condensation damage to sensitive optical components.
These simple repurposing materials strategies help extend your equipment’s life without breaking your budget.
Understanding Dew Formation on Telescope Optics
Despite what many stargazers initially assume, dew doesn’t fall onto telescope optics like rain—it forms directly on the surfaces through condensation. This occurs when your telescope’s temperature drops below the ambient dew point through radiative cooling, particularly affecting upward-facing optical surfaces.
Three key factors influence dew formation:
- Humidity levels – Higher humidity means more moisture in the air, raising the dew point and increasing condensation risk.
- Temperature differential – The greater the difference between your optics and surrounding air, the faster dew forms.
- Exposure time – Longer observing sessions without protection increase susceptibility to moisture buildup.
Understanding these principles helps you implement effective solutions like dew shields that block radiative heat loss or heaters that maintain temperatures just above the dew point.
Repurposing Kitchen Items for Effective Dew Shields
You don’t need expensive commercial equipment to protect your telescope from dew when common household items can deliver impressive results. Your kitchen contains perfect materials for crafting homemade dew shields that effectively prevent moisture buildup on valuable optics.
| Kitchen Item | Repurposing Method |
|---|---|
| Plastic containers | Cut to size and attach to telescope tube |
| Aluminum foil/baking sheets | Create reflective surface to minimize heat loss |
| Plastic bottles | Cut and fit around eyepiece holders |
| Cardboard cereal boxes | Cover with black paint for light absorption |
These repurposed kitchen items provide practical solutions for amateur astronomers. By transforming common household materials into functional dew shields, you’ll maintain clear viewing conditions without spending extra money. Plus, most of these options are lightweight, making them ideal for portable telescope setups during night observations.
Heating Elements From Resistors and Old Electronics
You can transform ordinary resistors and scrap electronics into effective dew heaters for your telescope by understanding basic power requirements and circuit design.
For a complete solution, you’ll need to calculate the appropriate resistance values using the formula Ohms = Volts² / Watts, with a 12-volt system typically requiring 48 ohms for a 3-watt heater suitable for larger optics.
Pair your homemade heating elements with the right power supply—battery packs or portable power stations work well—ensuring all connections are properly insulated to prevent short circuits.
Salvaging Heating Components
The humble junk drawer or garage shelf often contains goldmines of usable components for DIY telescope dew solutions. Those old hair dryers and toasters can yield valuable resistors that function perfectly as heating elements for your astronomy setup.
When hunting for salvaged components, consider these key points:
- Target resistors with appropriate resistance ratings – six 25-ohm resistors can generate about 1 watt of heat at 12 volts.
- Test your finds with a multimeter to verify electrical resistance values before installation.
- Use insulated copper wire for connections to prevent dangerous shorts in your power supply.
Matching your resistors to your available power supply is essential – always confirm components can handle the expected load to avoid overheating.
These recycled heating elements save money while providing effective dew prevention for your optics.
Circuit Design Basics
Once you’ve collected those useful resistors and heating components, understanding basic circuit design basics becomes your next step.
Calculate your resistor needs using the formula Ohms = Volts² / Watts. For instance, six 25-ohm resistors in parallel create about 1 watt of heat with a 12-volt power source—perfect for small telescope applications facing dew problems.
When building your heating element, secure all connections and tape any bare wires to prevent dangerous short circuits.
If you’re using nichrome wire instead of resistors, the same power principles apply. Position your heating element close to optical surfaces for maximum efficiency.
Remember to monitor the temperature regularly to avoid overheating your equipment. This simple approach provides effective dew prevention without expensive commercial solutions, keeping your night-sky viewing crystal clear.
Power Supply Options
Finding suitable power sources for your DIY dew heater represents a critical step in creating an effective, budget-friendly solution. Old electronics provide excellent 12V DC sources for powering your heating elements. Computer power supplies and discarded appliances can deliver appropriate voltage and current without additional cost.
When selecting power options, consider:
- Resistor configuration – Six 25-ohm resistors generate approximately 1 watt of heat when connected to a 12V source.
- Power requirements – For a 3-watt dew heater, aim for around 48 ohms total resistance (eight 6-ohm resistors in series).
- Battery alternatives – A 10Ah Lithium-Ion battery can power a 3-watt heater for about 4 hours between charges.
Always verify your salvaged electronics components are compatible with your desired power load to prevent overheating or damage to your telescope equipment.
Building a Simple 12V Dew Heater System
While commercial dew heaters can be expensive, you can build an effective DIY solution using readily available materials.
Start with nichrome wire as your heating element—it’s ideal due to its high resistance and heat durability. For medium to large telescopes, aim for about 0.3 watts per centimeter of wire; smaller scopes need only about 0.06 watts per centimeter.
Nichrome wire provides the perfect heating element—use 0.3W/cm for larger scopes, just 0.06W/cm for smaller instruments.
Connect the nichrome wire to insulated copper wire rated for your expected current to maintain electrical safety.
Wrap your completed dew heater around your telescope’s dew shield (for refractors) or corrector plate holder (for Schmidt-Cassegrains). Consider adding foam insulation to prevent heat loss.
Power your system with a 12V battery—a typical 3-watt heater draws just ¼ amp, giving you approximately 4 hours of use from a 1 amp-hour battery.
Recycled Materials for Custom-Fit Dew Protection
You’ll find that repurposed items around your home make surprisingly effective dew protection solutions.
Hair dryers can be modified into flexible heating bands, while cardboard from shipping boxes transforms into functional shield designs with minimal effort.
Empty coffee cup insulators offer ready-made protection that slips perfectly over smaller eyepieces and accessories, combining thermal insulation with the convenience of recycled materials.
Hair Dryer Heating Bands
Those struggling with dew formation on telescope optics can create effective DIY heating solutions using a common household appliance. By repurposing a hair dryer with adjustable heat settings, you’ll keep your telescope optics clear during humid observing sessions.
Create your custom heating bands by:
- Wrapping a flexible material like an old towel around your telescope’s dew shield.
- Positioning the hair dryer nearby on a low-heat setting, maintaining safe distance to prevent damage.
- Directing warm air flow along the dew shield so heat radiates onto the corrector plate or objective lens.
This economical alternative to commercial dew heaters works by keeping your optics above the dew point.
You’ll extend your viewing time while saving money with these recycled materials, ensuring your telescope remains operational even when humidity levels rise.
Cardboard Shield Designs
Wallet-friendly alternatives extend beyond heating solutions to include protective barriers made from everyday materials.
You’ll find cardboard particularly effective for creating custom dew shields that fit your telescope perfectly. Simply cut, shape, and assemble pieces to your specifications, securing them with painter’s tape for easy adjustments.
For ideal performance, spray the exterior with flat black paint to absorb light and eliminate stray reflections that might compromise image quality.
Layer multiple cardboard sheets to enhance insulation and durability while maintaining a lightweight design. For even better thermal protection, line the inner surface with reflective materials like aluminum foil, creating a thermal barrier that keeps optics warmer longer.
This dual-layer approach prevents condensation while ensuring your viewing sessions remain uninterrupted by moisture problems.
Insulated Coffee Cup Covers
While many amateur astronomers discard insulated coffee cup sleeves without a second thought, these everyday items make surprisingly effective dew shields for telescope components.
These covers provide excellent thermal insulation that maintains your telescope optics’ temperature, preventing the condensation that ruins observing sessions.
You’ll appreciate these benefits:
- Custom-fit protection – Coffee cup covers easily conform to various telescope components, creating a snug barrier against dew formation.
- Cost-effective solution – Recycling these materials saves money compared to commercial dew shields while promoting eco-friendly practices.
- Enhanced performance – Pair your insulated covers with flocking paper to reduce light reflection and increase contrast.
For best results, select neoprene or foam covers that offer superior insulation properties.
They’re easily modified to fit your specific telescope dimensions, ensuring maximum protection against unwanted moisture.
Budget-Friendly Power Solutions for All-Night Observing
When your telescope session extends into the early morning hours, maintaining power for your DIY dew heaters becomes a critical concern.
Understanding the current draw is essential—a 3-watt heater on a 12V battery pulls about ¼ amp, meaning a modest 1 amp-hour battery can power it for roughly 4 hours.
For longer sessions, consider scaling your power supply to match your setup. If you’re using nichrome wire or resistor-based heaters (like six 25-ohm resistors generating 1 watt at 12V), calculate your total heat output needs. An 8-inch Schmidt-Cassegrain typically requires around 3 watts to stay dew-free.
Don’t overlook safety measures—insulate all wires and monitor temperatures during operation to prevent overheating.
With proper planning, you’ll maintain clear optics throughout your observation without breaking the bank.
Weatherproofing Techniques With Common Household Supplies
Most astronomical enthusiasts don’t realize that effective telescope weatherproofing doesn’t require specialized equipment—your kitchen and garage likely contain everything you need.
Simple items can protect your instrument from moisture and environmental damage while extending its lifespan.
Try these practical approaches:
- Wrap your telescope in plastic wrap or garbage bags when idle, then secure with duct tape around joints and seams to create a moisture barrier.
- Store eyepieces and sensitive components in ziplock bags to keep them dry and dust-free between observation sessions.
- Apply foam insulation from old pool noodles or yoga mats to metal surfaces to minimize heat loss, while using breathable fabric like old t-shirts as dust covers that allow trapped moisture to escape.
These DIY solutions provide effective protection without investing in expensive specialized equipment.
Testing and Optimizing Your Homemade Dew Control System
After constructing your DIY dew prevention system, you’ll need to verify its effectiveness before trusting it with your valuable telescope equipment.
Start by using a multimeter to measure the current draw of your heating elements, confirming they’re operating within safe parameters to prevent overheating.
Monitor the optics’ temperature during operation, maintaining it just a few degrees above the point where dew forms. Experiment with different resistor values to optimize heat output—25-ohm resistors typically generate about 1 watt at 12 volts.
Position the heating elements close to your optics and secure them firmly.
Don’t forget to regularly inspect wiring and connections for wear that could lead to short circuits. This preventative maintenance confirms your system remains efficient and safe throughout your stargazing sessions.
Frequently Asked Questions
How to Prevent Condensation on a Telescope?
Store your telescope at outdoor temperatures, use dew shields, apply electric heaters at 0.3 watts per cm, maintain a slight breeze during sessions, and utilize silica gel desiccants in sealed storage.
Do I Need a Dew Shield for My Telescope?
Yes, you’ll likely need a dew shield for your telescope. It prevents moisture buildup on your optics during night viewing. They’re especially important for Schmidt-Cassegrain telescopes but beneficial for almost all telescope types.
How Do You Prevent Dew on a Telescope?
You can prevent dew on your telescope by using dew shields, installing electric dew heaters, maintaining airflow around the optics, and storing it properly. Commercial or homemade solutions both effectively keep your optics above the dew point.
How to Make a DIY Telescope at Home?
You’ll need a convex objective lens and concave eyepiece. Mount them in a cardboard tube or PVC pipe. Verify the tube length accommodates both lenses’ focal lengths. Add a stable mount for smooth viewing.
In Summary
You’ve now got several affordable ways to combat dew using items already in your home. Whether you’ve created a simple shield from kitchen materials or built a complete heating system from repurposed electronics, you’ll save money while enjoying clearer views. Don’t let moisture ruin your stargazing – test your DIY solutions before your next session and adjust as needed for peak performance under your local conditions.


Leave a Reply