
For untracked night photography, use Manual mode with aperture at f/2.8 or wider, ISO between 1600-3200, and shutter speed calculated using the 600 Rule (600 ÷ focal length). Shoot in RAW format, manually focus using Live View magnification, and set White Balance to Auto for post-processing flexibility. Always use a sturdy tripod and remote trigger to prevent camera shake. With these seven settings mastered, you’ll capture stunning celestial details that once seemed impossible.
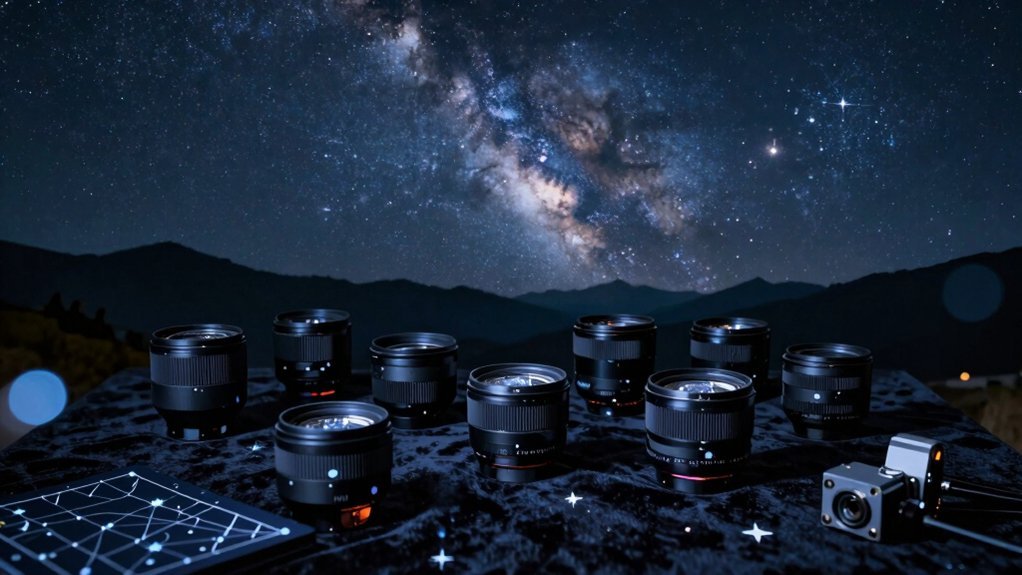
7 Best Camera Settings For Untracked Night Photography

When venturing into untracked night photography, switching to Manual Mode becomes your first vital step. This gives you complete control over all exposure settings, essential for capturing the night sky effectively.
Set your aperture as wide as possible (f/2.8 or lower) to maximize light gathering capability. This is significant when photographing faint stars and celestial objects without tracking equipment.
Open your lens to its widest aperture setting to capture the maximum starlight possible when shooting without tracking equipment.
Keep your ISO between 1600 and 3200 to balance sensitivity with noise. Higher values capture more light but introduce unwanted grain in your final image.
Calculate your maximum Exposure Times using the 600 Rule: divide 600 by your focal length to determine the longest exposure possible before stars begin to trail.
Always shoot in RAW format to preserve detail for post-processing adjustments.
Optimal ISO Balance: Finding the Sweet Spot for Night Sky Detail
Although many photographers fear high ISO settings, finding the perfect ISO balance is essential for successful night sky photography. Starting at ISO 1600 provides a good baseline, maintaining sensitivity while controlling noise. For darker conditions or sharper images, you can push to ISO 3200-6400, but watch for increased grain, especially in shadows.
| ISO Level | Advantages | Disadvantages | Best For | Noise Level |
|---|---|---|---|---|
| 1600 | Good balance | Moderate sensitivity | General night sky | Low-Medium |
| 3200 | Better star detail | More noise | Darker conditions | Medium |
| 6400 | Maximum star visibility | Significant noise | Very dark sites | High |
| 800 | Minimal noise | Requires longer exposure | Bright moons | Very Low |
| 12800 | Extreme sensitivity | Heavy noise | Emergency only | Very High |
Shooting in RAW gives you flexibility to manage noise during post-processing. Use the 600 Rule to calculate maximum exposure times and adjust your ISO accordingly.
Aperture Selection: Maximizing Light Collection Without Star Distortion
Since starlight travels millions of light-years to reach your camera, choosing the right aperture becomes critical for capturing these distant photons effectively.
For untracked night photography, aim for wide apertures (f/2.8 or lower) to maximize light collection and reveal faint celestial objects.
Consider stopping down one f-stop from your lens’s maximum aperture to improve image quality while maintaining sufficient light gathering. This balances sharpness with exposure, especially important when capturing star details.
- f/1.4 to f/2.0 – Maximum light collection ideal for Milky Way photography
- f/2.8 to f/4.0 – Sweet spot balancing light collection with reduced star distortion
- f/4.5 or narrower – Avoid unless necessary, as these settings considerably limit light capture
Test your specific lens during practice sessions to find its best aperture for night sky work.
Exposure Duration: Calculating the Perfect Shutter Speed Using the 500/600 Rule
When capturing the night sky, you’ll need to master the 500/600 Rule to determine your maximum shutter speed before stars begin to trail.
Calculate your ideal exposure time by dividing 500 (for full-frame) or 600 (for crop sensors) by your lens’s focal length—for instance, a 24mm lens on a full-frame camera yields about 21 seconds maximum exposure.
Remember that longer focal lengths dramatically reduce your available exposure time, requiring you to balance ISO and aperture settings more carefully to compensate.
Understanding the Rule
To capture sharp, pinpoint stars in your night photography, you’ll need to master the 500/600 Rule – a photographer’s formula for calculating the maximum shutter speed before stars begin to trail.
This rule helps you determine the longest exposure time possible while keeping stars as precise points of light.
The formula is simple: divide 500 (for crop sensors) or 600 (for full-frame cameras) by your focal length. For example, with a 24mm lens on a full-frame camera, your maximum shutter speed would be 25 seconds (600÷24).
- Mount your camera firmly – even the slightest movement amplifies at these exposure times.
- Test your results – sometimes you’ll need to adjust your ISO higher if your shutter speed must be shorter.
- Consider your specific gear – camera performance and lens characteristics may require fine-tuning.
Focal Length Calculations
As you apply the 500/600 Rule to different focal lengths, you’ll notice a direct inverse relationship between your lens choice and maximum exposure time.
For example, using a 75mm lens on a full-frame camera yields approximately 6.67 seconds (500÷75) before stars begin to trail. The same lens on an APS-C sensor provides about 5 seconds (600÷75) of sharp exposure.
When you increase to longer focal lengths, your available exposure time decreases dramatically. A 300mm lens limits you to just 1.67 seconds on a full-frame camera.
Remember that shorter shutter speeds become necessary as you zoom in closer to celestial objects. This inverse relationship makes wide-angle lenses (with shorter focal lengths) preferable for untracked astrophotography, as they allow longer exposures while maintaining pinpoint stars.
Avoiding Star Trails
One of the biggest challenges in night photography lies in capturing stars as sharp points rather than elongated streaks across your image. The 500/600 Rule helps you determine the maximum exposure time before star trails become visible. For full-frame cameras, divide 500 by your focal length; for APS-C sensors, use 600 instead.
When setting up your shot, remember:
- Longer focal lengths require shorter exposure times – a 200mm lens might limit you to just 2.5 seconds before trails appear.
- Wide-angle lenses (14-24mm) allow exposure times of 20-35 seconds, giving you more light-gathering potential.
- Always account for your camera’s crop factor when calculating your maximum shutter speed.
To prevent camera shake during these precise exposures, use a sturdy tripod and remote trigger, especially when pushing the limits of your calculated exposure time.
Manual Focus Techniques for Crystal-Clear Stars and Celestial Objects
Achieving sharp focus on stars and celestial objects requires manual focusing techniques that autofocus systems simply can’t handle.
You’ll need to switch your lens to manual focus mode and use your camera’s Live View to magnify a bright star until it appears as a crisp point of light rather than a fuzzy blob.
While many photographers set their lens to infinity, temperature changes can shift your focus point, so always fine-tune manually and verify your results with test shots before capturing your final images.
Manual Focus Techniques for Crystal-Clear Stars and Celestial Objects
When photographing the night sky, manual focusing becomes essential since autofocus systems typically struggle in low-light conditions.
Using your camera’s live view mode, zoom in on a bright star and adjust the focus ring until the star appears as a tiny point of light rather than a blurry blob.
A high aperture setting (f/2.8 or lower) maximizes light gathering, though stopping down by one f-stop can reduce optical defects for sharper images.
Take test shots to confirm focus before committing to your final composition.
- Position your camera on a sturdy tripod and locate the brightest star visible.
- Switch to live view, zoom to maximum, and slowly turn the focus ring until the star shrinks to its smallest possible size.
- Use a red-filtered flashlight to preserve your night vision while making adjustments.
Focus at Infinity
Focusing at infinity marks a critical first step for capturing tack-sharp night sky images. Switch your camera to manual focus and locate the infinity symbol (∞) on your lens. In low light conditions, this prevents your camera from hunting for focus points that simply aren’t visible.
For precise adjustment, activate live view mode and zoom in on a bright star, fine-tuning until it appears as a sharp point rather than a blurry disc. If your lens lacks a clear infinity mark, focus on a distant light source or use a smartphone flashlight placed far away.
Consider using a red-filtered headlamp while making these adjustments to preserve your night vision.
Always take a test shot and review it at 100% magnification to verify your stars are crisp before committing to longer exposures.
White Balance Settings for Natural Night Sky Colors
The natural beauty of a starlit sky depends heavily on your white balance settings.
When shooting in RAW format, Auto White Balance offers the most flexibility, allowing you to fine-tune your night sky colors during post-processing in Lightroom.
For JPEG shooters, try the Fluorescent preset to capture more accurate low-light colors without additional editing.
- Set your camera to Auto White Balance when shooting RAW files for maximum adjustment potential later.
- Switch to Fluorescent White Balance for JPEGs to immediately achieve deeper blues and more natural star colors.
- Maintain consistent white balance across all images if you’re planning to stack multiple exposures.
RAW Format and Memory Management for Maximum Post-Processing Flexibility
Unlike JPEG’s limited data capture, RAW format stands as the cornerstone of successful night photography by preserving every detail your sensor records.
You’ll retain complete control over white balance, exposure, and shadow recovery—critical when capturing the night sky’s subtle nuances.
Be prepared for RAW’s larger file sizes by investing in high-capacity memory cards and establishing a workflow for regularly offloading images to external storage.
This memory management prevents frustrating interruptions during prime shooting conditions.
When processing your night images, you’ll appreciate RAW’s flexibility as you balance star brightness, enhance nebulosity, or correct color casts without degrading image quality.
While this requires specialized software like Lightroom or Photoshop, the superior results justify the additional processing time and storage requirements.
Frequently Asked Questions
What Camera Settings Should I Use for Night Photography?
For night photography, you’ll want to use manual mode with ISO 1600-3200, wide aperture (f/2.8 or lower), and 15-30 second shutter speeds. Don’t forget to shoot in RAW format for better post-processing options.
Can You Do Astrophotography Without Tracking?
Yes, you can do astrophotography without tracking! Use short exposures (following the 600 Rule), a sturdy tripod, fast lenses (f/2.8 or lower), and higher ISO settings. Post-processing will help enhance your final images.
What Is the 500 Rule for Night Photography?
The 500 rule helps you avoid star trails in astrophotography – just divide 500 by your lens’s focal length to find your maximum exposure time in seconds. Don’t forget to adjust for your camera’s crop factor.
What Is the 600 Rule in Night Photography?
The 600 rule helps you determine maximum exposure time to avoid star trails by dividing 600 by your focal length times crop factor. It’s similar to the 500 rule but allows slightly longer exposures.
In Summary
You’re now equipped to capture stunning night skies without tracking equipment. Remember, it’s all about balancing ISO sensitivity with acceptable noise, choosing the right aperture, calculating proper exposure times, mastering manual focus, setting appropriate white balance, and shooting in RAW. Don’t be afraid to experiment beyond these guidelines. With practice, you’ll develop your own signature approach to freezing the cosmos in breathtaking detail.
Leave a Reply