
For successful bulb mode night sky photography, set your camera to manual with aperture at f/2.8 or wider and ISO 3200-6400. Mount on a sturdy tripod and use a remote release to prevent vibration. For point stars, keep exposures under 20 seconds; for star trails, use multiple 30-second shots with 5-second intervals. Focus manually in live view on bright stars. Shoot in RAW and consider stacking multiple exposures to reduce noise. The techniques below will transform your celestial captures.
Setting Up Your Camera for Bulb Mode Sky Photography
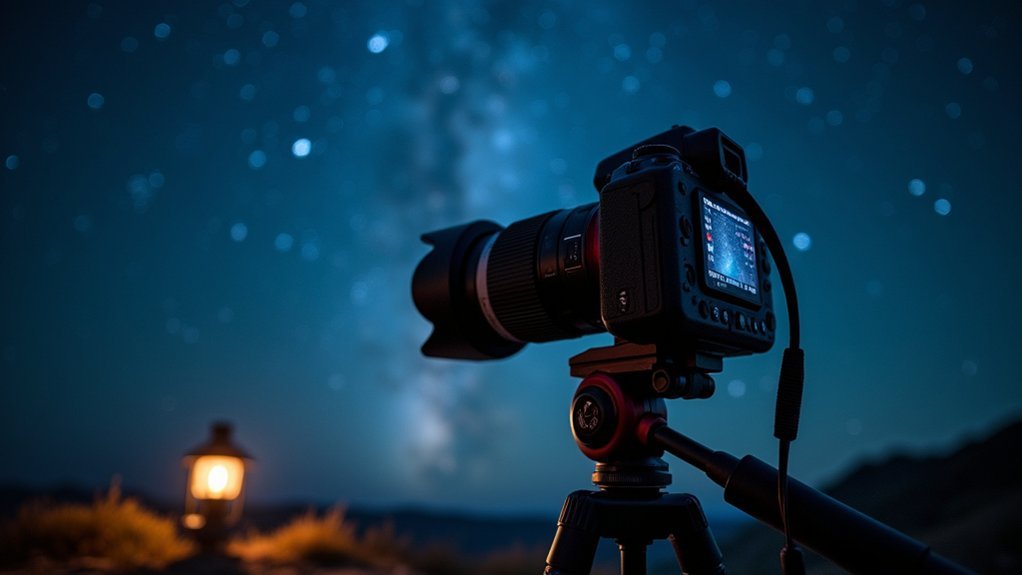
When shooting the night sky, you’ll need to master bulb mode to capture those breathtaking celestial scenes. Start by switching your camera to manual mode (M), then locate bulb mode by turning the shutter speed dial to ‘B’ or accessing it through your camera’s menu system. This allows exposures longer than the standard 30-second limit.
Set your aperture wide—around f/2.8 works well for capturing maximum light while maintaining sharpness. For ISO settings, begin with 3200-6400 to balance sensitivity and noise control in dark environments.
Before starting your long exposures, manually focus using live view by zooming in on bright stars.
Mount your camera on a sturdy tripod and connect a remote shutter release to eliminate vibrations that could blur your images.
Essential Gear for Successful Night Sky Captures
Now that you’ve configured your camera settings, let’s focus on the equipment that will transform your night photography from good to spectacular. Success in bulb mode photography depends heavily on your gear selection.
| Equipment | Purpose | Importance |
|---|---|---|
| Camera with Bulb Mode | Enables long exposures | Essential |
| Sturdy Tripod | Eliminates camera shake | Critical |
| Remote Shutter Release | Prevents vibration at start/stop | Necessary |
| Fast Lens (f/2.8 or wider) | Captures more light | Very Important |
| ND Filters | Controls light in bright conditions | Situational |
Don’t underestimate the importance of a quality tripod—even the slightest movement can blur your stars during extended exposures. Your remote shutter release works hand-in-hand with bulb mode, allowing you to capture exposures beyond 30 seconds without touching the camera.
ISO and Noise Management in Extended Exposures
You’ll need to carefully balance ISO settings when shooting night skies in Bulb mode, typically starting at ISO 3200-6400 to capture sufficient starlight while minimizing digital noise.
Managing noise becomes critical during longer exposures, where thermal interference can degrade your image quality, especially in warmer conditions.
Consider using techniques like image stacking or your camera’s Long Exposure Noise Reduction feature alongside RAW format shooting to preserve detail while effectively controlling unwanted noise.
Subheading Discussion Points
Finding the perfect balance between ISO sensitivity and noise control represents one of the greatest challenges in bulb mode photography. Start with ISO 3200-6400 to capture enough starlight while minimizing digital noise in your nightscape images.
When using long exposure photography techniques, remember that sensor heat builds up over time, degrading image quality. Combat this by shooting in cooler temperatures and enabling your camera’s Long Exposure Noise Reduction feature, which automatically captures a dark frame to subtract thermal noise.
Instead of single lengthy exposures, consider taking multiple shorter 30-second shots and stacking them later. This technique dramatically reduces noise while preserving stellar details.
Always shoot in RAW format to retain maximum information, giving you greater flexibility to address noise issues during post-processing without sacrificing image quality.
ISO Selection Fundamentals
Mastering ISO selection forms the cornerstone of successful bulb mode astrophotography. You’ll need to start with lower ISO values between 100-800 to minimize digital noise in your long exposures. While higher ISOs capture more light, they introduce unwanted artifacts that can ruin your night sky images.
| ISO Range | Noise Level | Best Use Case |
|---|---|---|
| 100-200 | Minimal | Deep sky, moonlit scenes |
| 400-800 | Low | General starscapes |
| 1600 | Moderate | Milky Way core |
| 3200 | High | Aurora, time-limited shots |
| 6400+ | Excessive | Emergency situations only |
Consider implementing the 400 Rule to determine your maximum shutter speed before stars begin to trail. For achieving noise-free long exposures, test different ISO settings on the same scene and employ image stacking techniques when higher sensitivity is unavoidable.
Noise Reduction Techniques
Combat unwanted digital noise that plagues extended exposures through strategic planning and camera settings. Set your ISO to the lowest possible value—typically ISO 100 for APS-C sensors or ISO 50 for full-frame cameras—to minimize digital noise in your bulb mode shots.
Enable your camera’s Long Exposure Noise Reduction (LENR) feature, which captures a dark frame to subtract noise patterns from your final image. Be aware this doubles your total shooting time, but greatly improves quality.
Consider shooting on cooler nights when thermal noise naturally decreases.
If you’re planning to stack multiple exposures, you can use higher ISOs (3200-6400) for individual frames while applying dark frame subtraction in post-processing.
Experiment with slightly narrower apertures (f/4-f/5.6) to enhance sharpness while managing noise in your nightscape images.
Aperture Selection for Star Detail and Clarity
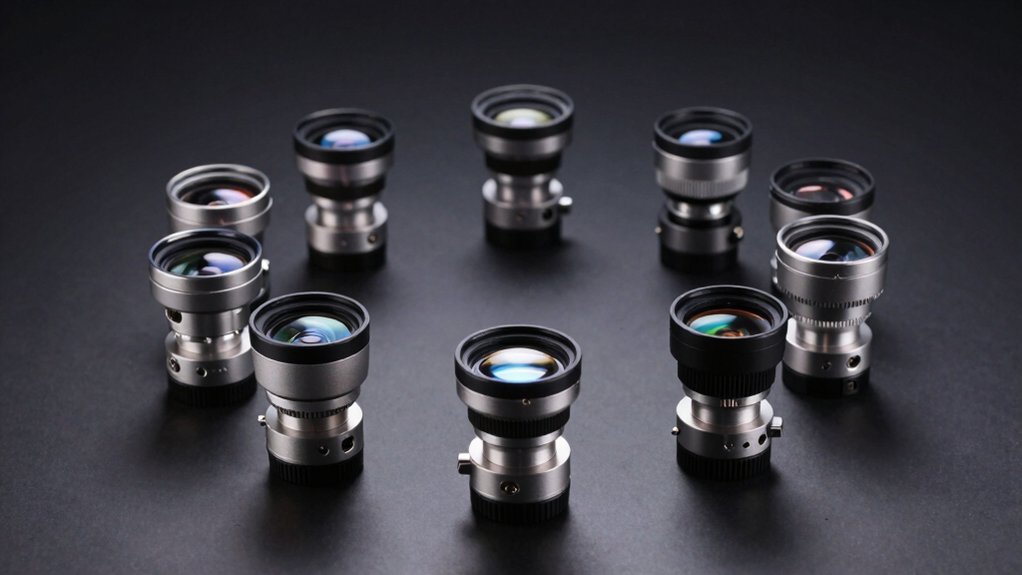
When shooting the night sky, your aperture setting serves as the critical gateway for starlight to reach your camera’s sensor. To capture maximum star detail in your night photography, you’ll want to use the widest aperture your lens allows—ideally f/2.8 or wider. This larger opening permits more light collection, revealing faint stars that might otherwise remain invisible.
If your lens doesn’t reach f/2.8, don’t worry. Set it to its widest available setting to optimize light sensitivity. The wider aperture also creates pleasing bokeh in foreground elements while keeping stars sharp.
For static star images, you might experiment with slightly narrower apertures to reduce trails, though this requires longer exposures.
Consider combining multiple exposures with different aperture selections in post-processing for images with both detailed skies and properly exposed foregrounds.
Intervalometer Timing for Star Trails vs. Point Stars
You’ll need different intervalometer settings depending on whether you’re capturing star trails or point stars.
For star trails, program your intervalometer to take 20-30 second exposures continuously over several hours, allowing you to stack multiple images for smooth trails with minimal noise.
When shooting static point stars, you’ll want longer individual exposures (1-2 minutes) while still respecting the 400 Rule, with slightly longer intervals between shots to conserve battery and storage.
Subheading Discussion Points
How you program your intervalometer dramatically affects whether you’ll capture star trails or pinpoint stars in night photography.
For point stars, you’ll need to keep exposures short—typically 10-30 seconds—by using the shutter speed dial or calculating with the 400 Rule (divide 400 by your focal length).
For star trails, set your intervalometer to take multiple 30-second exposures in bulb mode for long periods without touching your camera. This approach enables you to capture continuous movement across the night sky while minimizing noise. Long exposures by keeping the shutter open continuously would result in excessive noise and potential overexposure.
Try experimenting with different timing settings—slight adjustments can transform your results completely, giving you either crisp stellar points or dramatic celestial arcs depending on your creative vision.
Exposure Calculation Fundamentals
Understanding exposure calculations lies at the heart of successful nightsky photography, whether you’re aiming to capture pinpoint stars or dramatic star trails.
When shooting point stars, apply the “400 Rule” by dividing 400 by your lens’s focal length—with a 20mm lens, you’d use a maximum 20-second shutter speed to avoid trails.
For star trails, bulb mode becomes essential as you’ll need exposures ranging from minutes to hours. Your intervalometer timing is critical here: program it to take multiple 30-second exposures with 5-second intervals between shots. This gap allows your sensor to cool, reducing noise in the final image.
Remember that different goals require different approaches—point stars need shorter exposures (under 25 seconds with wide-angle lenses), while star trails demand longer exposure sequences for dramatic celestial arcs.
Star Movement Timing
While Earth’s rotation creates challenges for nightsky photographers, it also offers creative opportunities when properly managed through intervalometer timing.
When shooting point stars, apply the 400 Rule to determine your maximum shutter speed—divide 400 by your focal length to avoid unwanted movement.
For star trails, use bulb mode with your intervalometer set to capture multiple 15-30 second exposures continuously. This approach allows you to stack images in post-processing, creating smooth trails without excessive noise. You’ll want higher ISO settings and wider apertures for these shorter exposures.
The timing difference is essential: point star photography requires single exposures under the calculated limit (typically 20-30 seconds), while star trails demand numerous sequential shots over several hours with minimal gaps between frames to maintain continuous streaking effects.
Focusing Techniques in Complete Darkness
Once the sun sets and darkness engulfs your surroundings, achieving perfect focus becomes one of the most challenging aspects of night sky photography.
Switch to manual focus and use bright stars or distant lights as focal points. Live view magnification is your best ally—zoom in on a bright star and adjust until it appears sharp. For precision, enable focus peaking if your camera offers this feature.
The infinity mark on your lens provides a good starting point, but don’t rely on it exclusively. Take a quick test shot at high ISO and wide aperture to verify sharpness, then fine-tune as needed.
For foreground elements, temporarily illuminate them with a flashlight or smartphone light to achieve focus before locking your settings for the final composition.
Weather Conditions and Their Impact on Bulb Mode Settings

The success of your bulb mode exposures depends heavily on the weather conditions you’ll encounter in the field. Different elements affect not only what you can capture but also how you’ll need to adjust your settings.
| Weather Condition | Impact on Bulb Mode Settings |
|---|---|
| Cloud Cover | Reduces star visibility; may require shorter exposures |
| Wind | Increases camera shake risk; stabilize tripod |
| Temperature | Cold reduces sensor noise during long exposures |
| Humidity | Can fog lenses; acclimate gear before shooting |
| Moon Phase | Full moon requires shorter exposures; new moon allows longer captures |
For ideal results, plan your shoot around clear, cold nights with minimal wind. Always check weather forecasts specifically for astronomical viewing conditions. When facing windy conditions, lower your tripod, add weights, or use your body as a windbreak to prevent unwanted camera shake during those critical long exposures.
Post-Processing Dark Frames and Stacking Multiple Exposures
After capturing your bulb mode images, post-processing becomes essential for transforming good night sky photos into exceptional ones.
Start by creating dark frames—shots taken with the lens cap on—to serve as reference images that can be subtracted from your main photos, effectively reducing heat-generated noise.
Stacking multiple exposures is a game-changer for night sky photography. By combining 10-20 shorter exposures (around 30 seconds each), you’ll minimize noise while maintaining detail in both stars and foreground.
Image stacking transforms night photography from noisy to magical, revealing cosmic details invisible in single exposures.
This technique allows you to shoot at higher ISO settings and wider apertures without the usual drawbacks.
Use software like StarTrails.exe or Photoshop to align and stack your images. Proper alignment is vital for creating smooth, continuous star trails in your final composite, which will showcase celestial movements while preserving crisp foreground elements.
Frequently Asked Questions
What Is the Bulb Setting in Night Photography?
Bulb setting keeps your camera’s shutter open as long as you hold the button down, allowing extended exposures beyond 30 seconds. You’ll use it for capturing night scenes like star trails and low-light environments.
What Is the Best Setting for Night Sky Photography?
For night sky photography, use f/2.8 or wider aperture, ISO 3200-6400, and shutter speeds of 10-25 seconds following the 400 Rule. You’ll want to shoot in RAW and manually focus on a bright star.
How to Use Bulb Mode for Astrophotography?
In bulb mode, attach a remote shutter release, set your aperture wide (f/2.8), ISO between 3200-6400, and manually focus on a bright star. You’ll control exposure length by holding the shutter open for minutes or hours.
What Is the Best Aperture for Bulb Mode?
For bulb mode night sky photography, you’ll want to start with f/2.8 or your lens’s widest aperture. This maximizes light capture and reveals more stars while minimizing exposure time and reducing potential digital noise.
In Summary
Bulb mode mastery doesn’t happen overnight. With practice, you’ll find your perfect settings combination based on your gear, location, and artistic vision. Remember to balance ISO, aperture, and exposure length while maintaining focus in darkness. Whether you’re capturing star trails or pinpoint stars, it’s the attention to detail and willingness to experiment that’ll transform your night photography from ordinary to extraordinary. Keep shooting—the night sky awaits!
Leave a Reply