Dark frame stacking is a vital noise reduction technique in astrophotography where you capture multiple frames with the lens cap on, then combine them to create a master dark frame. This master reveals your camera’s unique thermal noise pattern, hot pixels, and amp glow that can be subtracted from your light frames. You’ll need to match exposure time, ISO, and sensor temperature between dark and light frames for effective calibration. Discover how this simple process dramatically improves your deep-sky image quality.
What Is Dark Frame Stacking in Astrophotography Calibration?

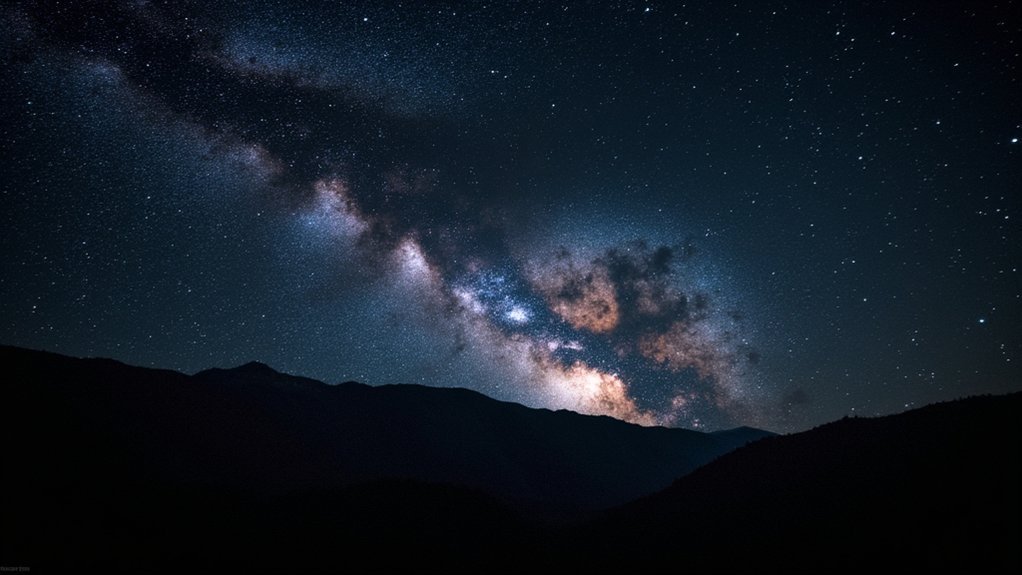
While capturing stunning images of the night sky requires patience and skill, managing noise remains one of the biggest challenges in astrophotography.
Dark frame stacking is a powerful calibration technique that helps you combat unwanted artifacts in your celestial images. The process involves taking multiple dark frames—exposures with your lens cap on—under identical conditions as your light frames.
Using stacking software, you’ll combine 20-50 darks to create a master dark that accurately models thermal noise and banding patterns. This master dark mathematically improves your signal-to-noise ratio when subtracted from your light frames during processing.
For this technique to work effectively, your darks must match the exposure time and camera settings of your light frames. When done properly, dark frame calibration reveals finer astronomical details that would otherwise remain hidden behind noise.
Understanding Dark Frames and Their Purpose in Signal-to-Noise Ratio Improvement
Dark frames reveal the unique thermal noise pattern your camera sensor generates during long exposures, fundamentally creating a fingerprint of unwanted signal that can be removed during processing.
You’ll notice these frames capture both random noise and fixed-pattern noise, allowing you to identify and subtract predictable sensor imperfections from your astronomical images.
The greatest benefits come with long-exposure deep sky photography, where even modest sensors can produce remarkably cleaner images when proper dark frame calibration is applied.
Noise Source Identification
Every image captured through your telescope contains unwanted artifacts alongside the celestial wonders you’re hoping to record.
Dark frames help you identify and isolate these specific noise sources that contaminate your astrophotography. During the stacking process, these calibration images reveal four primary types of interference:
- Hot pixels – Bright spots appearing in the same locations consistently
- Thermal noise – Random grain that increases with sensor temperature
- Amp glow – Reddish or purplish illumination near sensor edges
- Fixed pattern noise – Regular banding or grid patterns from electronics
Thermal Sensor Patterns
Beneath the visible noise sources in your astrophotography lies a complex world of thermal patterns that can make or break your final image. Your camera sensor generates distinctive thermal sensor patterns like banding and amp glow during long exposures, which can greatly degrade image quality.
Dark frames are specifically designed to capture these thermal noise signatures when no light reaches the sensor. By creating a master dark from 20-50 calibration frames that match your light frames’ exposure time and settings, you’ll dramatically improve your signal-to-noise ratio.
The effectiveness of your noise reduction scales with the square root of frames used—more dark frames yield cleaner results.
Don’t underestimate these invisible patterns; proper dark frame stacking will reveal faint details in your astrophotography images that would otherwise remain buried in thermal noise.
Long Exposure Benefits
When capturing the faint light of distant celestial objects, your camera’s sensor endures extended exposure times that inevitably introduce thermal noise into each frame.
Dark frame stacking becomes essential for improving your signal-to-noise ratio in these challenging situations.
The benefits of using dark frames for long exposure astrophotography include:
- Enhanced detail visibility – By subtracting a master dark from your light frames, you’ll reveal faint details previously hidden by noise.
- Elimination of amp glow – Those bright corners in your images diminish when proper calibration frames are applied.
- Consistent results – Matching dark frame exposure time and temperature to your light frames guarantees accurate noise reduction.
- Improved stacking efficiency – Clean individual frames lead to better alignment and integration during processing.
Essential Equipment and Software for Effective Dark Frame Capture
Your dedicated camera cooling system will dramatically improve dark frame quality by maintaining consistent sensor temperatures and reducing thermal noise.
You’ll need raw capture software that preserves all sensor data, allowing for precise pixel-by-pixel subtraction during the calibration process.
Reliable exposure timer tools, such as intervalometers or advanced astronomy capture applications, enable you to automate dark frame sequences with identical durations to your light frames.
Camera Cooling Systems
Although astrophotographers employ various techniques to reduce noise, camera cooling systems remain one of the most effective investments for serious deep-sky imaging.
Cooled astronomy cameras utilize thermoelectric cooling (TEC) to dramatically lower sensor temperature, greatly improving your signal-to-noise ratio during long exposure times.
When capturing dark frames with a cooled camera, you’ll need to:
- Match the exact exposure time and gain settings used in your light frames
- Maintain consistent sensor temperature throughout your imaging session
- Regularly calibrate your cooling system as sensor characteristics change over time
- Use software tools like PixInsight or DeepSkyStacker to process and stack your dark frames
This thermal noise reduction approach allows you to push exposure times further without introducing artifacts like banding, ultimately resulting in cleaner, more detailed astronomical images.
Raw Capture Software
Dedicated astrophotography software represents the command center of effective dark frame acquisition. Programs like Backyard EOS, APT, and Nebulosity provide precise control over your DSLR or mirrorless camera, allowing you to match dark frames with light frames by maintaining consistent ISO, exposure time, and white balance settings.
You’ll benefit from automation features that can capture multiple dark frames sequentially without intervention. Many applications offer live view capabilities to verify your camera is properly capped before beginning dark frame capture.
When paired with an intervalometer, you’ll achieve precise timing while ensuring no stray light contaminates your frames.
The best raw capture software also helps organize your dark frame library by temperature and exposure settings—a vital feature since thermal noise varies with ambient conditions. This organization streamlines your astrophotography workflow and improves final image calibration quality.
Exposure Timer Tools
Precise exposure timing stands at the heart of creating effective dark frames. When capturing calibration data for your astrophotography sessions, exposure timer tools become indispensable allies in your workflow.
These specialized tools enhance your dark frame capture process in several ways:
- Automation capabilities allow you to program sequential dark frames without manual intervention, freeing you to focus on other aspects of your imaging session.
- Consistent exposure settings guarantee your dark frames perfectly match your light frames’ noise characteristics.
- Remote operation through intervalometers or shutter releases minimizes vibration and camera disturbance.
- Integration with capture software streamlines your calibration workflow with thorough control systems.
You’ll find these timer tools particularly valuable during long imaging sessions when maintaining consistent calibration data becomes challenging but remains essential for producing clean, noise-reduced final images.
Step-by-Step Process for Creating and Stacking Dark Calibration Frames
When you’re ready to improve your astrophotography images, creating and stacking dark calibration frames becomes an essential skill in your toolkit.
Start by ensuring your camera settings match those of your light frames captured—identical exposure time, ISO, and sensor temperature are vital for effective calibration.
Capture 20-50 dark frames with your lens cap securely fastened to block all light. These frames will help eliminate thermal noise in your final image.
Next, import these frames into stacking software like DeepSkyStacker to create a master dark frame. The software will stack individual dark frames, considerably enhancing your signal-to-noise ratio.
Remember to update your master darks periodically as your sensor ages or when shooting in different temperature conditions for ideal noise reduction.
Temperature Matching: Why It Matters for Accurate Dark Frame Calibration
Although many astrophotographers focus primarily on exposure settings, sensor temperature plays an equally critical role in creating effective dark frames. For accurate noise subtraction, your dark frames must match the thermal conditions of your light frames precisely.
When capturing calibration frames for astrophotography, remember:
- Dark frames should be taken at the same sensor temperature as your light frames to properly represent thermal noise patterns.
- Temperature variations as small as 2-3°C can greatly reduce the effectiveness of your noise reduction.
- Capture dark frames immediately before or after your imaging session to maintain consistent thermal conditions.
- Monitor your camera’s temperature during long sessions, as gradual cooling throughout the night may require multiple sets of dark frames.
Temperature matching guarantees your calibration process effectively removes thermal noise without introducing artifacts that degrade image quality.
Building and Organizing Your Master Dark Frame Library for Efficiency
Creating an extensive dark frame library saves you countless hours in the field and dramatically improves your astrophotography workflow.
A well-organized dark frame library transforms your astrophotography process, saving precious time under the night sky.
When building your master dark frame library, aim to capture 20-50 dark frames with varying exposure lengths, ISO settings, and temperatures to accommodate different imaging conditions.
Organize your library by categorizing dark frames based on exposure length and temperature for streamlined calibration during sessions. This systematic approach makes selecting the appropriate frames much faster when processing your images.
You’ll need to update your library seasonally to account for sensor aging and changing thermal noise characteristics.
Validate your library’s effectiveness by comparing results from pre-stacked master darks with those created on-site. This verification guarantees your calibration process delivers best noise reduction across all your astrophotography projects.
Dark Frame Integration: Applying Stacked Masters to Light Frames

After you’ve built your dark frame library, the next critical step involves integrating your master dark frames with your light frames during processing.
The effectiveness of dark frame integration depends on matching your master dark frame to your light frames, particularly regarding sensor temperature and exposure settings.
To properly apply your master dark frame:
- Import both light frames and master dark frame into your astrophotography software
- Confirm ISO settings and exposure times match between light and dark frames
- Allow the software to subtract fixed-pattern noise, thermal noise, and amp glow automatically
- Review the resulting calibrated image for improved signal-to-noise ratio
The integration process fundamentally subtracts unwanted artifacts from your stacked light frames, revealing faint details that would otherwise remain hidden behind sensor noise.
Frequently Asked Questions
What Is a Dark Frame in Astrophotography?
A dark frame is a photo you’ll take with your lens cap on, capturing only sensor noise. You’ll use it to subtract unwanted thermal artifacts from your night sky images during processing.
What Does Stacking Mean in Astrophotography?
In astrophotography, stacking means you’re combining multiple images of the same celestial object to reduce noise and enhance details. You’ll get cleaner results as random noise cancels out while real signal gets stronger.
How Many Dark Calibration Frames Do I Need?
You’ll need 20-50 dark frames for ideal calibration. At minimum, use 10-15 frames, but going beyond 50 offers diminishing returns. Always match your dark frames’ settings with your light frames for best results.
What Is the Difference Between Bias and Dark Frames?
Bias frames capture read-out noise with the fastest shutter speed, while dark frames record thermal noise during longer exposures. You’ll take both with the lens cap on, but darks must match your light frame exposure settings.
In Summary
Dark frame stacking is your essential defense against noise in astrophotography. You’ll see dramatic improvements in your final images when you properly capture, organize, and apply these calibration frames. By matching temperature conditions and maintaining a library of master darks, you’re eliminating thermal noise that would otherwise obscure faint details. It’s a small effort that makes a significant difference—the mark of a serious astrophotographer committed to quality results.


Leave a Reply